Windows via console
1. Open the console as follows: Start > Run and enter "cmd" and confirm the window with OK.
2. Now write one of the two variants (depending on the requested folder) in the command line:
- Home directory:
net use [drive letter]: webspeicher.in.uni-weimar.de/fs/home/ [Ihre Struktur]/[your structure]/[your username] /user:in\[login] - Project folder:
net use [drive letter]: webspeicher.in.uni-weimar.de/fs/pjg/ /user:in\[login]
If you want the drive to persist after a logoff, append the following command with a space to the above commands: /persistent:yes
3. Confirm with Enter.
4. Next, enter your password and confirm it with Enter. To do this, the following must be visible in your console window:
Enter the password for "in\[Login name]" to connect to "webspeicher.in.uni-weimar.de":
5. If you have done everything correctly, you should see the following line:
The command was executed successfully.
6. The drive should now be available to you under Workspace.
Windows via Explorer
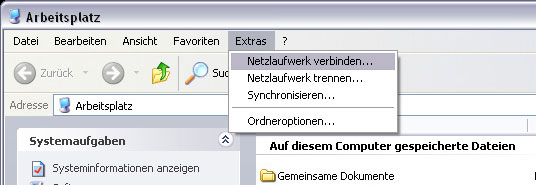
1. To do this, in Explorer or in Workplace, click on the Connect network drive button under the Extras menu item.
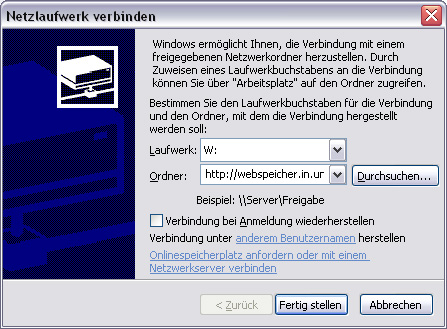
2. In the following Connect network drive dialog box, you can select the desired drive letter from the Drive drop-down menu, which will later be assigned to your network drive.
3. Then enter the appropriate path (https://webspeicher.in.uni-weimar.de/fs) in the Folder line or select it via dropdown in the same line (if you have entered it before).
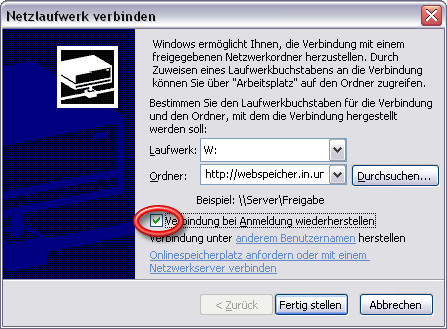
4. If you want the network drive to persist after logging off, select the Reconnect on logon check box. Otherwise, leave the settings as they are.
5. To finish, click the Finish button.
6. Now a window will open, where you have to enter your username and password. Enter your user name as follows:
in\[Login]
Confirm your entries with Enter.
If you have entered your data incorrectly by mistake, the window will remain. However, an Internet address is given in front of your user name, which you must delete to enter it correctly.
7. If all entries are correct, a window with your network drive will open automatically. You can also find it in the Explorer or via Workplace under the drive name you assigned.
Note that this process may take a moment, as the connection to the university's server must first be established.
8. If you want to remove the drive again, right-click on your network drive in the workspace or in Explorer and navigate to the Disconnect menu item.
Attention: Your data will not be lost in the process!