Double-click on the created certificate file (smime_..._.p12).
It is located in the download folder by default.
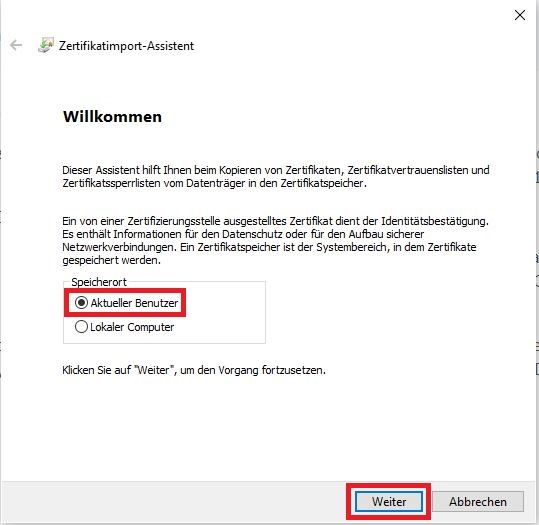
The certificate import wizard opens.
»Current user« should be selected under Storage location.
Click on »Next«.
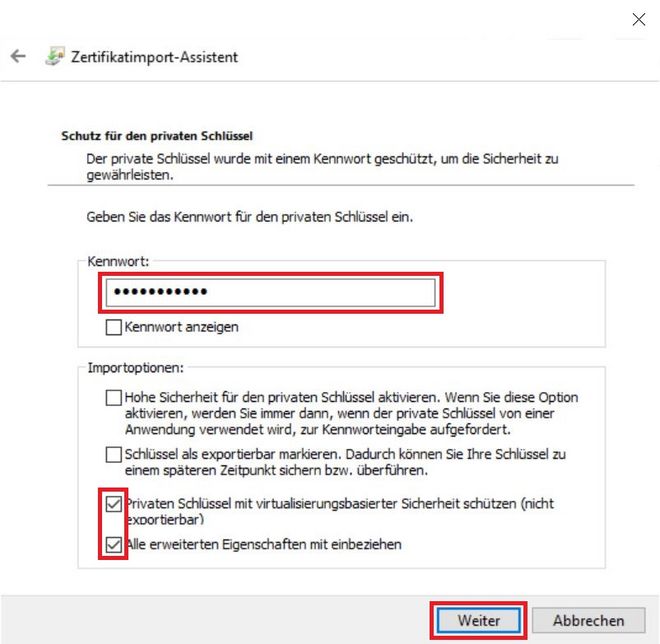
You must now enter the password with which you have protected the ».p12certificatefile« and enter the »Import options«. Once you have made your selection, click on »Next«.
We recommend the following settings for the »Import options«:
- »Protect private key with virtualisation-based security (not exportable)«
- »Include all extended properties«
Explanation:
- If you select »High Security« in the options, you have to enter the password every time you send a signed e-mail.
- Ticking »Protect private key with virtualisation-based security ...« is the most secure setting, but means that the private key cannot be exported from the certificate store later. Instead, the original certificate file must be used.
Therefore, save the certificate file »smime_..._.p12« in a secure location (also ensure it is fail-safe) and also make sure that you can always access the assigned password if necessary.
Please note: If you receive encrypted e-mails, you should also keep older user certificates so that you can still read the corresponding e-mails at a later date.
Leave the recommended setting for the storage location for the certificates. Click on »Next« and then on »Finish«. The successful import is then confirmed. Click on »OK«.


You can now »Configure Outlook«.