
00-Introduction:
This simple tutorial documents our first Costumes and Environment work. A wireless connection is fundamental to connect a dancer or actor to its environment. The Xbee-Technology is one possibility to send sensor data, collected by the Arduino Lilypad to the computer.
We used the following components:
Hardware:
- LilyPad
- LilyPad Xbee
- Xbee S1 x2
- Xbee USB Shield
Software:
- Arduino IDE
- Processing
- XCTU
The result looks like this:
Whenever the button is pressed, the Lilypad sends a serial message to the Lilypad-Xbee-Component. That message is transmitted wirelessly to the other Xbee-Component, which is connected via USB to the Computer. In processing, the message can be read like an event. In our case a visual entity, a circle, simply changes destination.
01-Step-by-Step-Tutorial:
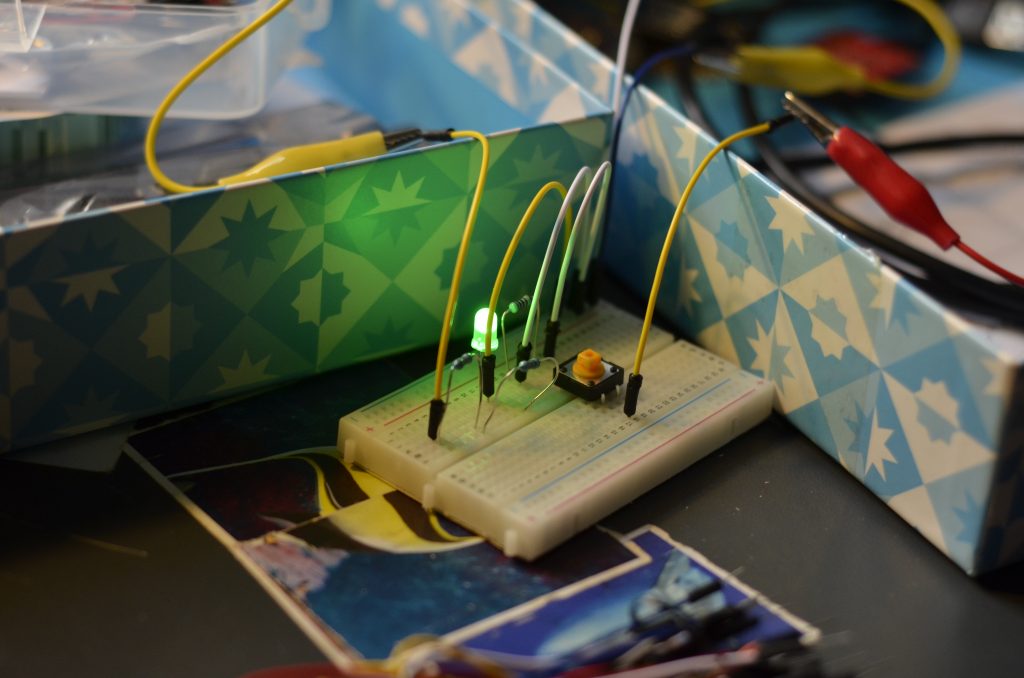
a)At first, we should create a simple Lilypad-circuit, to collect sensor-data. For example a pushbutton: https://www.arduino.cc/en/Tutorial/Button Any circuit is fine, as long as we can determine a state(Serial-Monitor: 0, 1 or whatever).
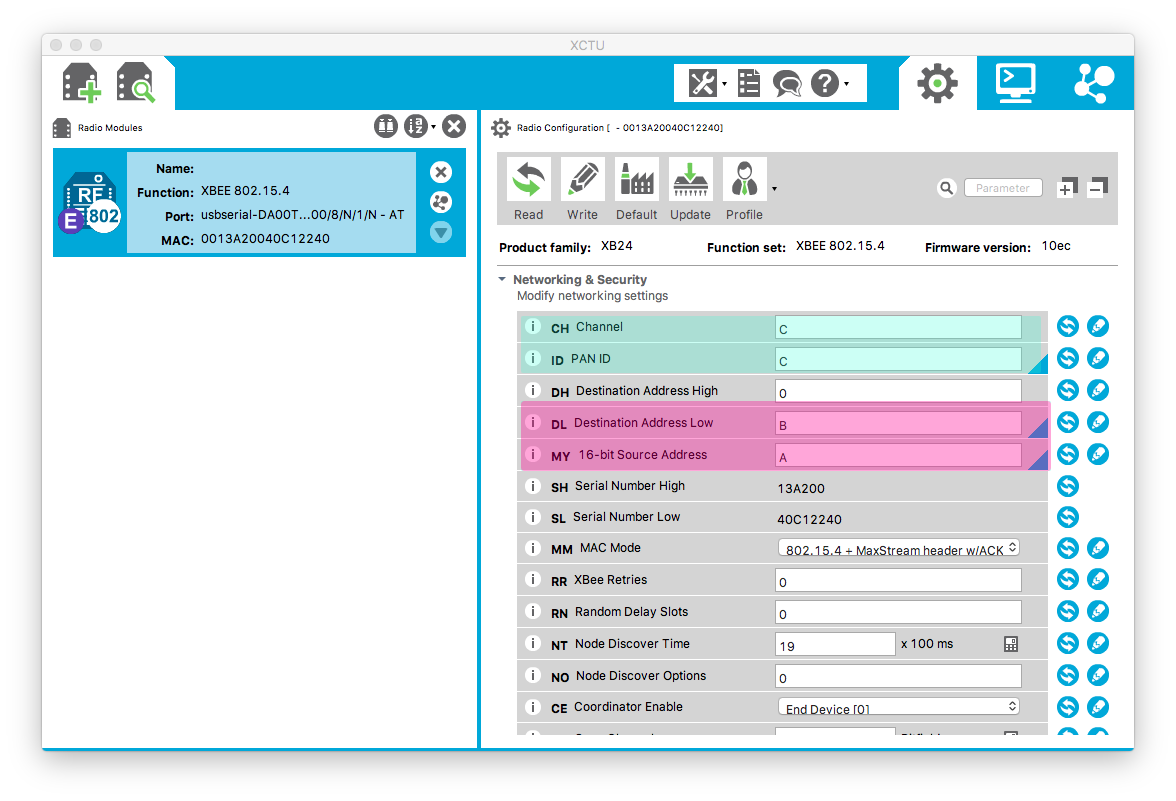
b)Now it is time to configure your XBees. You connect each XBee at a time via USB to the Computer and edit it in XCTU. You want them to communicate in the same channel(For Example C). Furthermore the source of each XBee should be the destination of the other XBee.
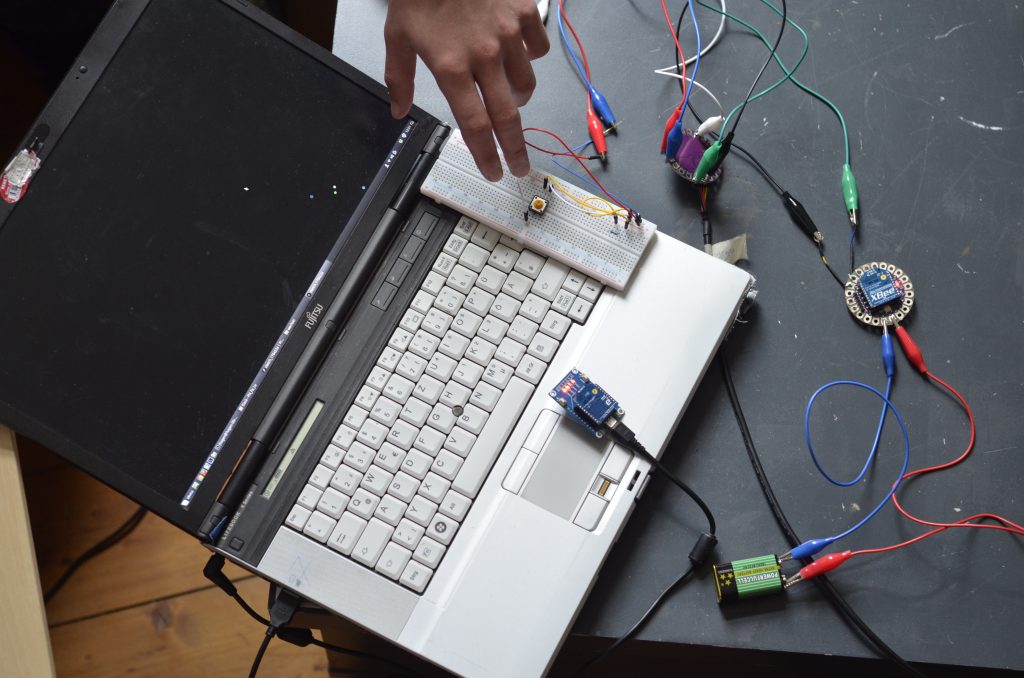
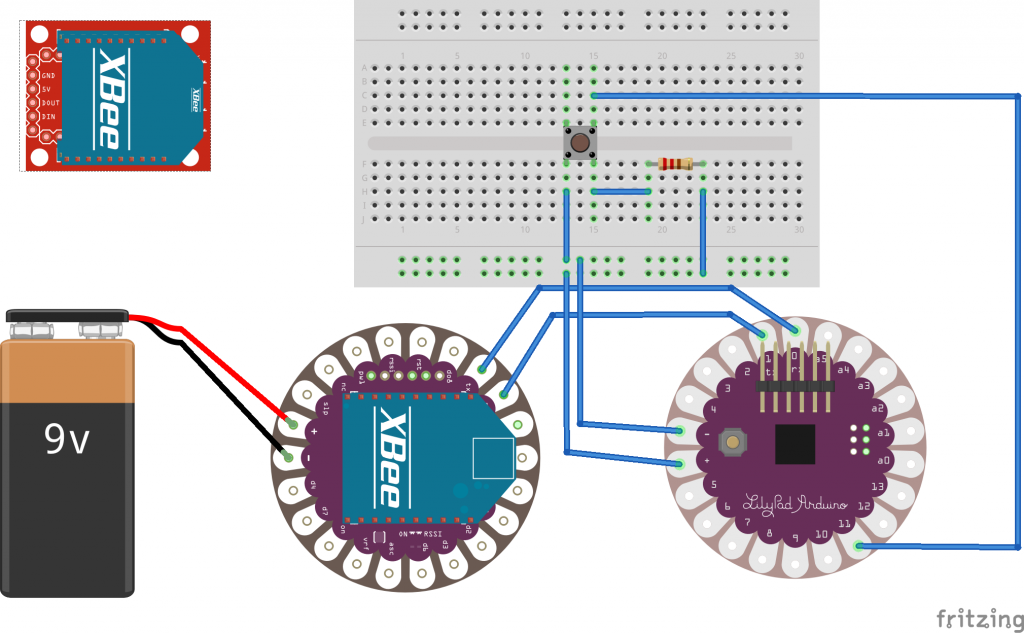
c)We can integrate the XBees in the circuit. The XBee-Lilypad-Shield should get at least 3.3V(we used a 9V blockbatterie). Furthermore you connect the Arduino Lilypad rx with the Xbee-Lilypad-Shield tx and the other way round, so that ones serial input(rx=receive) can receive messages from the others serial output(tx=transmit). The USB-XBee simply has to be plugged into the PC. We prefer that modular way of connecting, to keep things replaceable and (de)composable!
We don’t want an LED to blink, when we press the button, so we modify the Arduino Code and communicate with the XBee:
...
void setup() {
  Serial.begin(9600);
  pinMode(11, INPUT);
}

void loop(){
  int button = digitalRead(11);

  //Checks if button is pressed
  if (button == 1){

    //When input availabe, it prints
    if(Serial.available()){
      Serial.println("Button Pushed!");
      delay(1);
    }

    //Onboard LED Blinks if there is no Input to receive
    digitalWrite(13,HIGH);
    delay(250);
    digitalWrite(13, LOW);
    delay(250);
  }

  else {

    //Prints Stuff if nothing is received
    if(!Serial.available()){
      print_mh();
      print_pon();
    }

    //Prints Input if there is some
    else if(Serial.available()){
      Serial.println(Serial.read());
      delay(100);
    }
  }
}
d)Now we should build a simple processing Sketch. We simply used an older sketch of mine, which looks quite complicated. But any sketch is fine, as long as it works! For example a simple keyboard input-sketch: https://processing.org/examples/keyboard.html
Anyway, that is my sketch:

wechsel.pde is a processing sketch, with simple circles(entities). They interact via reciprocal attraction. Furthermore their behavior is influenced by random noise. Usually I control a special entity with mouse or touch. -Phil
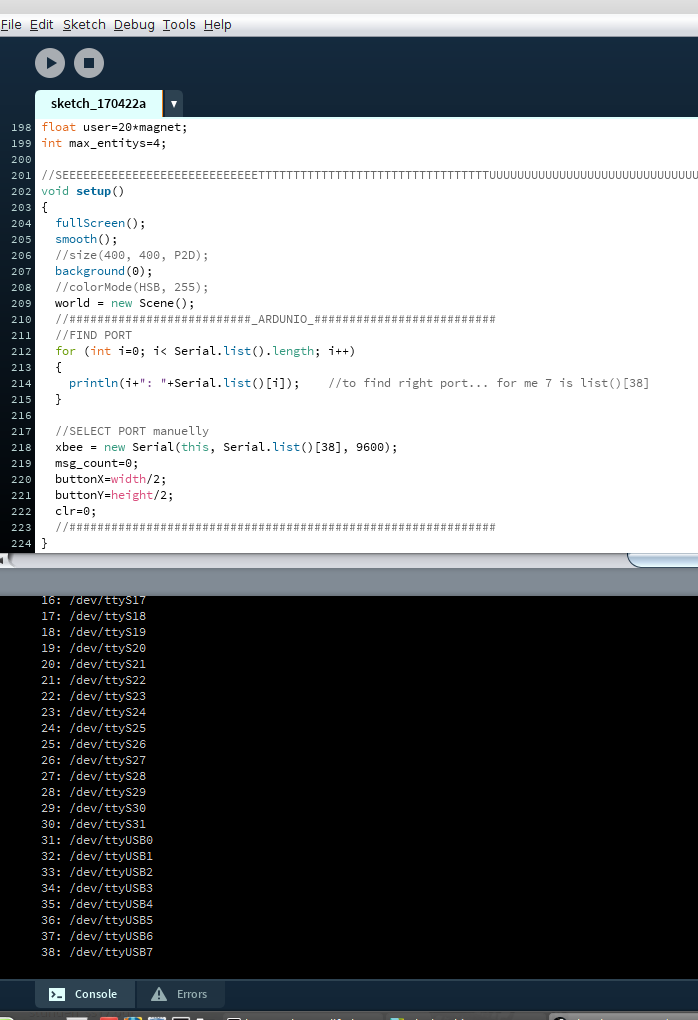
e)Now I want to integrate the XBee to Processing. In the Setup, we have to find the right port. So you check processing’s console for your USB-Port. Than you have to configure your code to fit to your port!
import processing.serial.*; //To work with the serial XBEE
Serial xbee;                //Declare XBEE
...

void setup()
{
 ...
  //FIND PORT
  for (int i=0; i< Serial.list().length; i++)
  {
    //Check console and search for your USB-Port
    println(i+": "+Serial.list()[i]);
  }

  //SELECT PORT
  //In my case, Serial.list()[38] is the right port..
  //You have to check your console and enter your Port here
  //manually!
  xbee = new Serial(this, Serial.list()[38], 9600);
  //Your Baud-Rate should be the same in Ardunio and
  //Processing, for example 9600!
}
...
See the Console:
Furthermore, we need a Free-Event-Function, that is acivated, whenever the XBee receives something.:
String message;
void serialEvent(Serial xbee) {
   message = xbee.readStringUntil(10); // read incommung String

  if (message != null) {
    println(message);                  //Print message to console
    //Do_Something_With_This_message!
  }
}
Now one can simply use the XBee-Input the way you used the keyboard/mouse/touch-input in d).
02-Sources:
In order to build this tutorial, the following sources were helpful:
Tutorial: Simple Wireless Textile Stretch Sensor with XBee and LilyPad
https://forum.processing.org/two/discussion/4943/how-to-connect-xbee-with-processing