So if you now are interested in how to build your own movable tentacle, I will explain the steps to realize it. This tentacle can be move in two directions ( so along one axis). But for more complex movements the construction stays the same. Only the motor controlling gets more complex to handle more axes.
Materials:
- plywood ( not thicker than 4 mm)
- some cable gland screws (I used some from 3 mm to 6.5 mm sealing scope)
- a flexible shaft (or some thick steel cable)
- some strong threads (these ones are made from aramid fibre)
Tools:
- hole cutters (68 mm, 62 mm, 58 mm)
- dill machine and different drills
- scissor
- screw wench for the cable gland screws
Step 1: The wooden disks
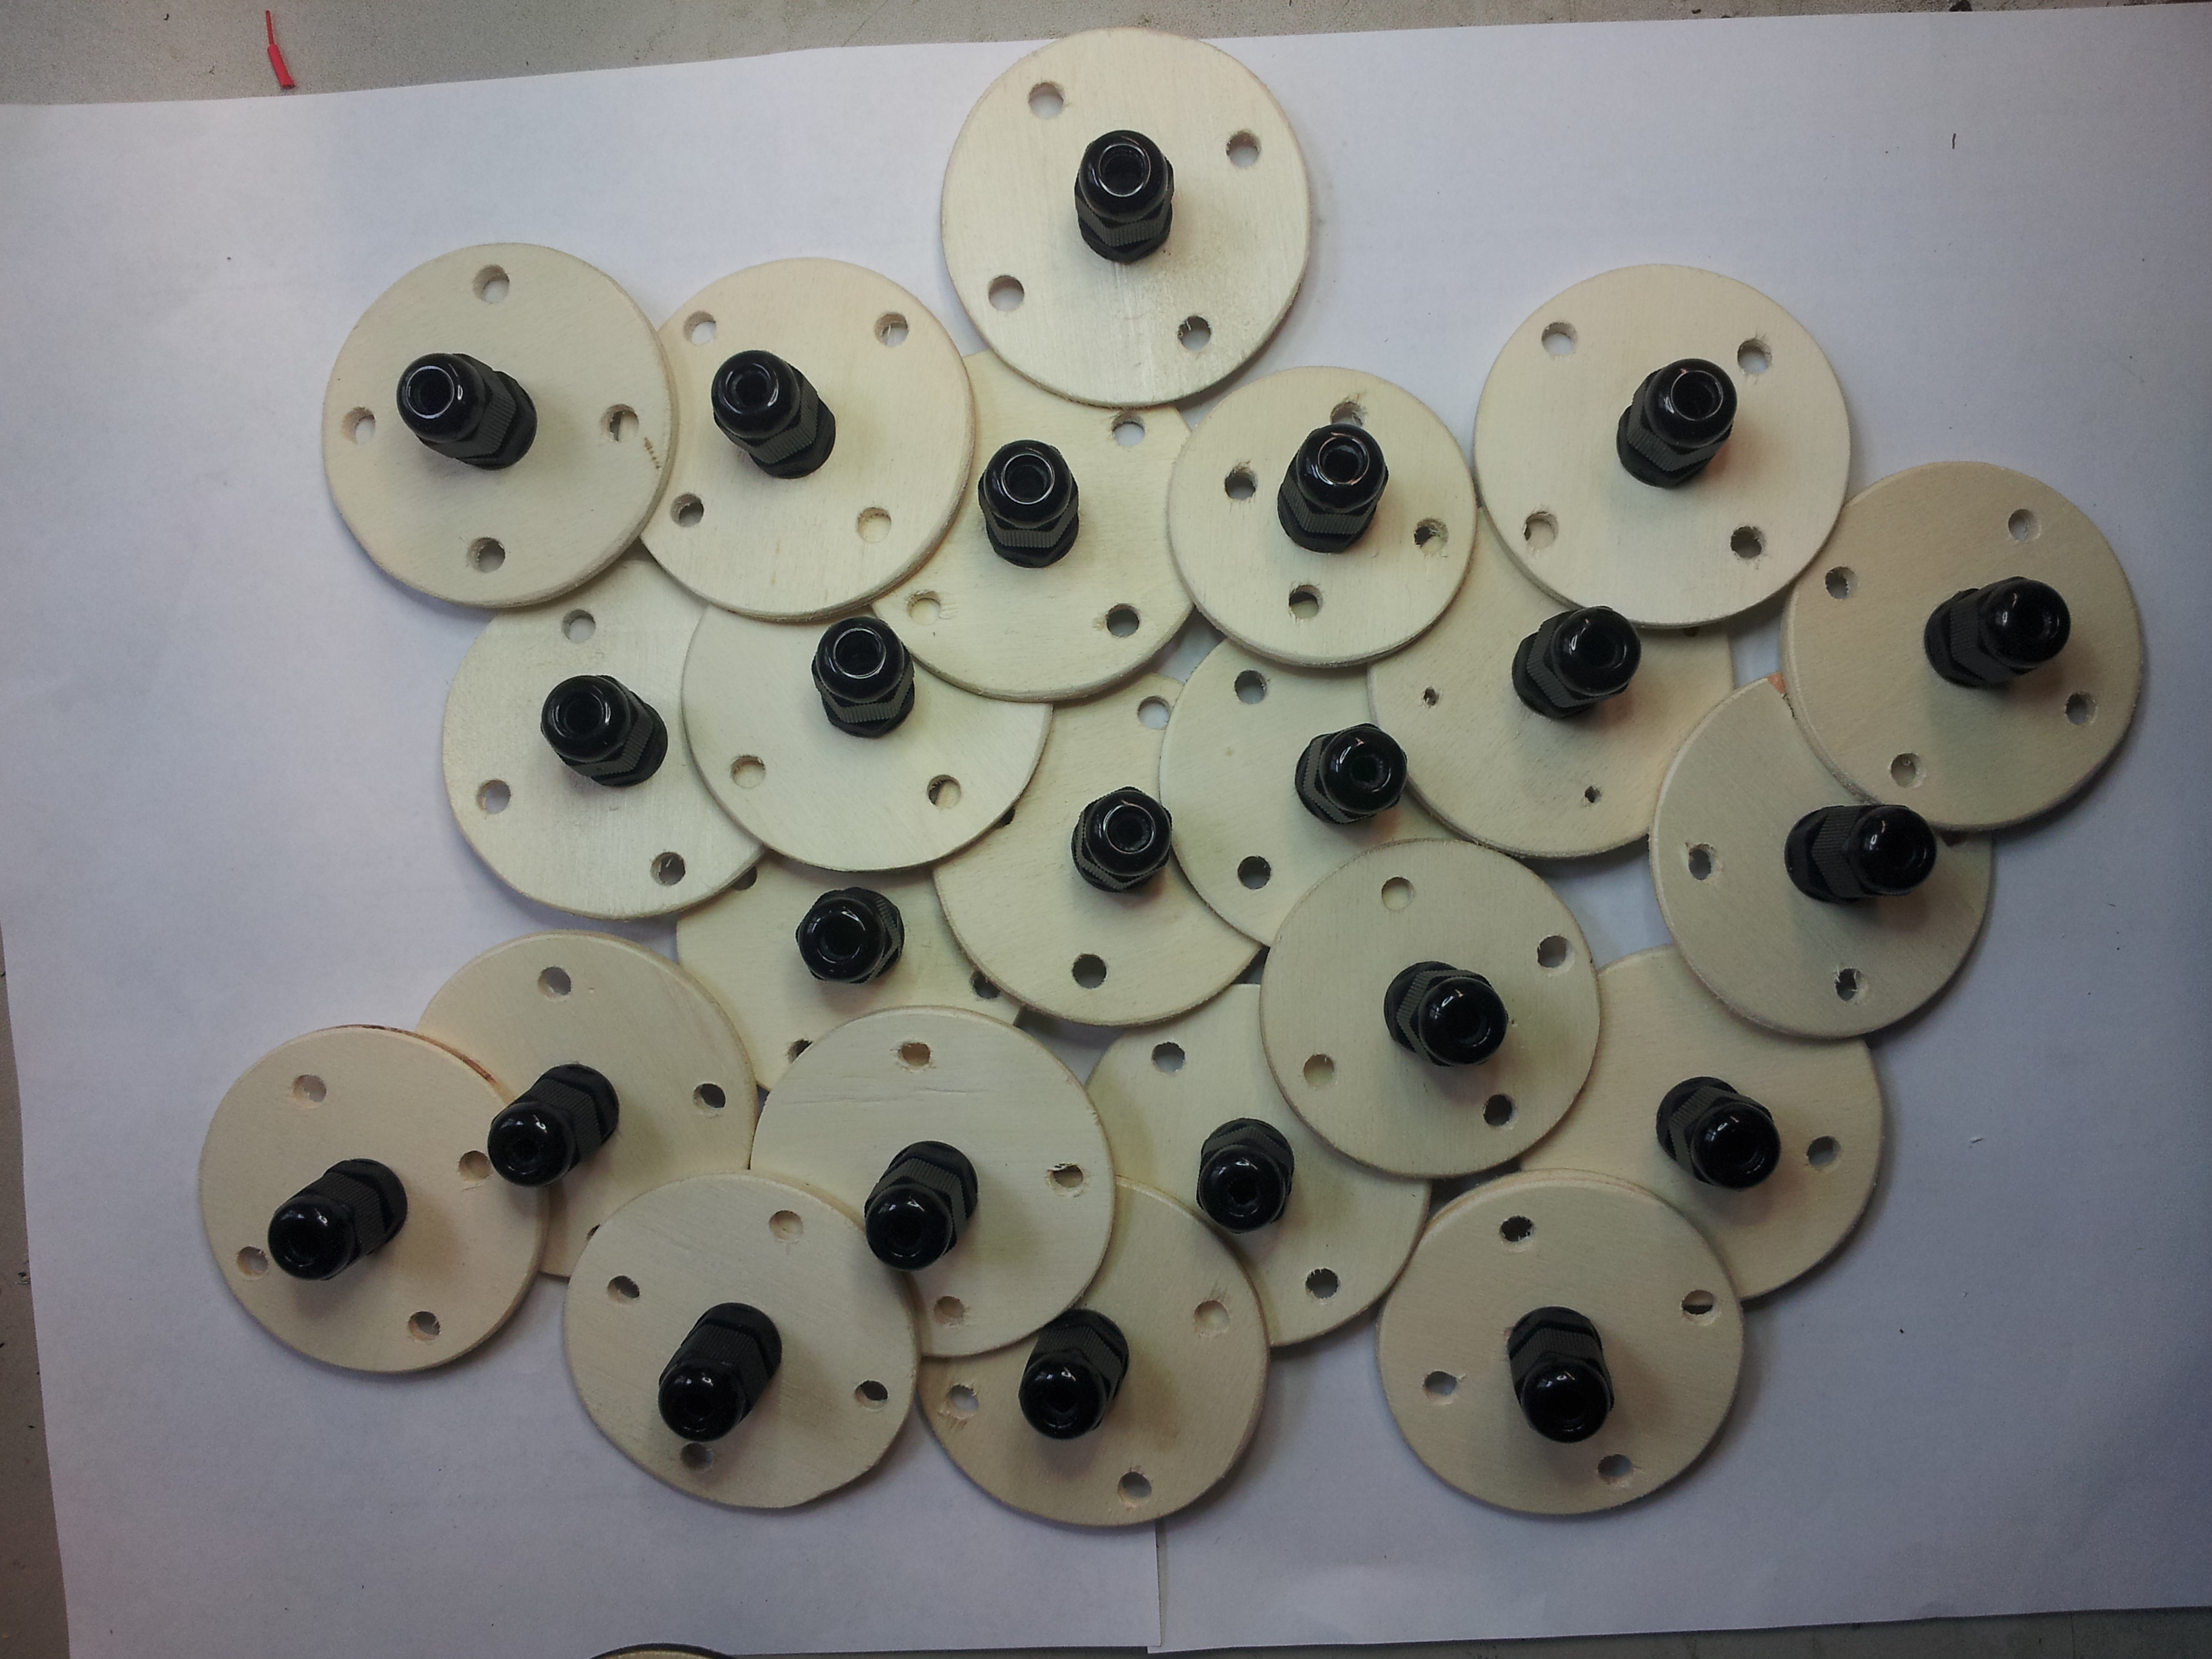
At first you need some vertebrae. Therefore you cut 19 disks with a diameter of 68 mm from the pywood. For the tip of the tentacle you can use one wooden disk with 62 mm and one with 58 mm to indicate the end.
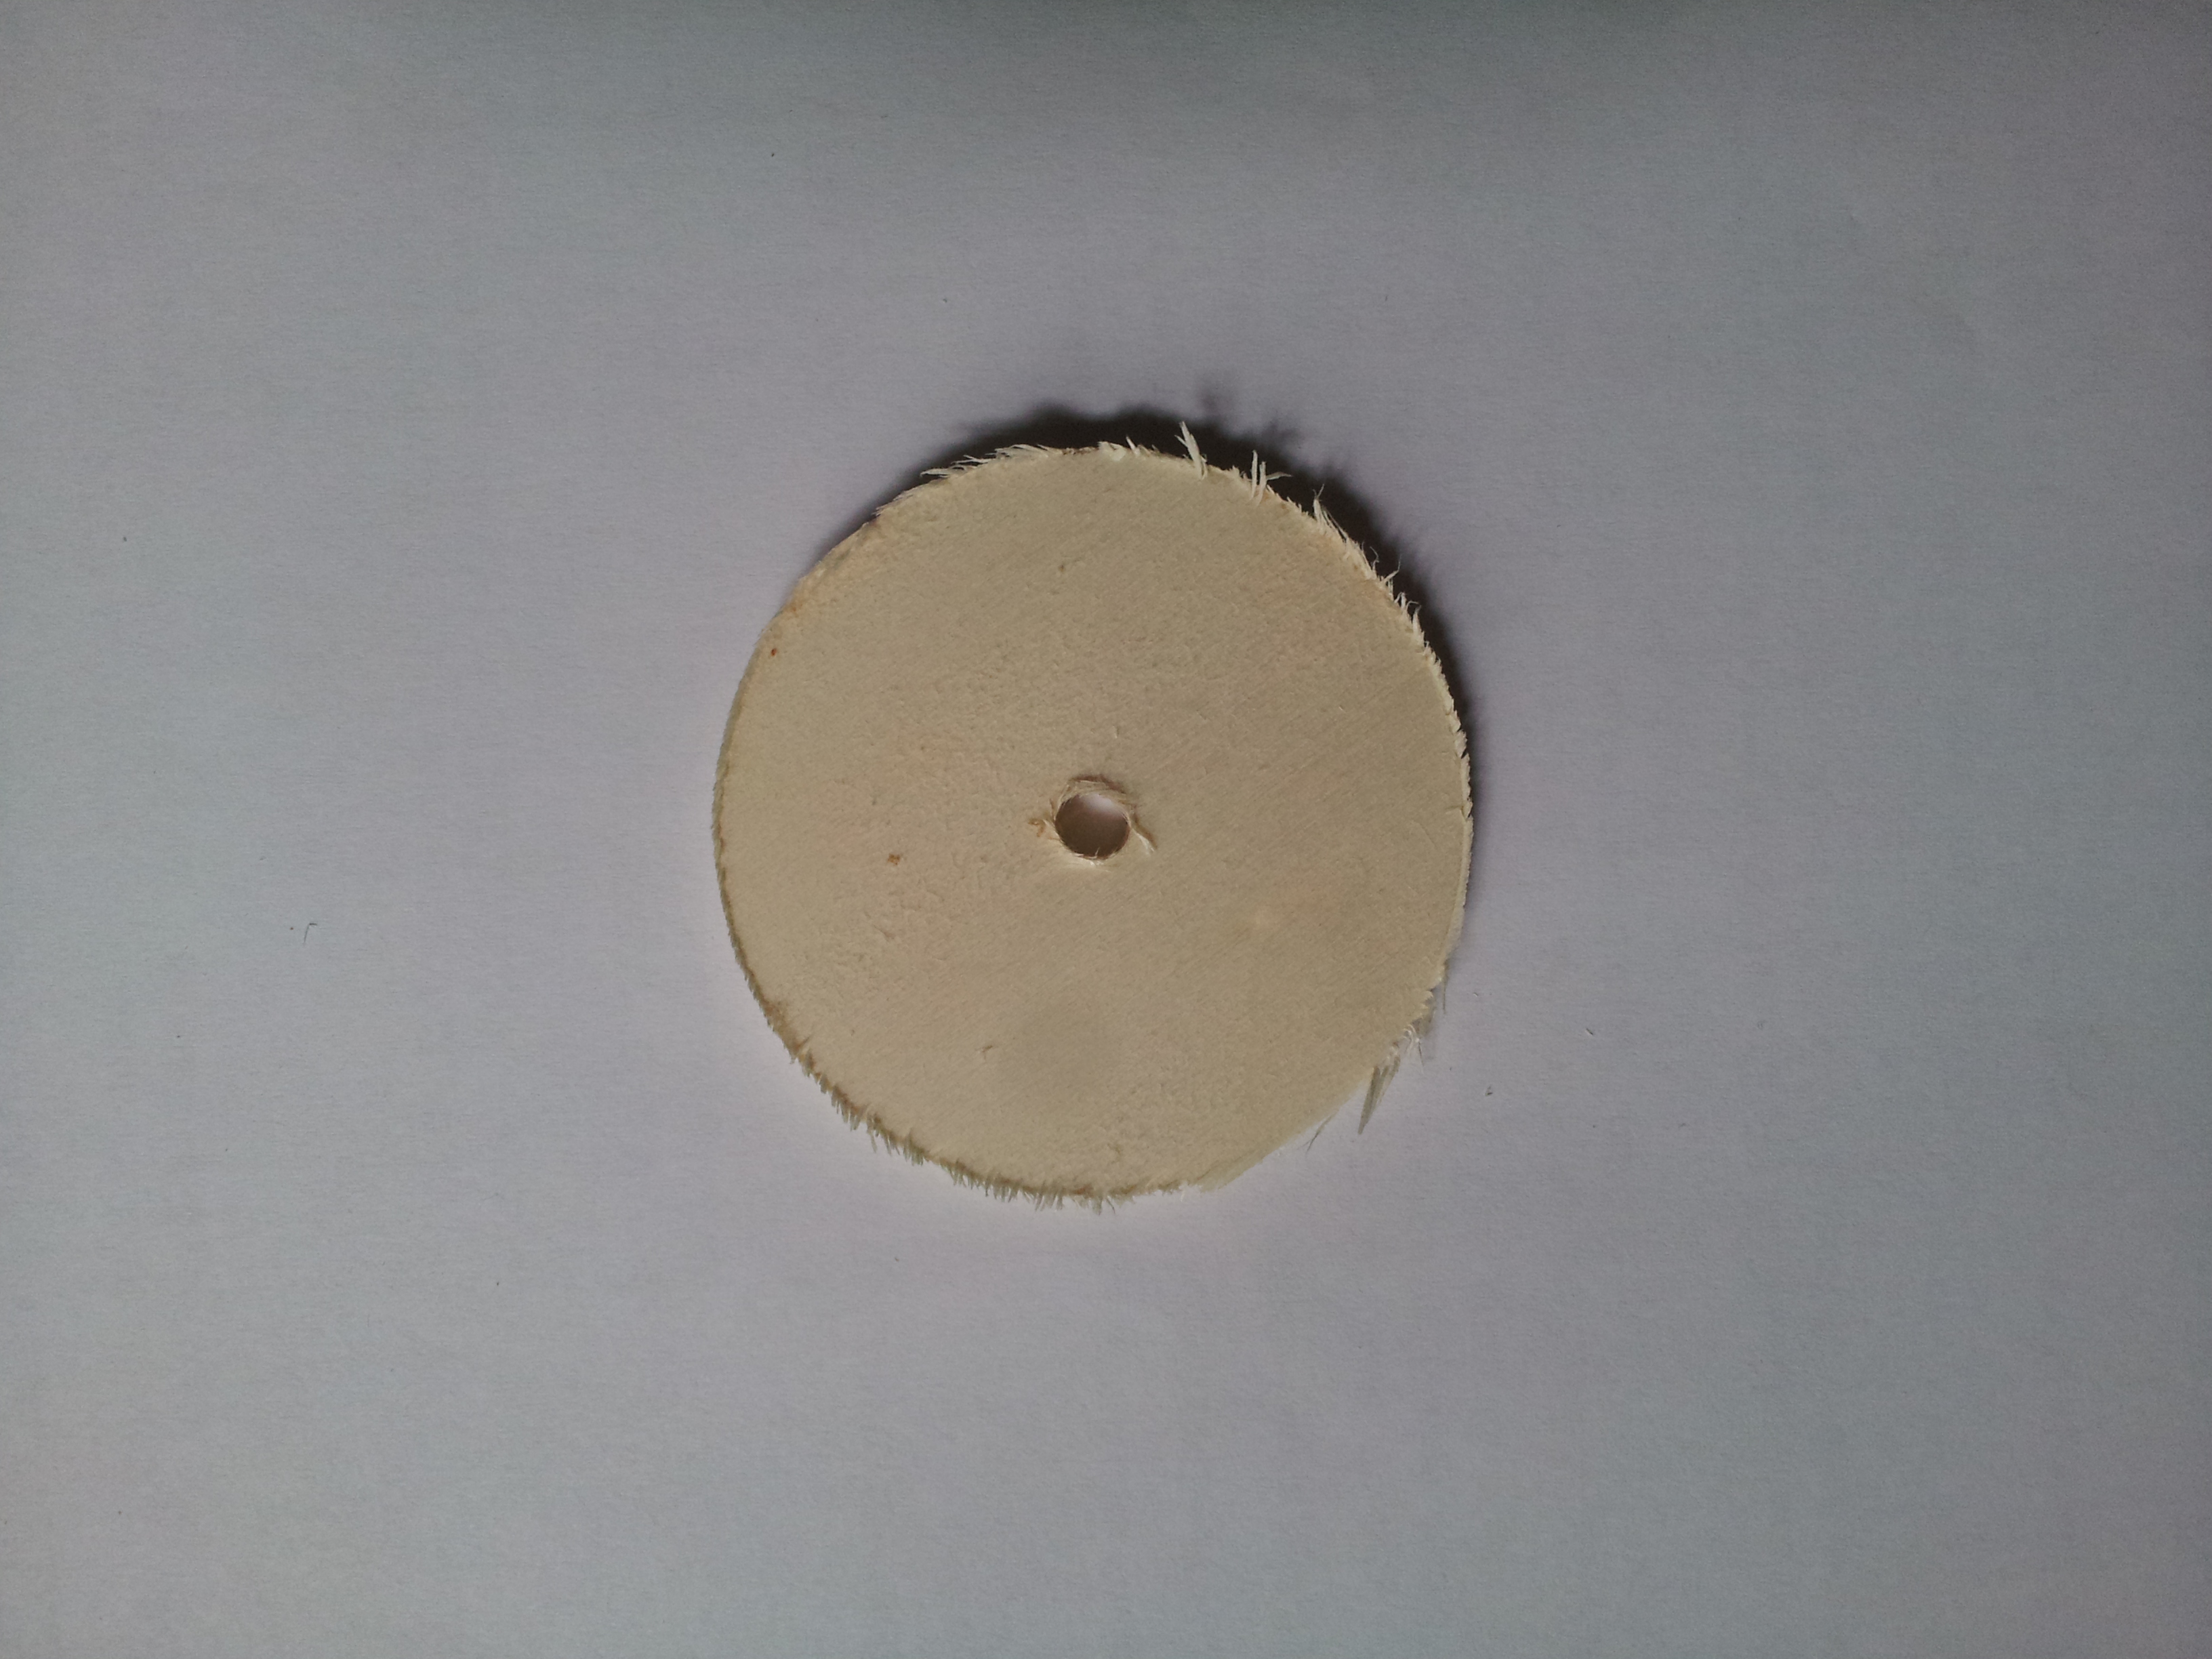
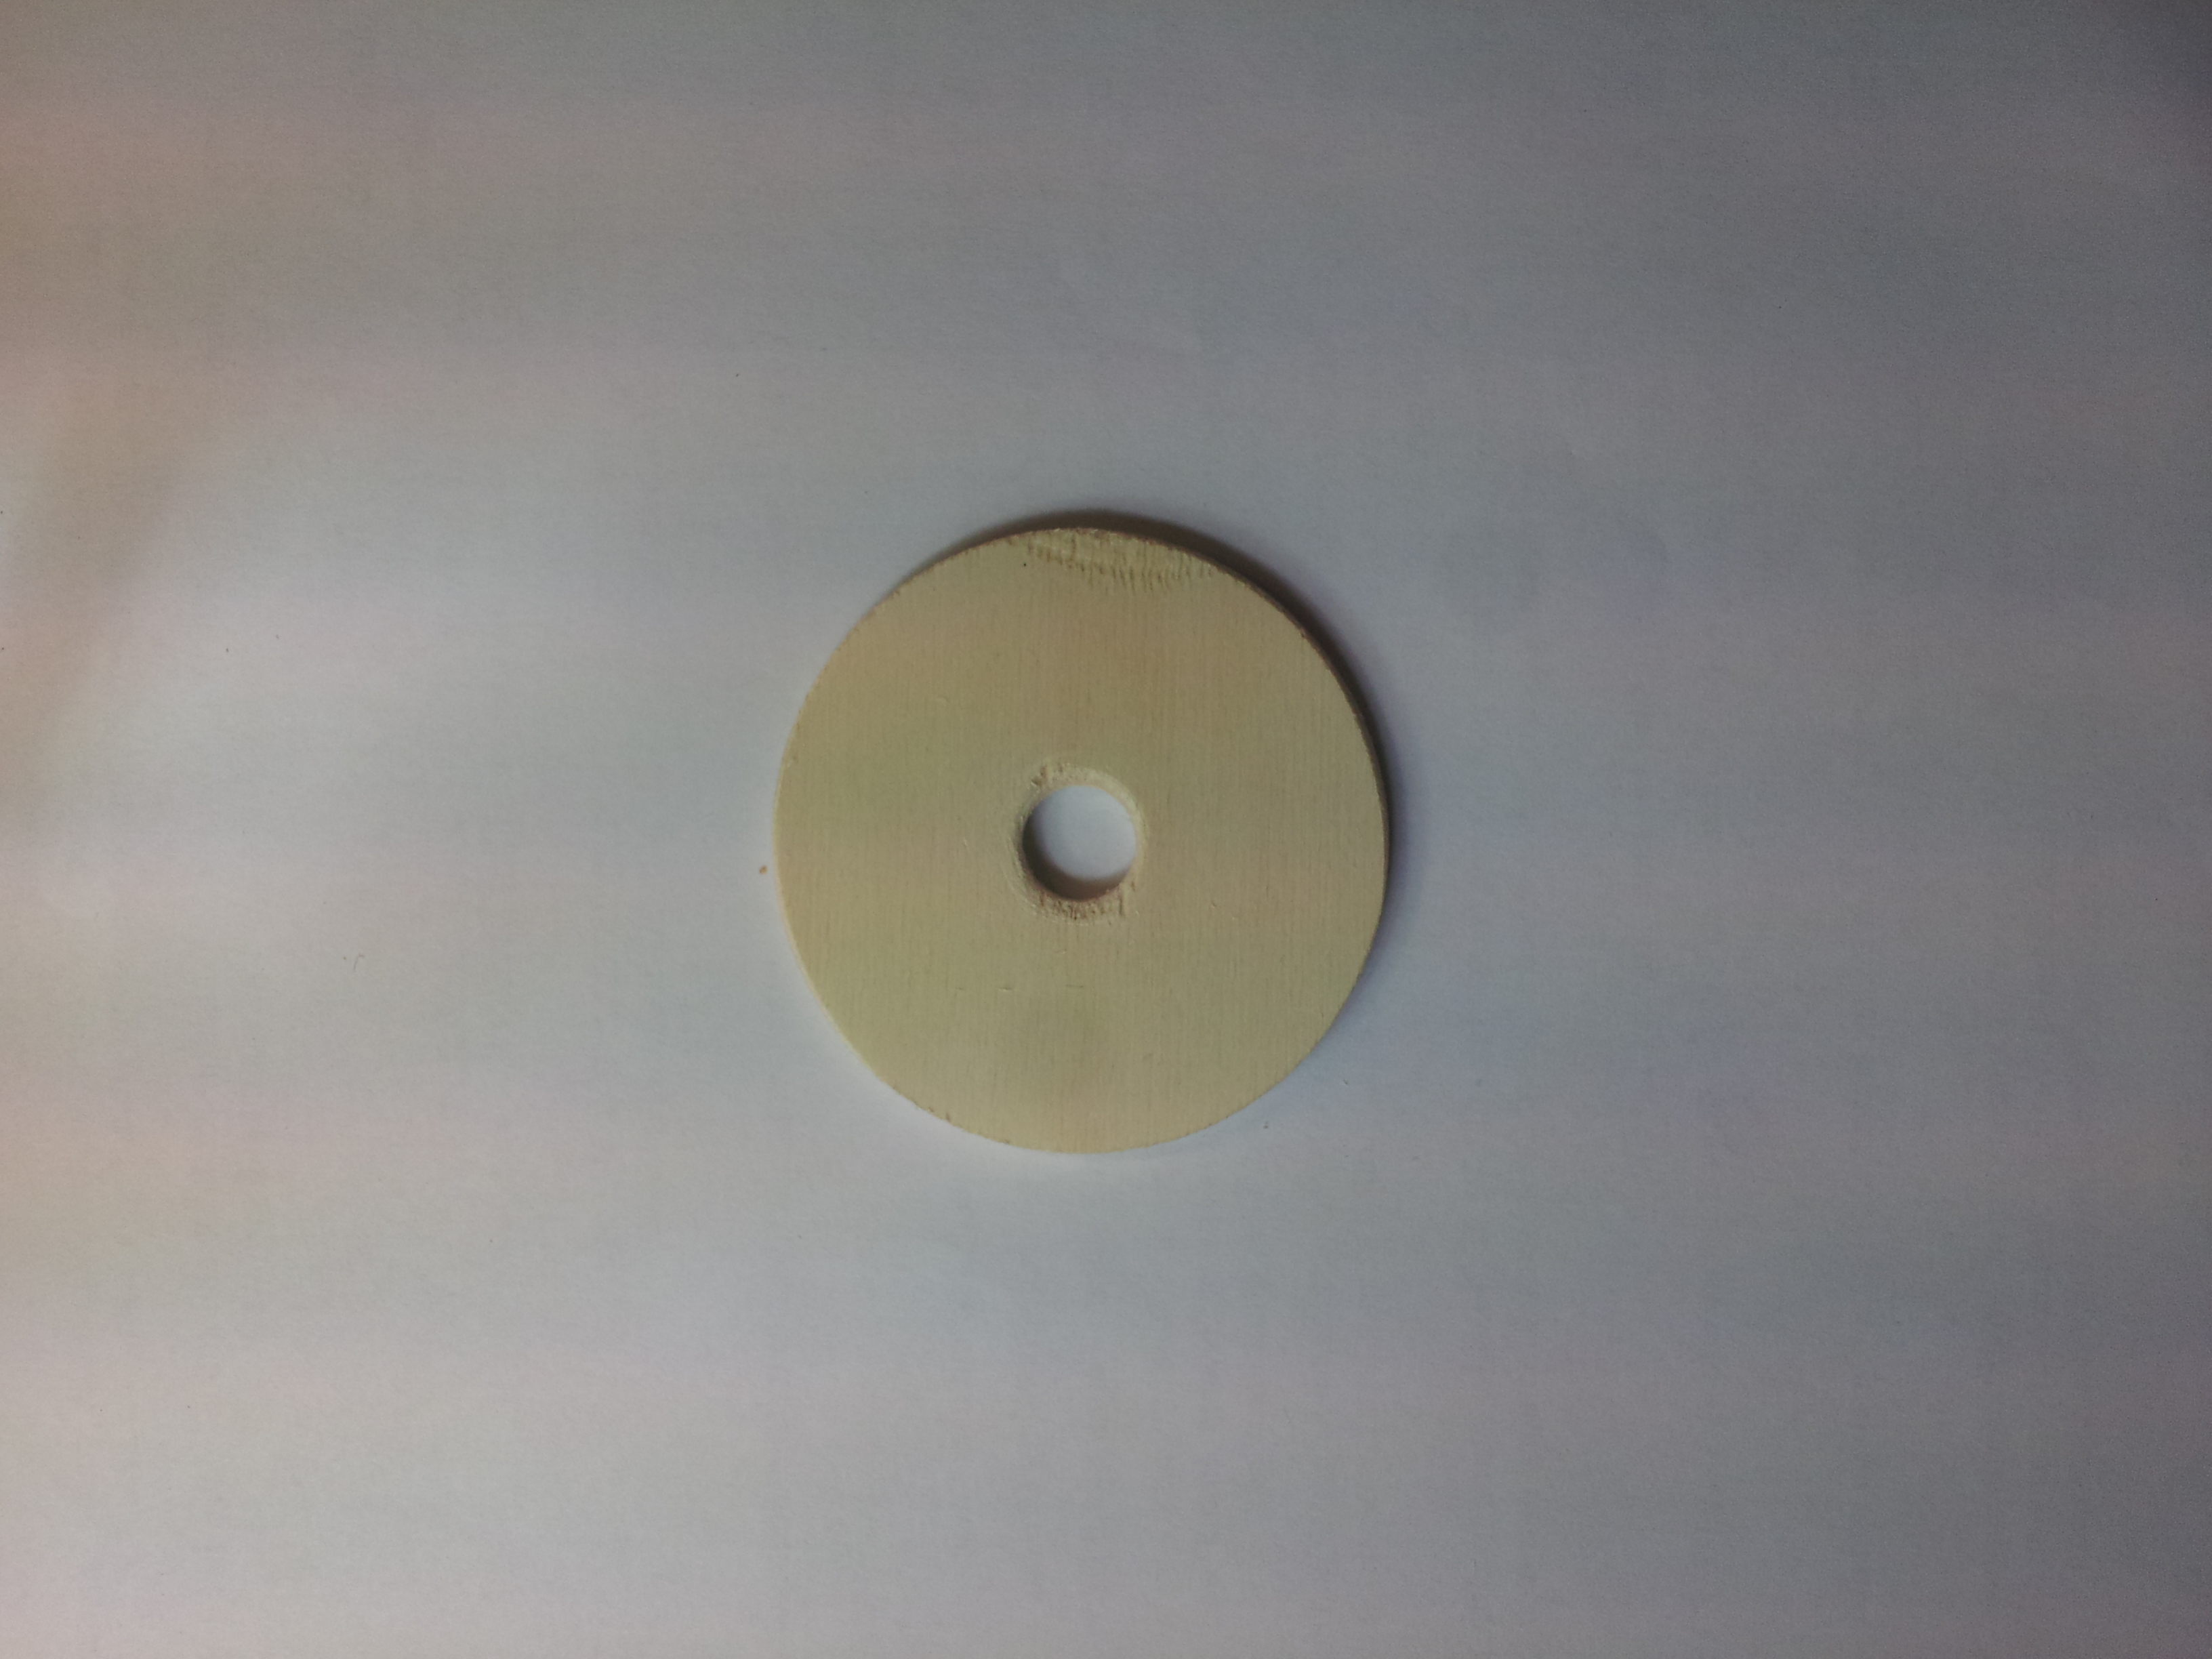
As you can see, after you cut the disk you have to sand it to smooth the edges. Furthermore the hole in the middle of disk which is created by the hole cutter, has to be expanded so that the cable gland screws fit in. Here I used screws with an M12 winding. The result of the sanding and drilling can be seen below.
Next you have to drill the holes for the control threads. I used four holes because then we can fix to sides and control two sides for the movement. But if you want to build a tentacle with more movement control, you could use more holes ( you could also use only three holes, then you have to calculate more for the movement; same principle as with the quad-copters). Next you have to drill the holes for the controlling threads. For the big (68 mm) disks I align them on a circle with radius of 24 mm around the center. This is just 1 cm less then the radius of the disk. The diameter of the control holes amounts 5 mm.
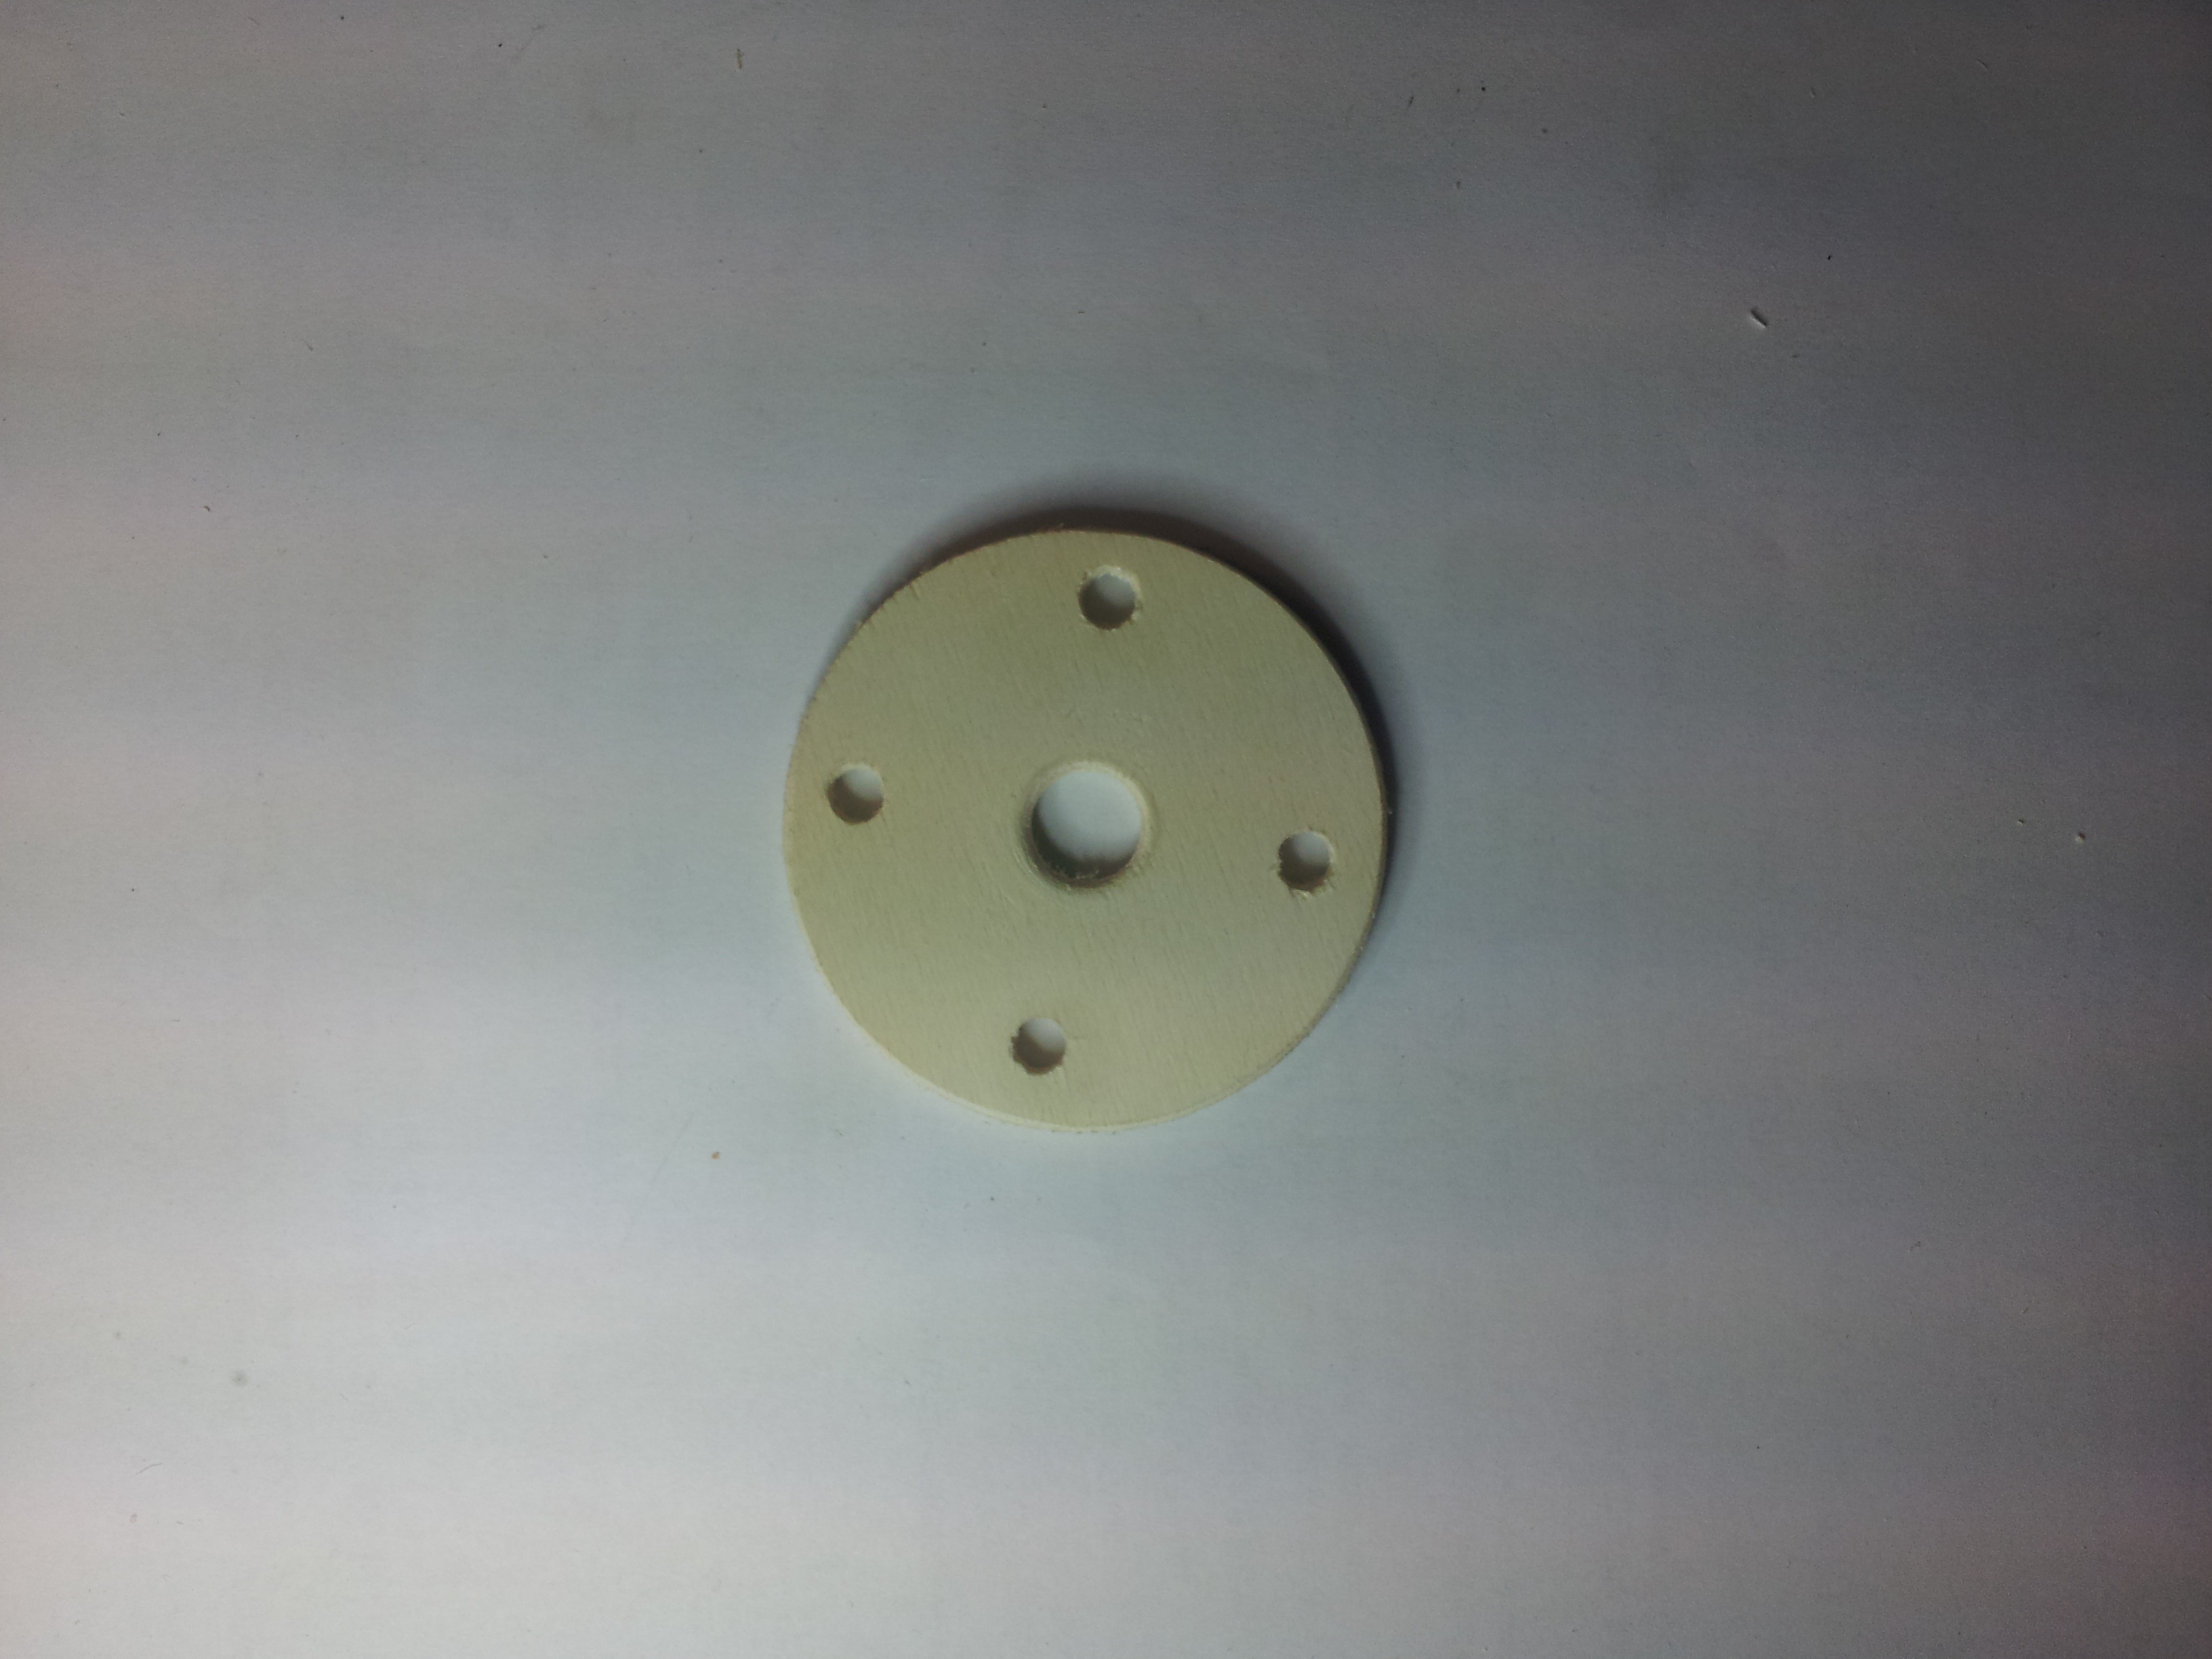
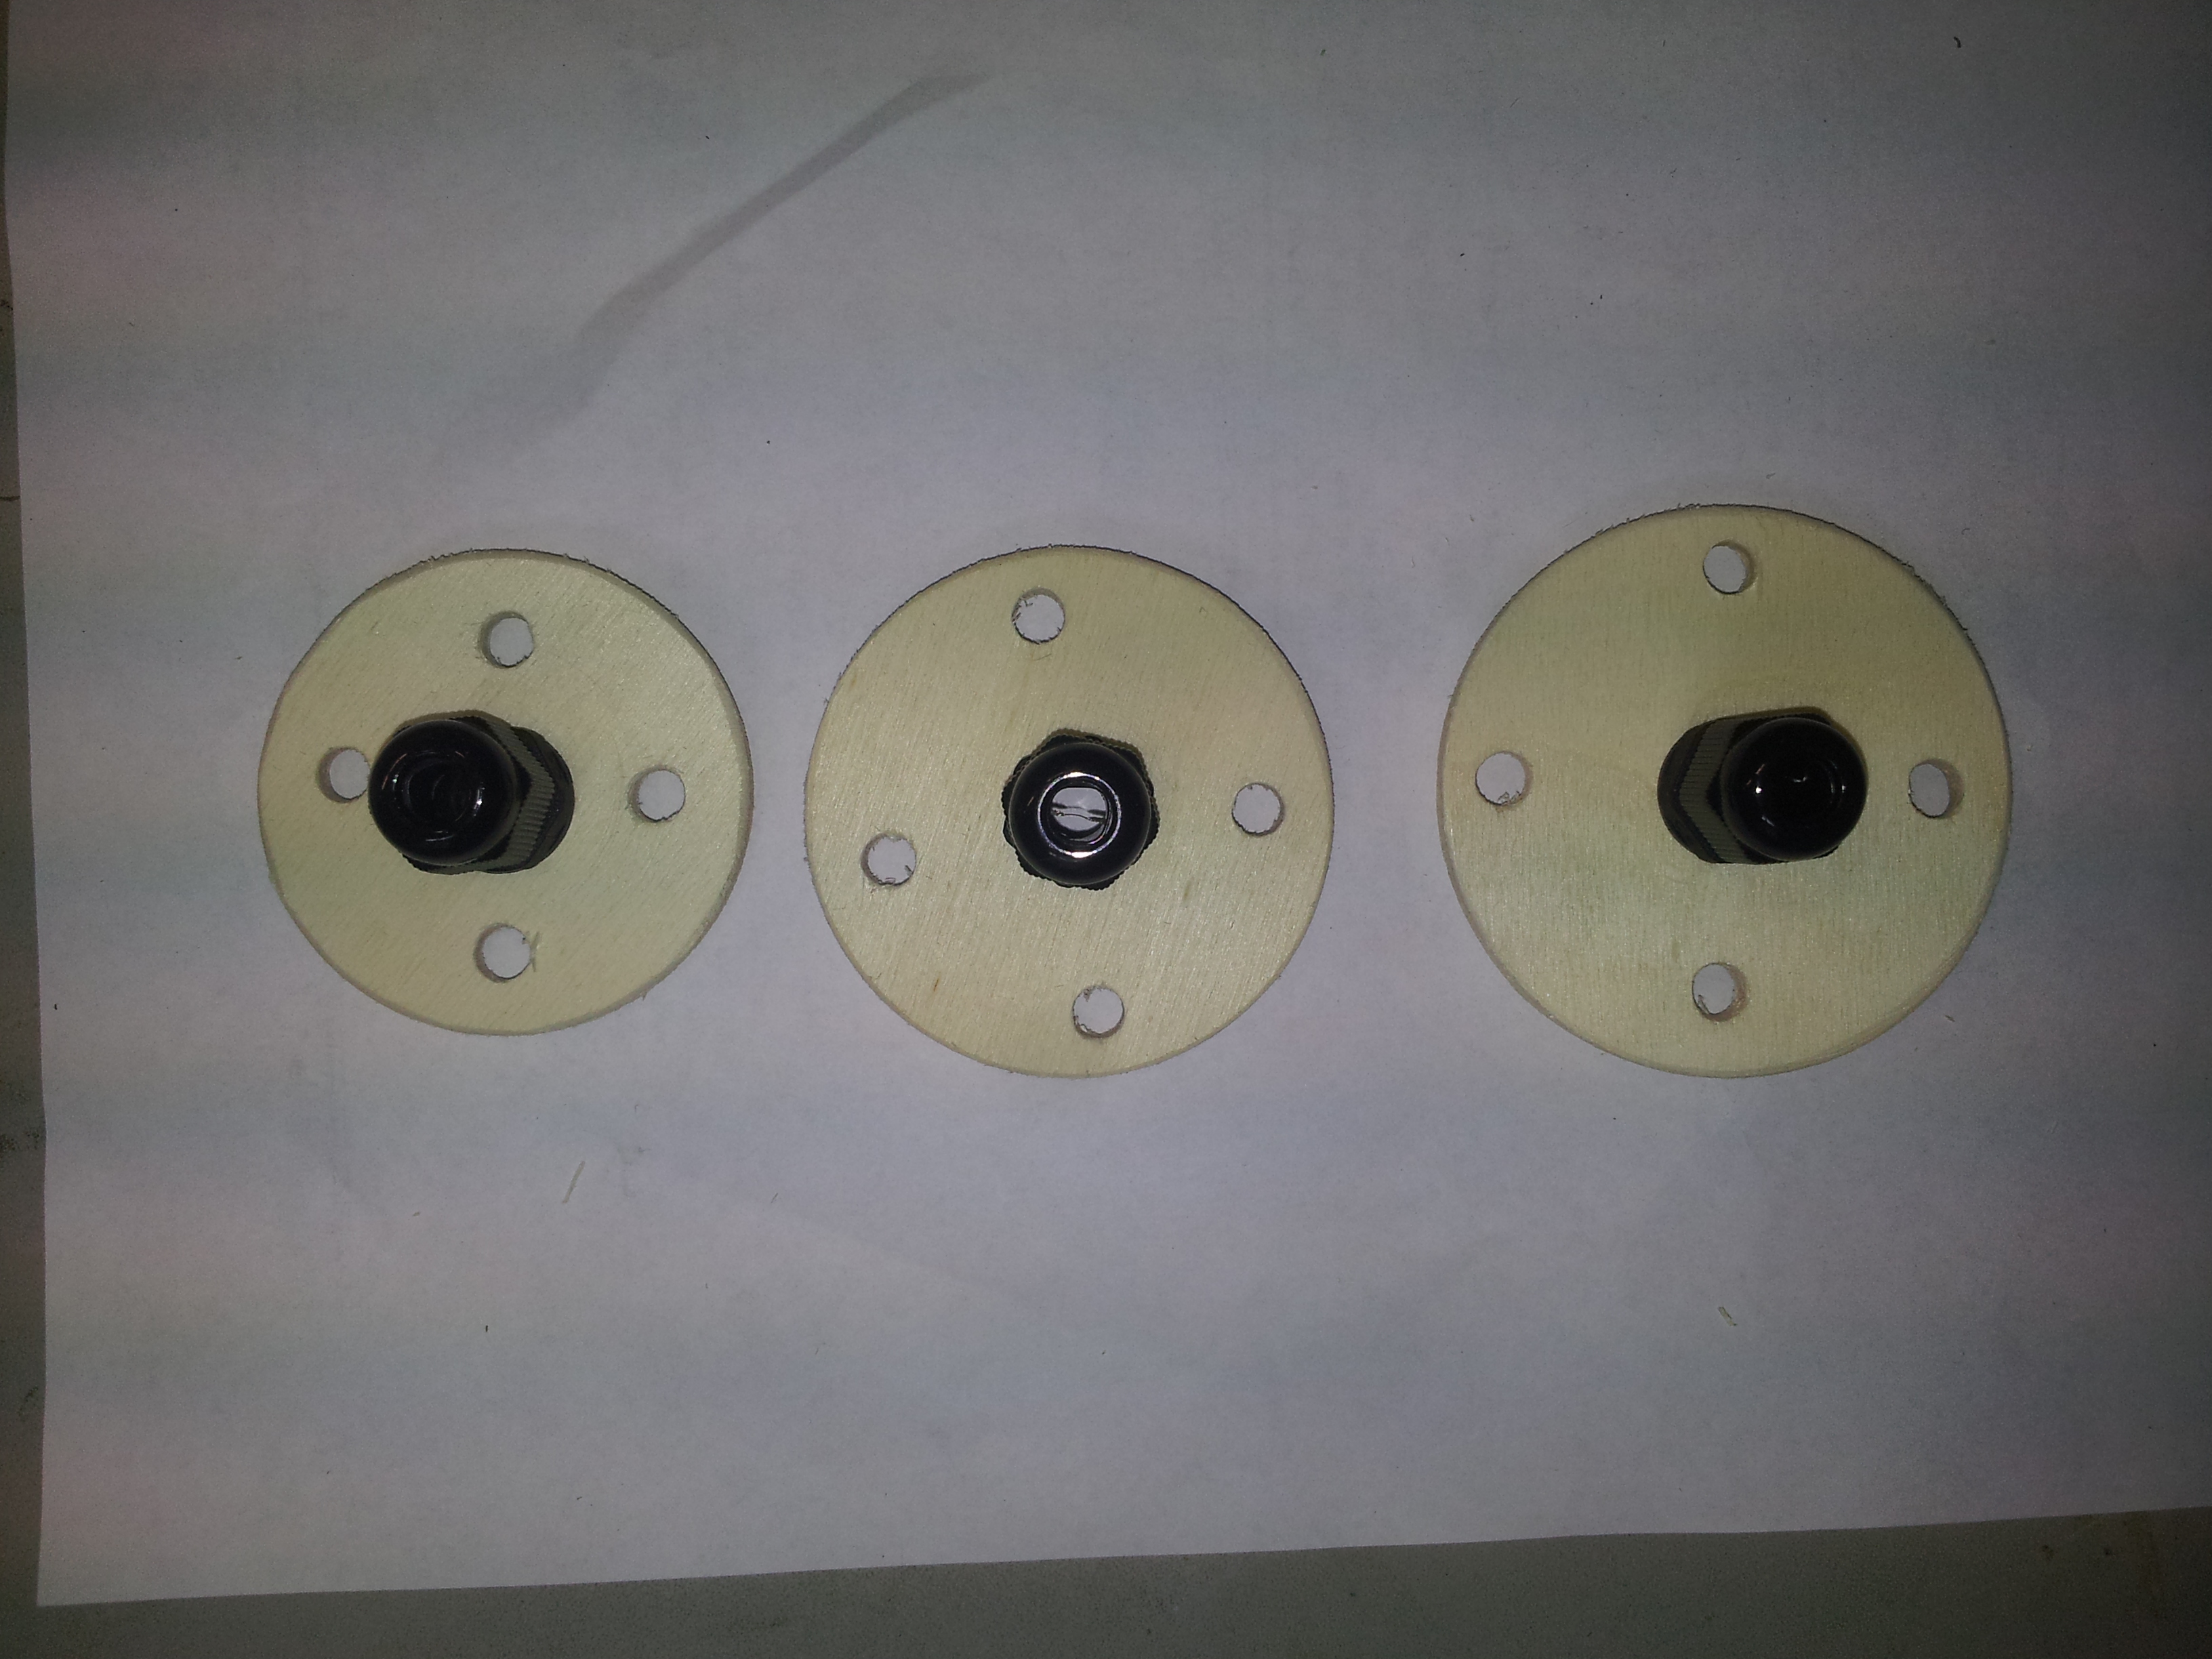
This is how the wooden disk should look after this step. Next you have to apply the cable gland screws and put them aside.
This was the fiddly work. The next steps will be more straight forward.
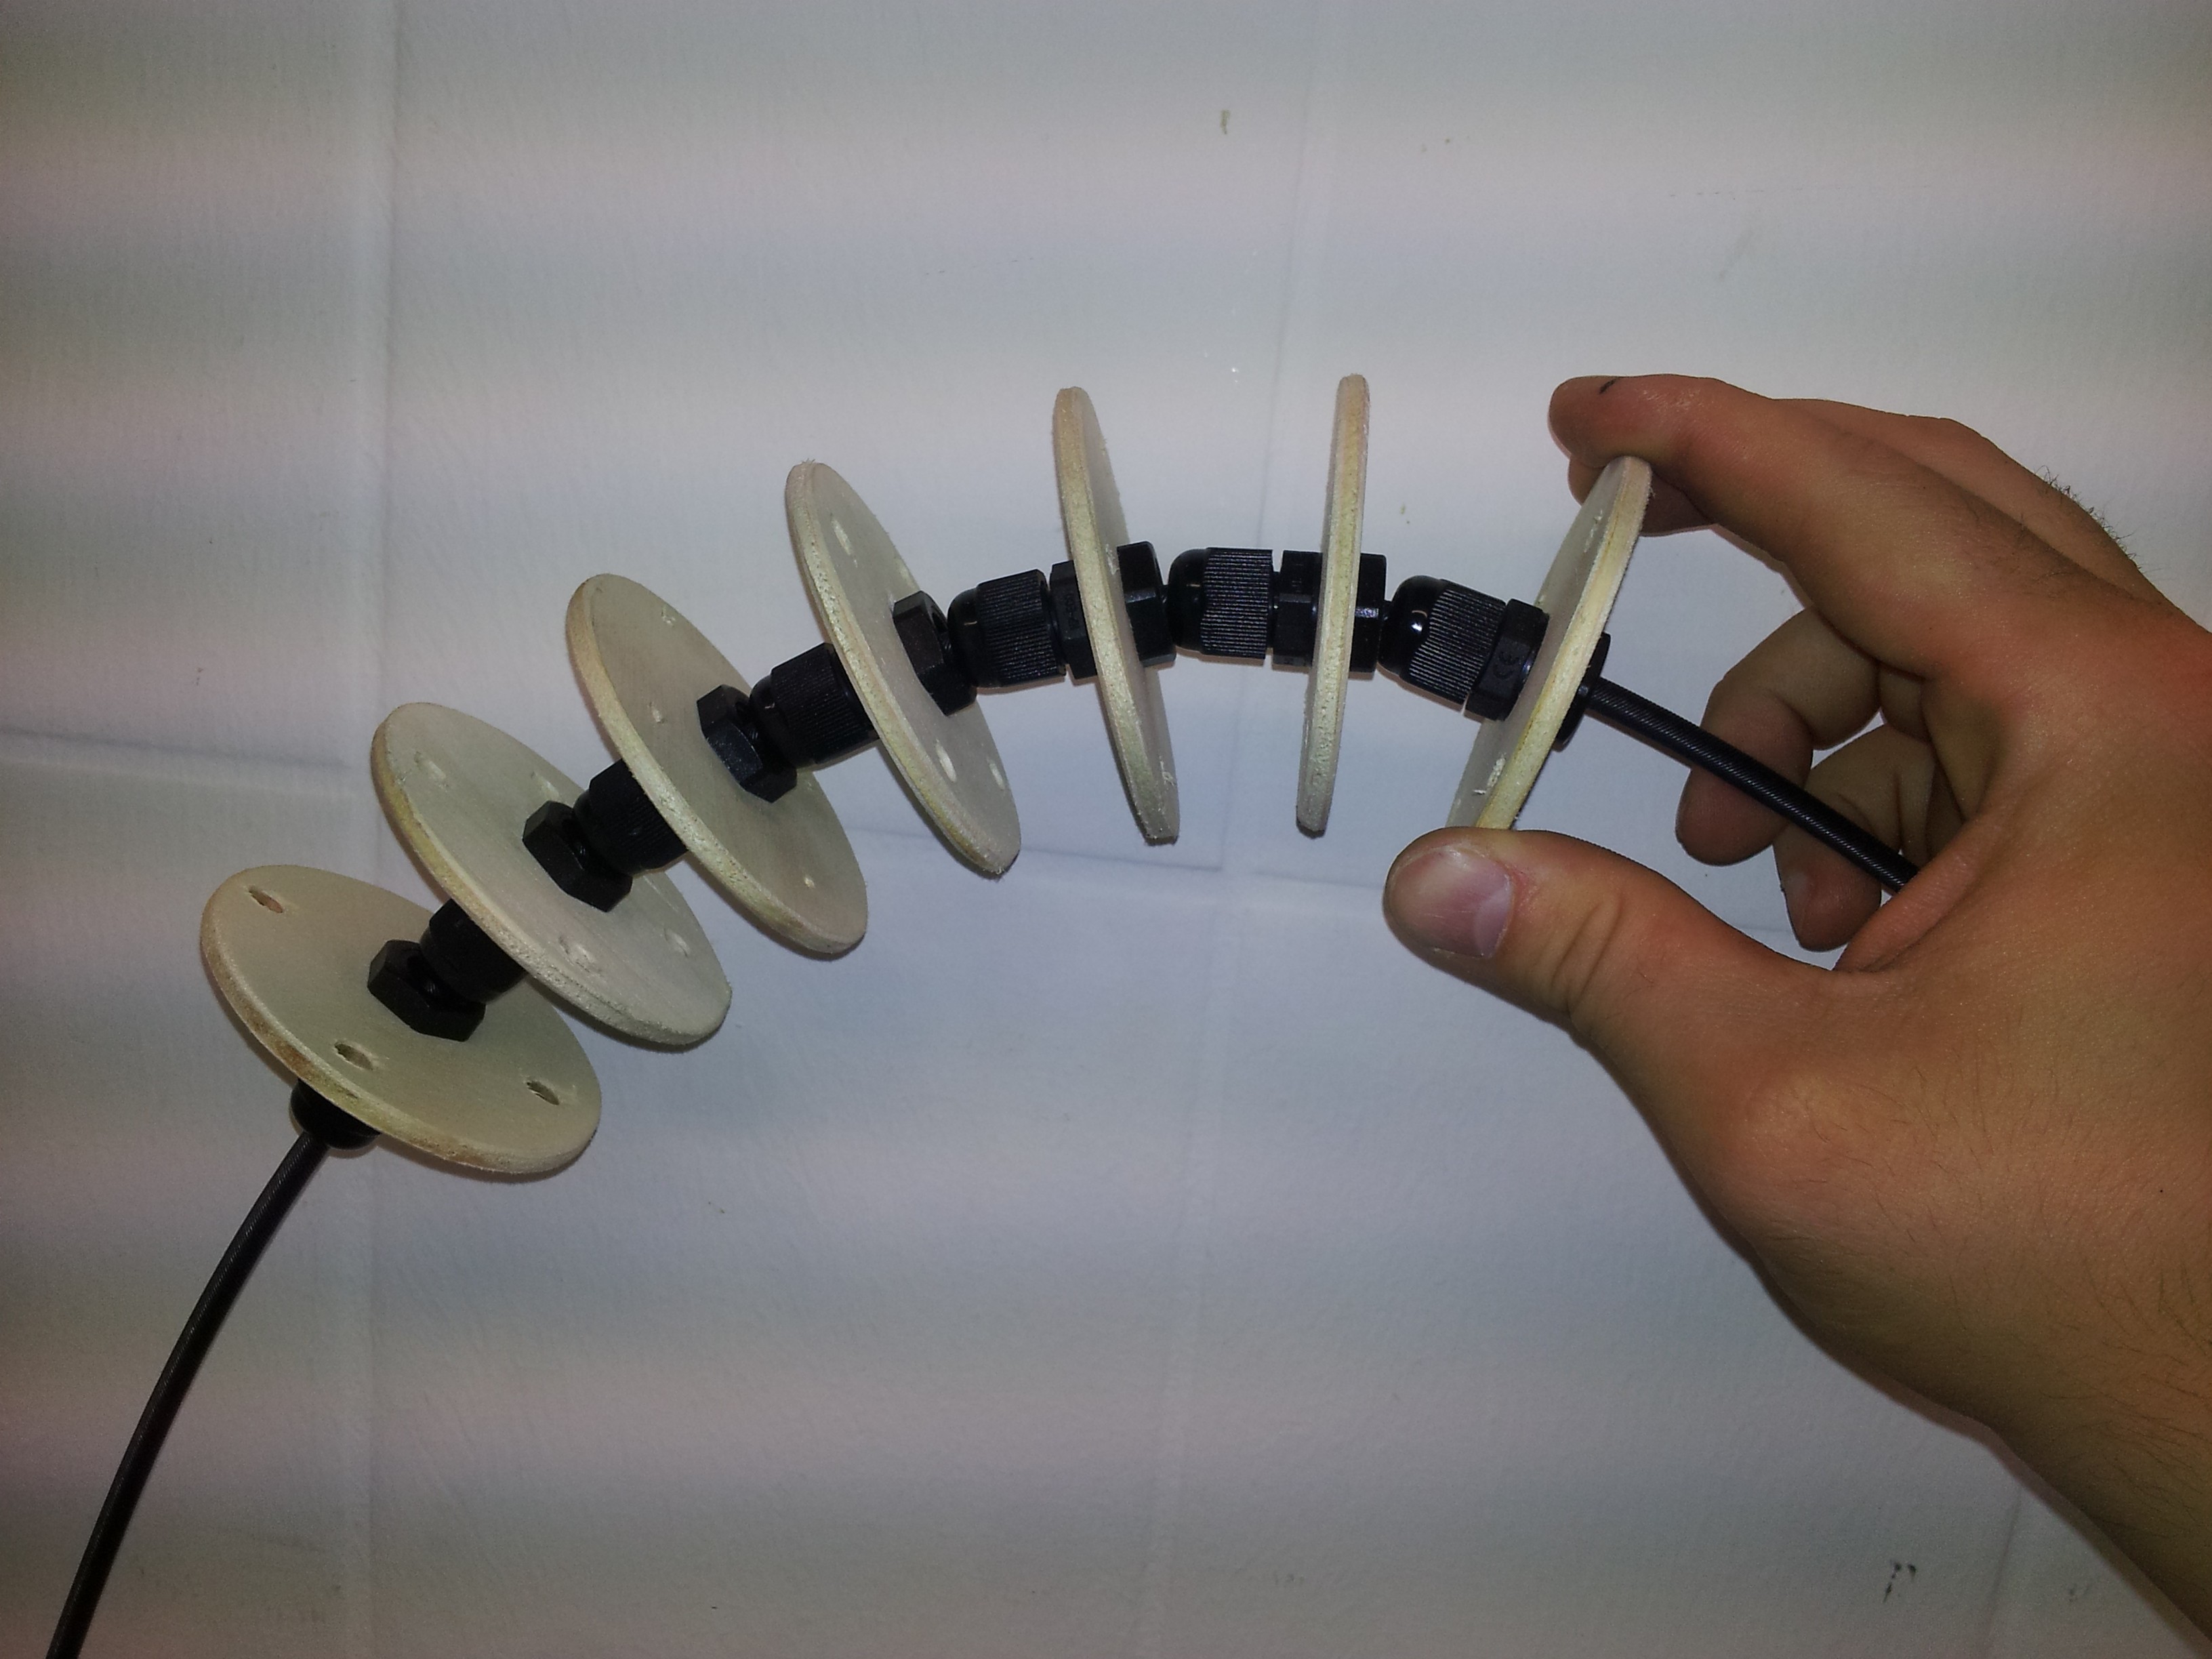
Step 2: Assembling the spine
Now you can take the disk with the screws and 1 m of your soul (here the flexible shaft) and put them together. Leave 12 cm from the top of the shaft and place the first disk there. The 12 cm are used to mount the tentacle later to the costumes. The first 6 disks have nearly no space in between to stiffen this part. Therefore it will stick out of the costume a little bit and not just hanging down. The next disks have a distance about 4.5 cm. The two last disks are the smaller one to indicate the tip of the tentacle.

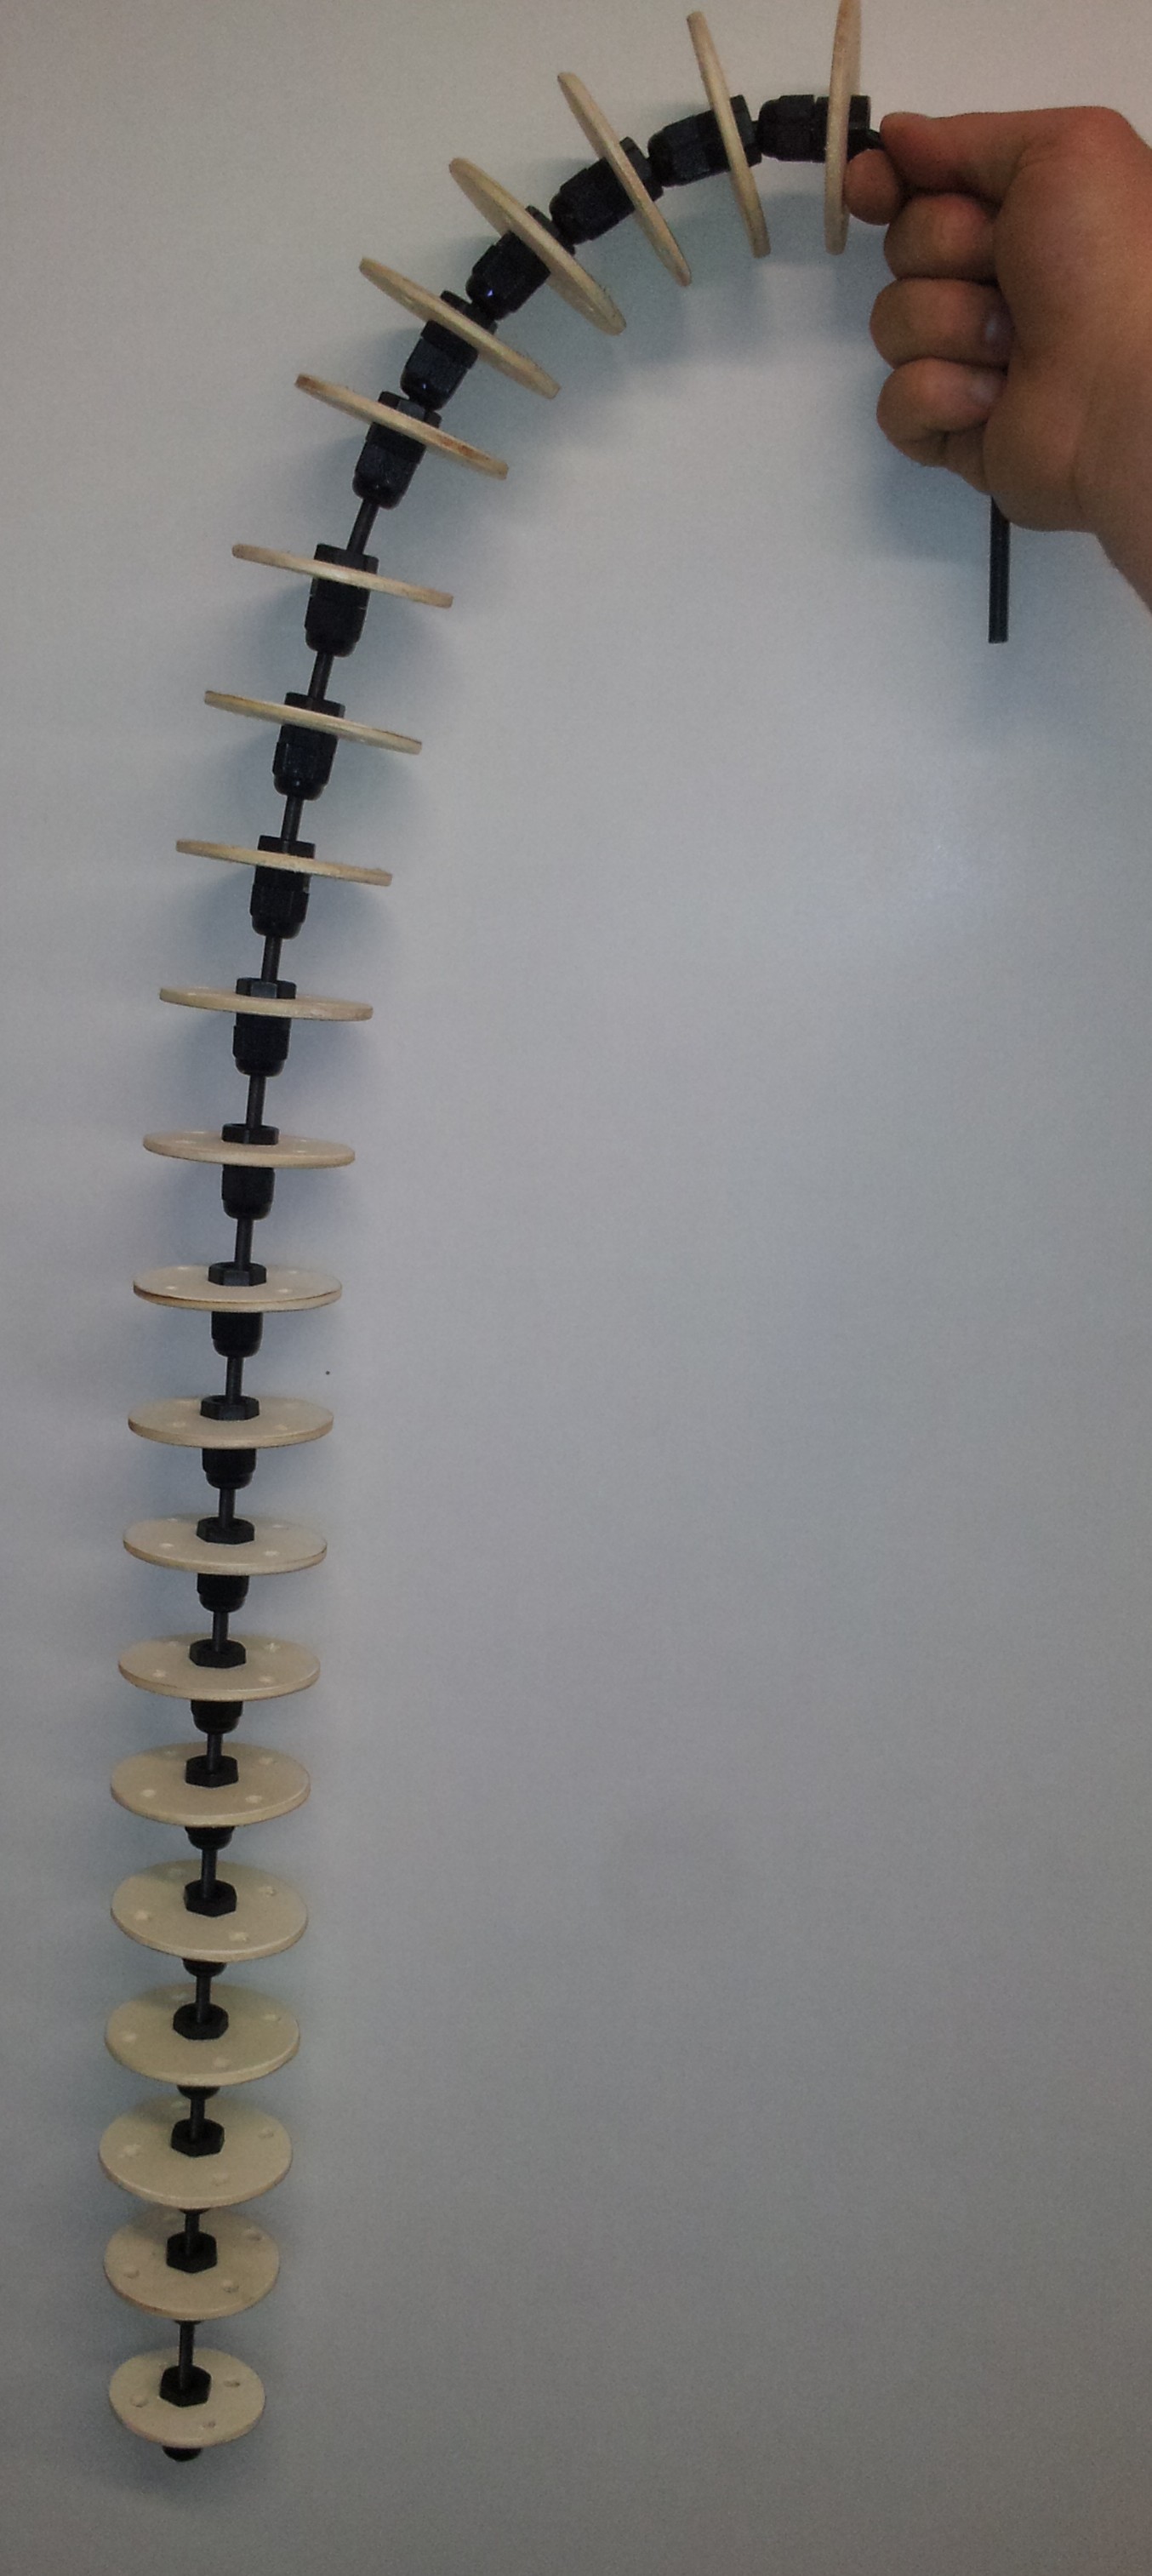
Step 3: Attach the controlling threads
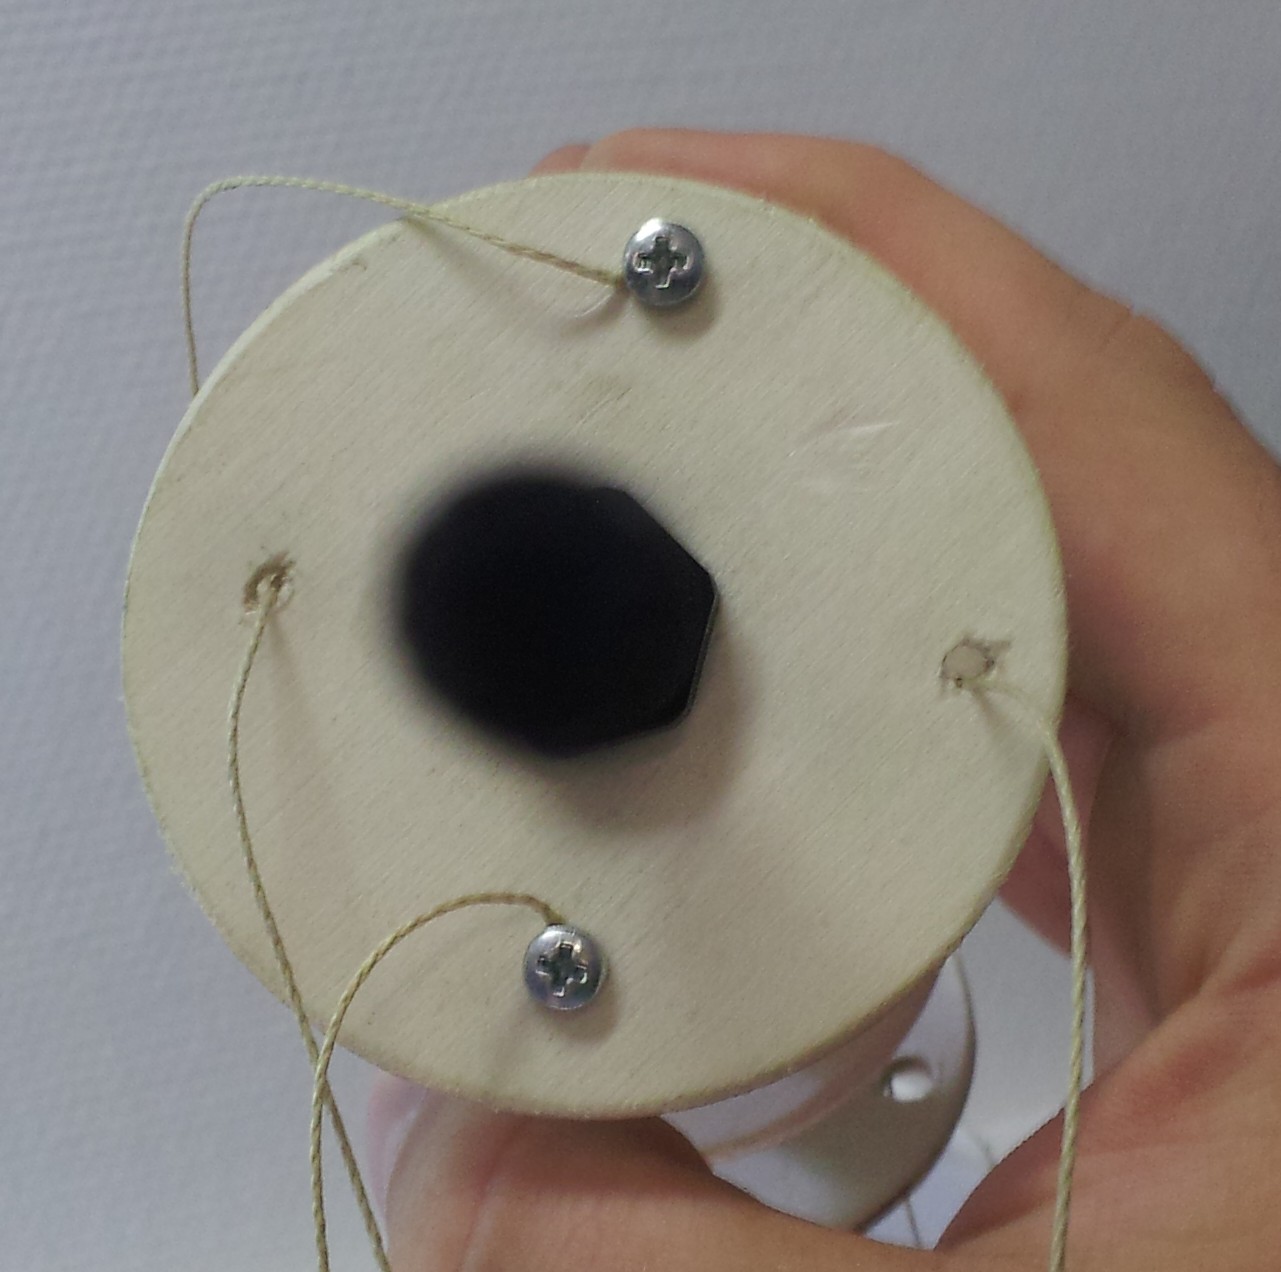
The last step is to attach the controlling threads. I used 1.6 m for the movable threads and 1.2 m for the fixed dimension. You should take care about the tip. To have a smooth movement the threads should placed carefully as you can see below.

This is how the tentacle mechanism is built. The controlling threads are then attached to a motor. The movement will be described in another post.