Category Archives: Our costumes

Sewing lessons – diver´s vest

dear all! we´ve been starting to sew! Completely new territory for me. But with Wiebke´s help it´ll become a decent prototype of a costume – hopefully.

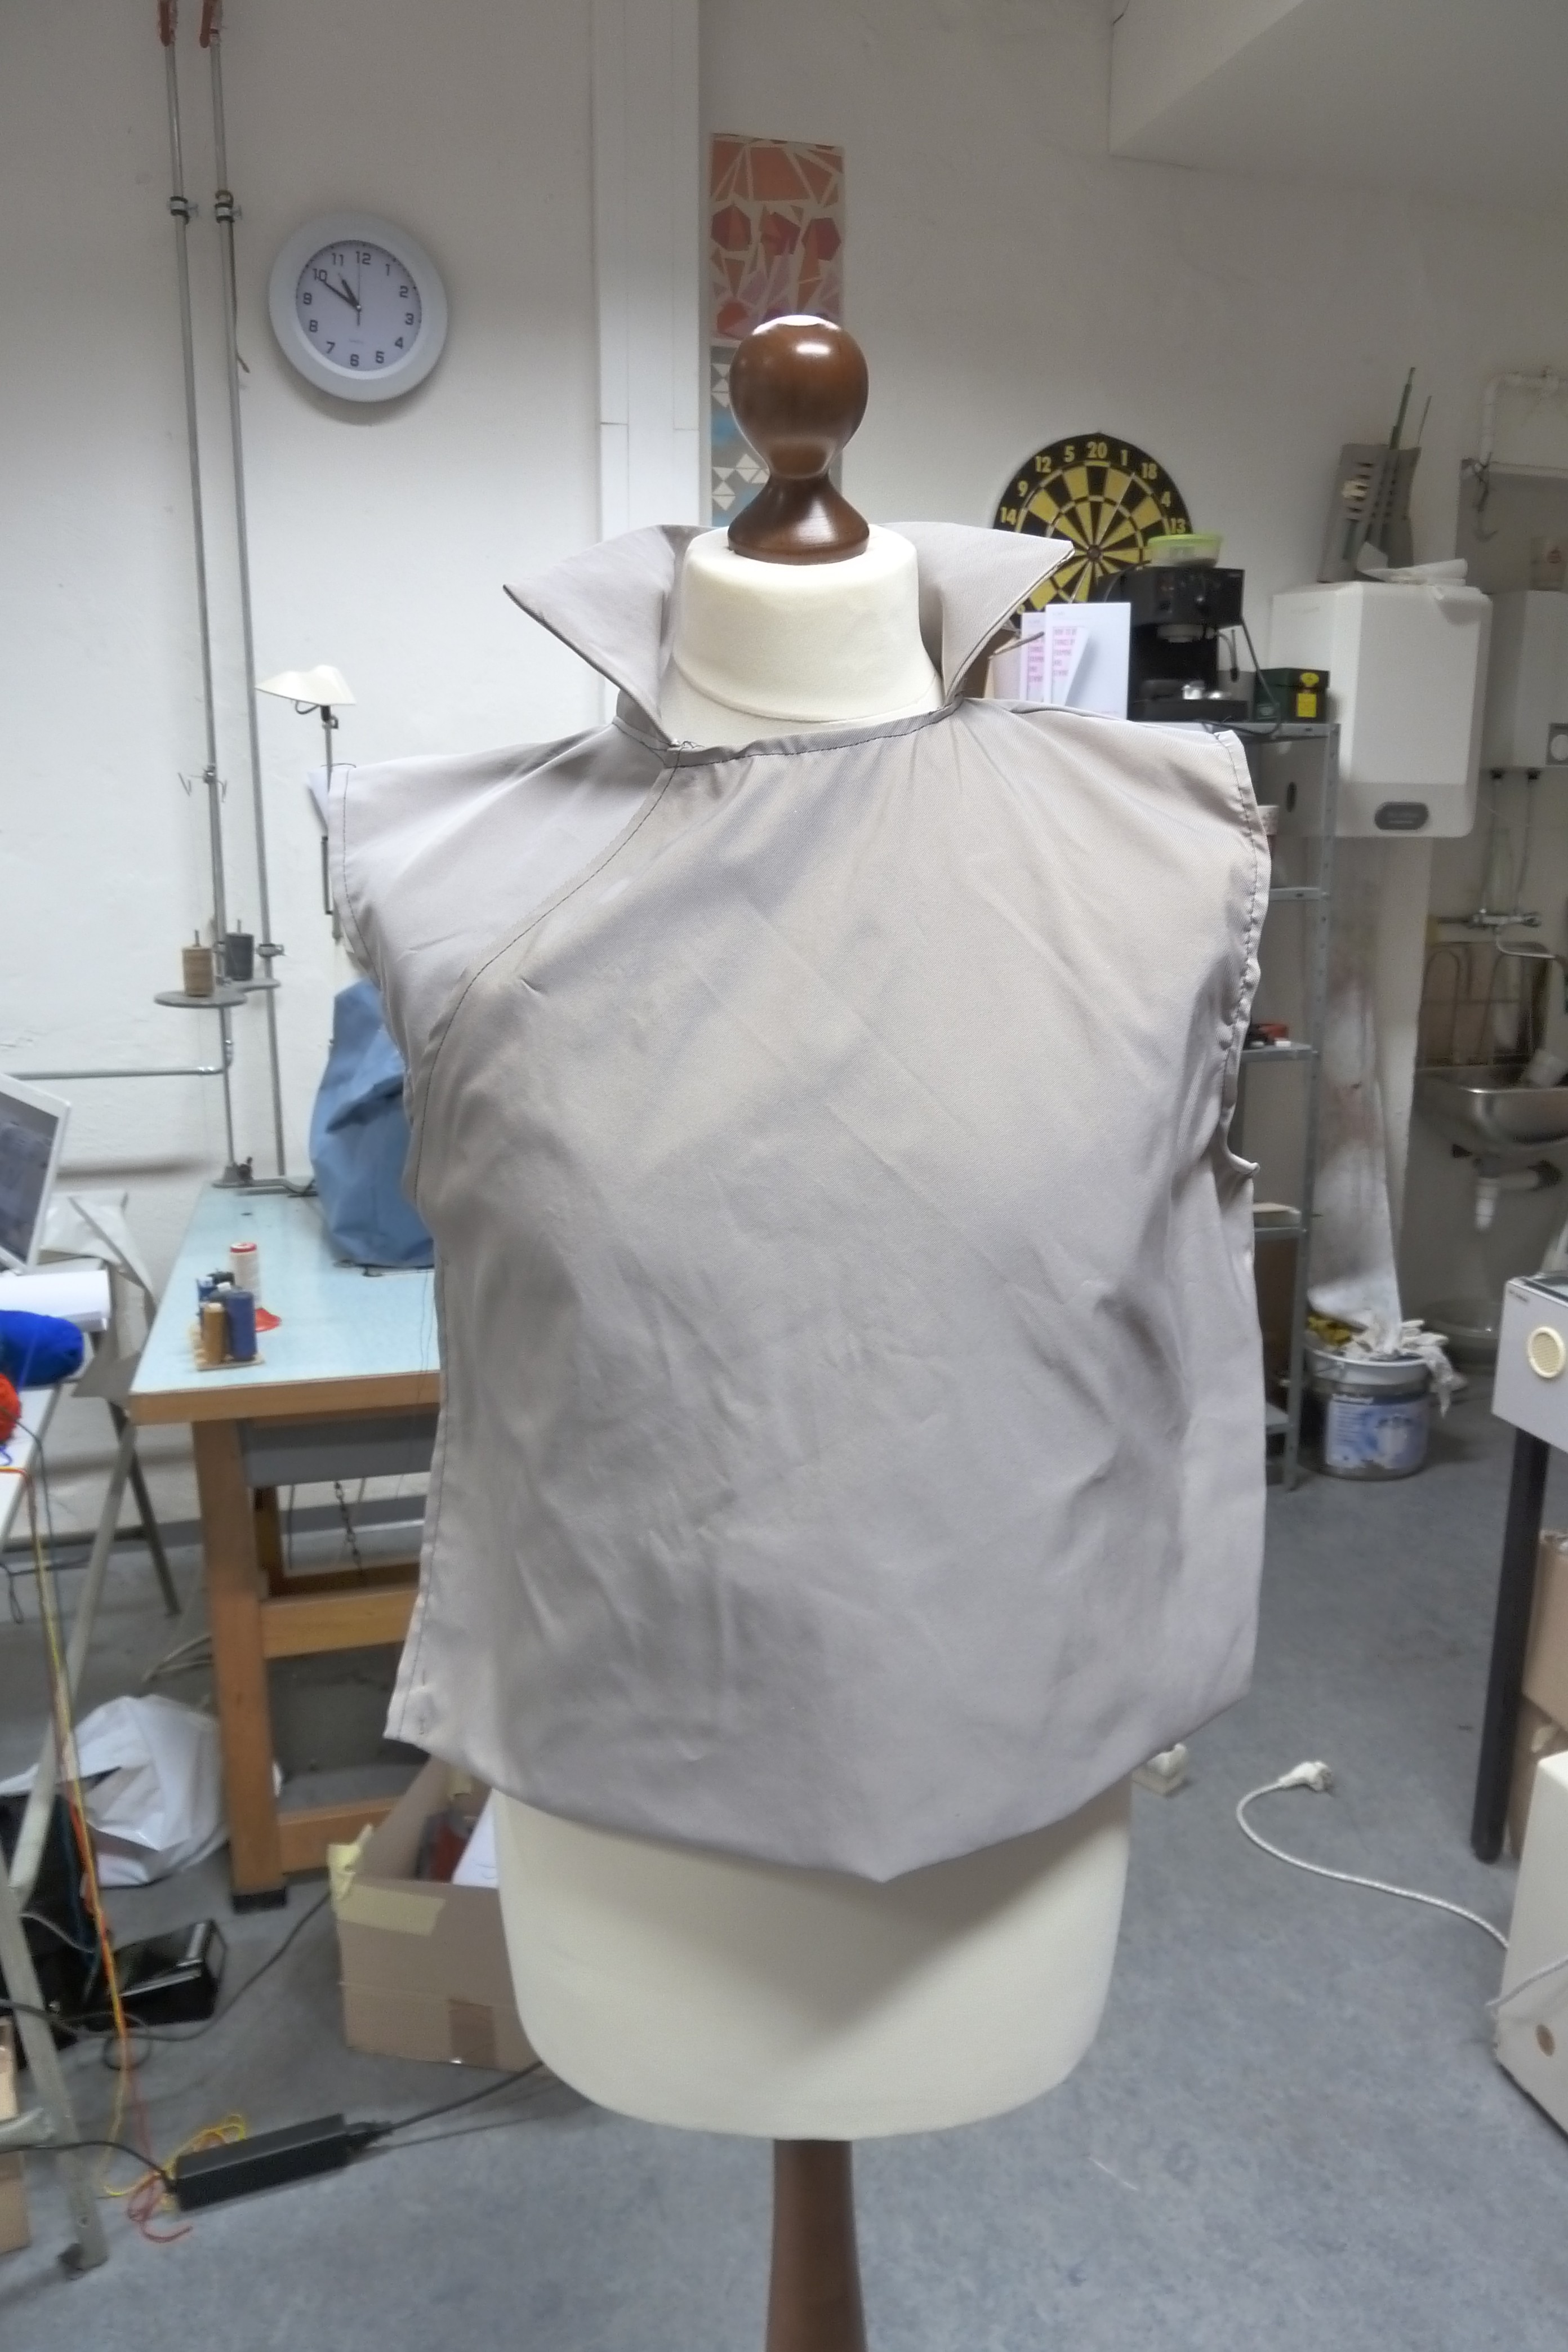
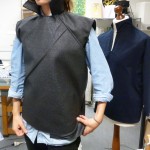
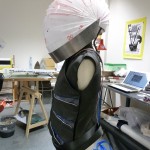
We started out with a basic vest. It overlaps and closes on the side. The collar is really tall and will be the junction of suit and helmet. It´s made from textile that we had laying around. Our final version will be made from the black rubbery textile.


basic diver´s vest
basic diver´s vest

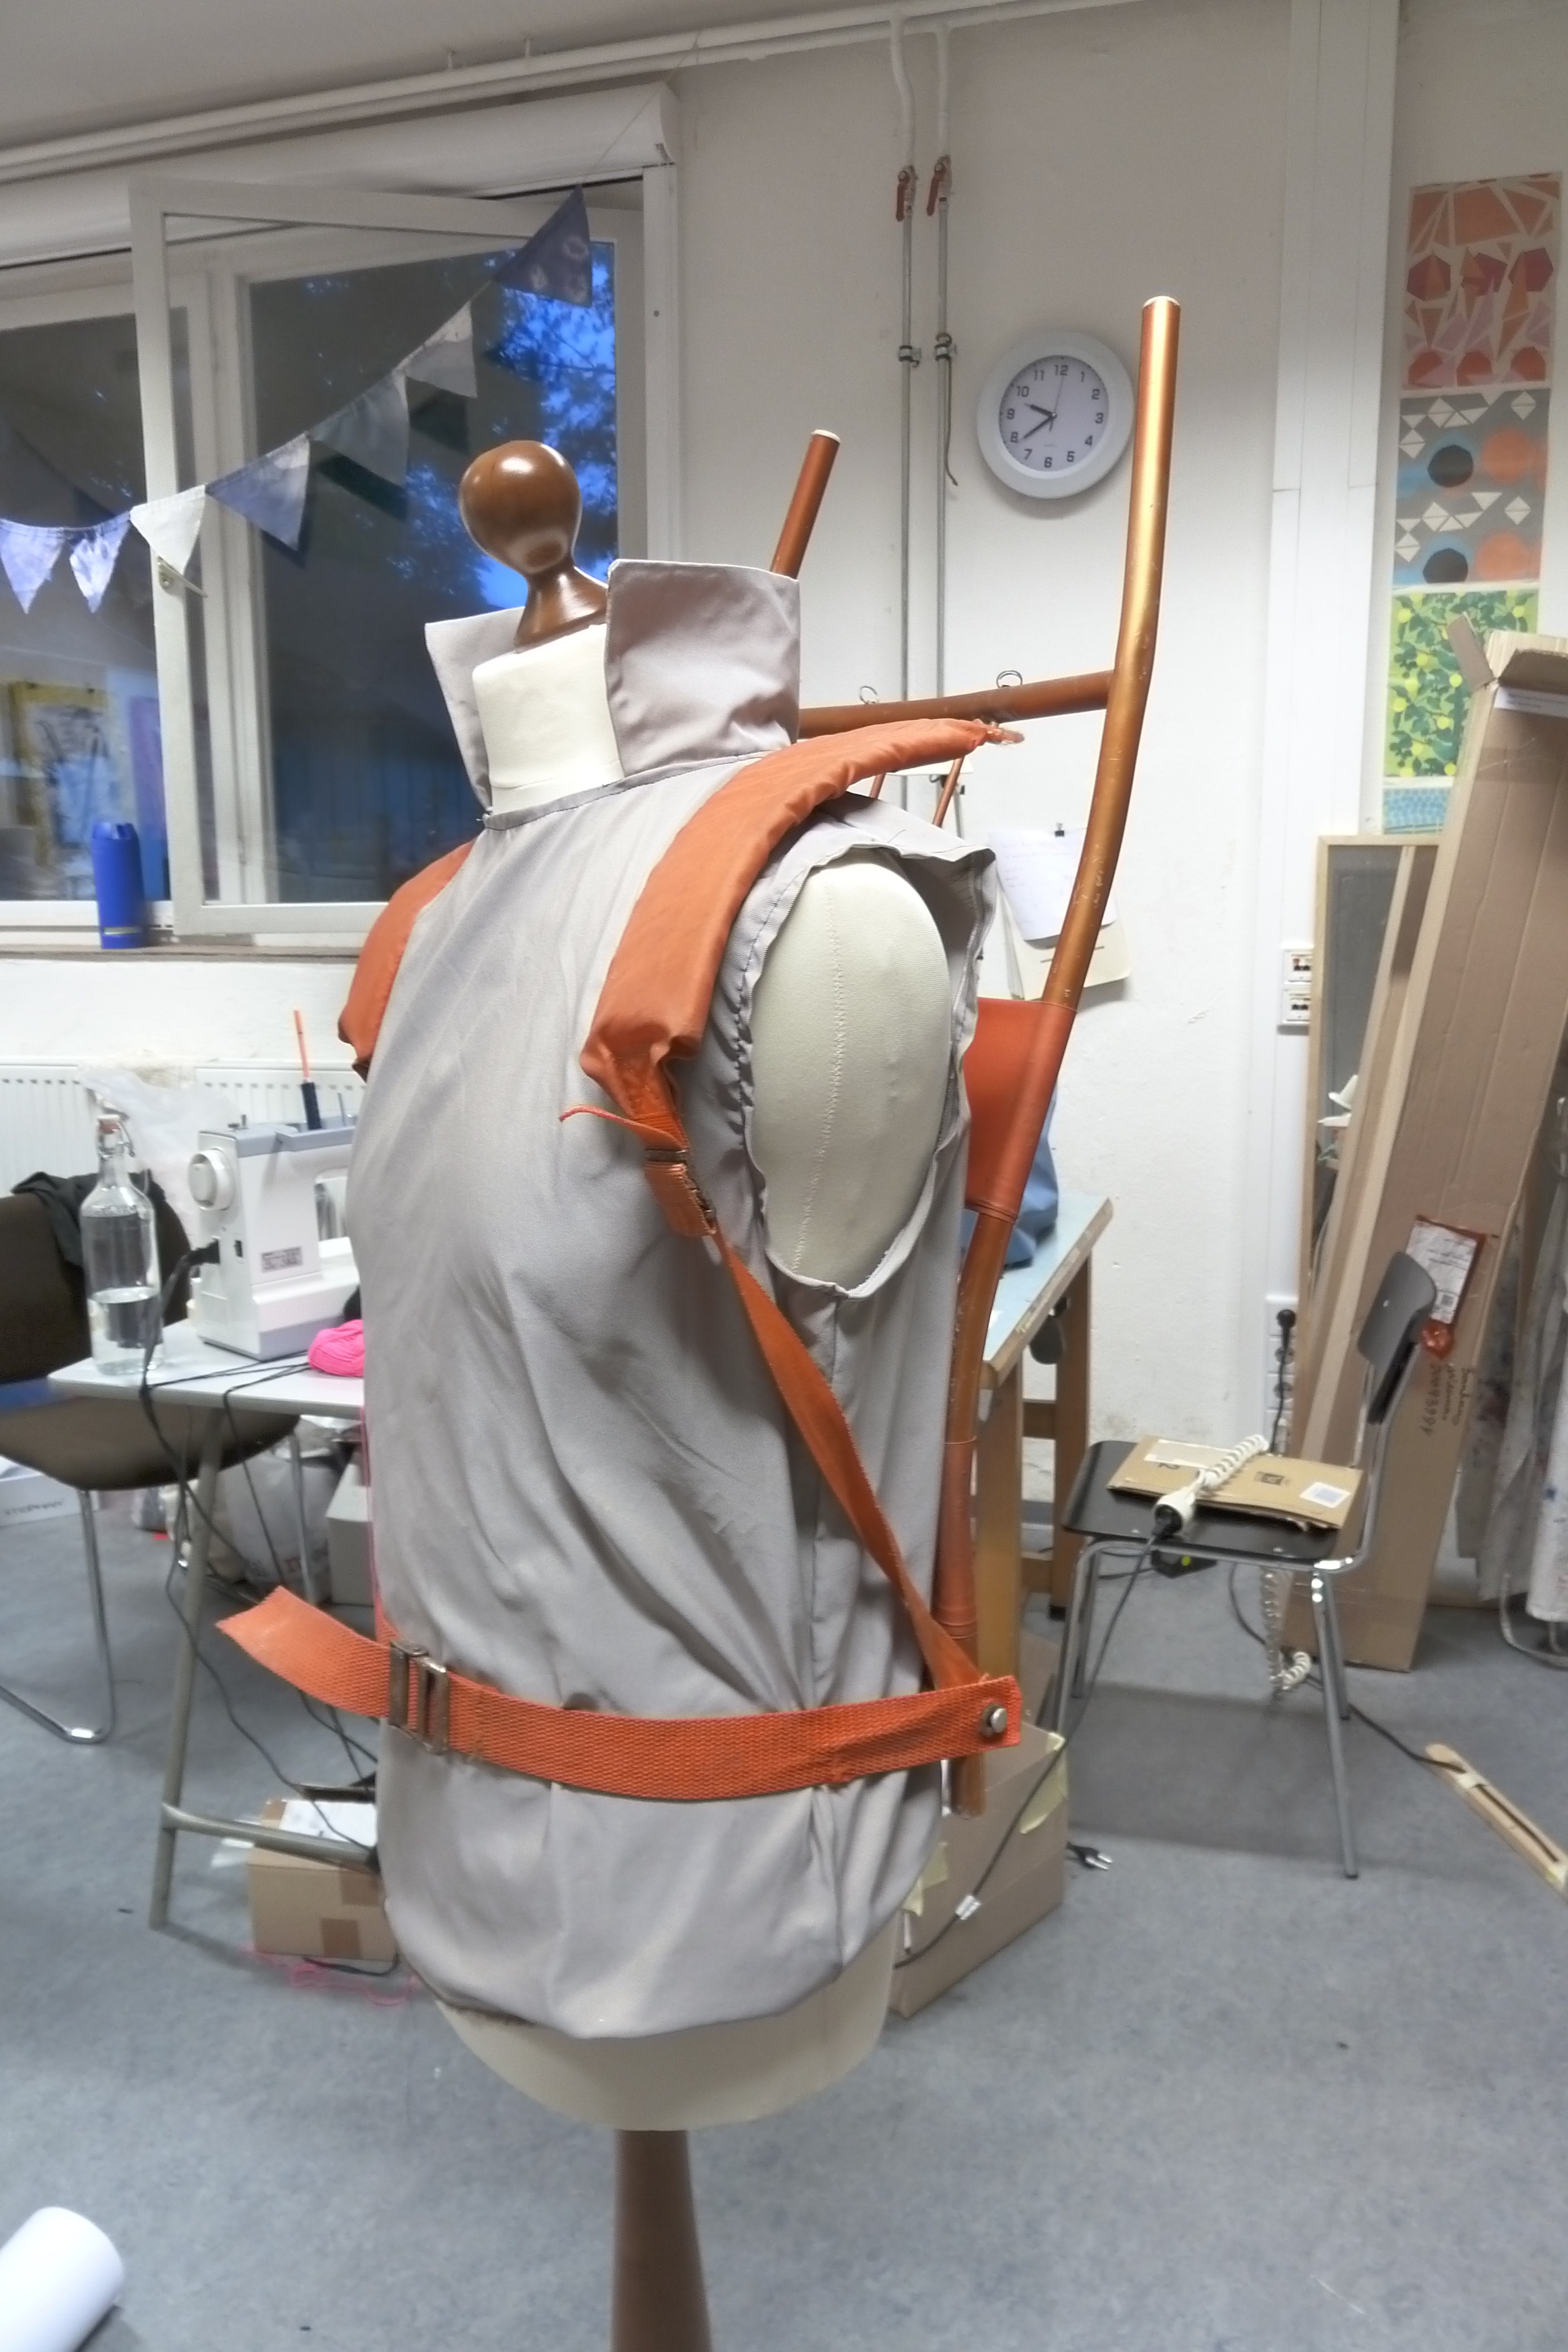
The backpack/oxygen tank straps will be attached on the inside of the vest, so that the straps won´t be visible.

size/ dimension test

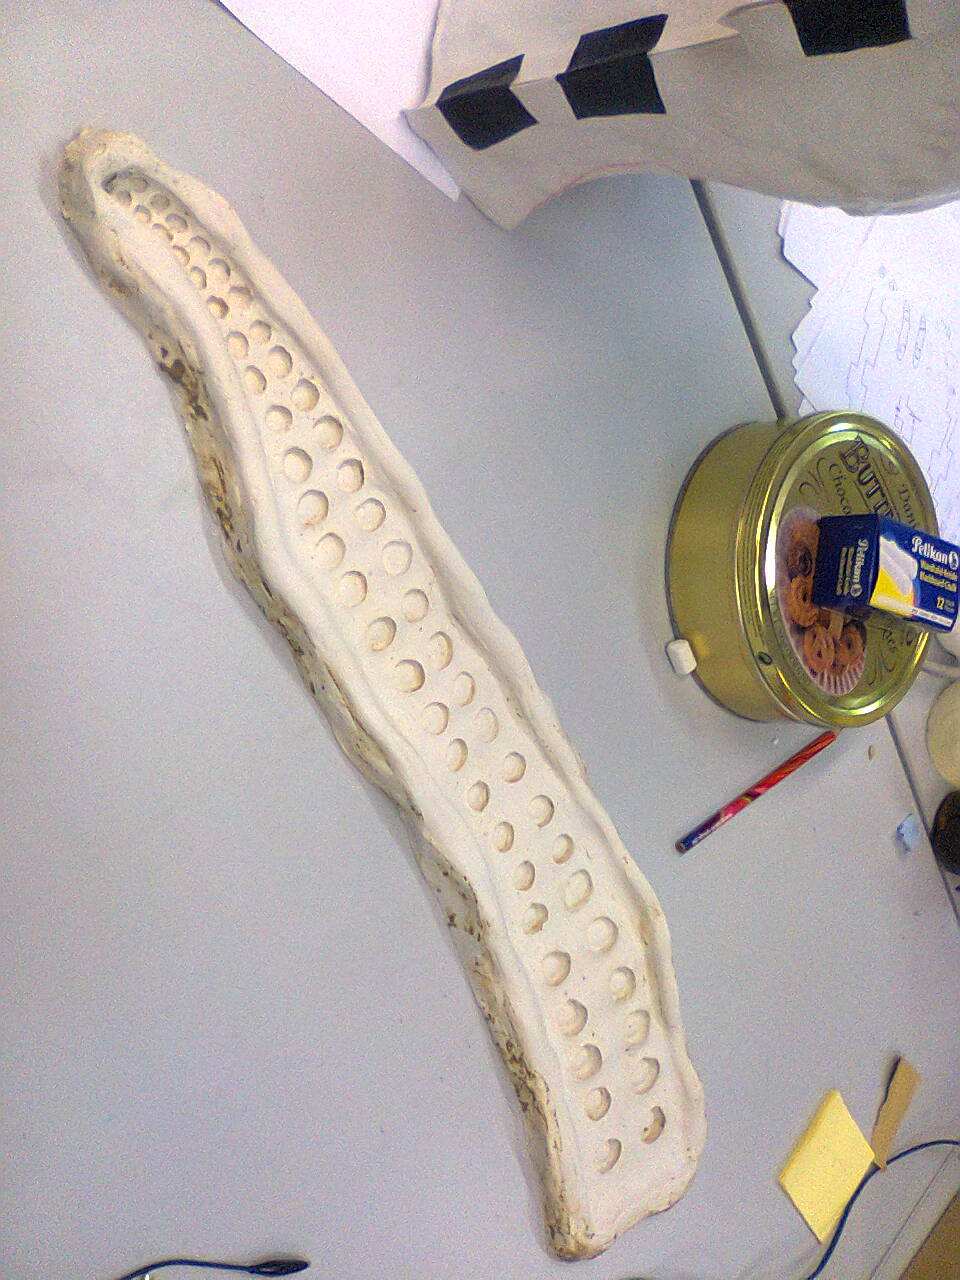
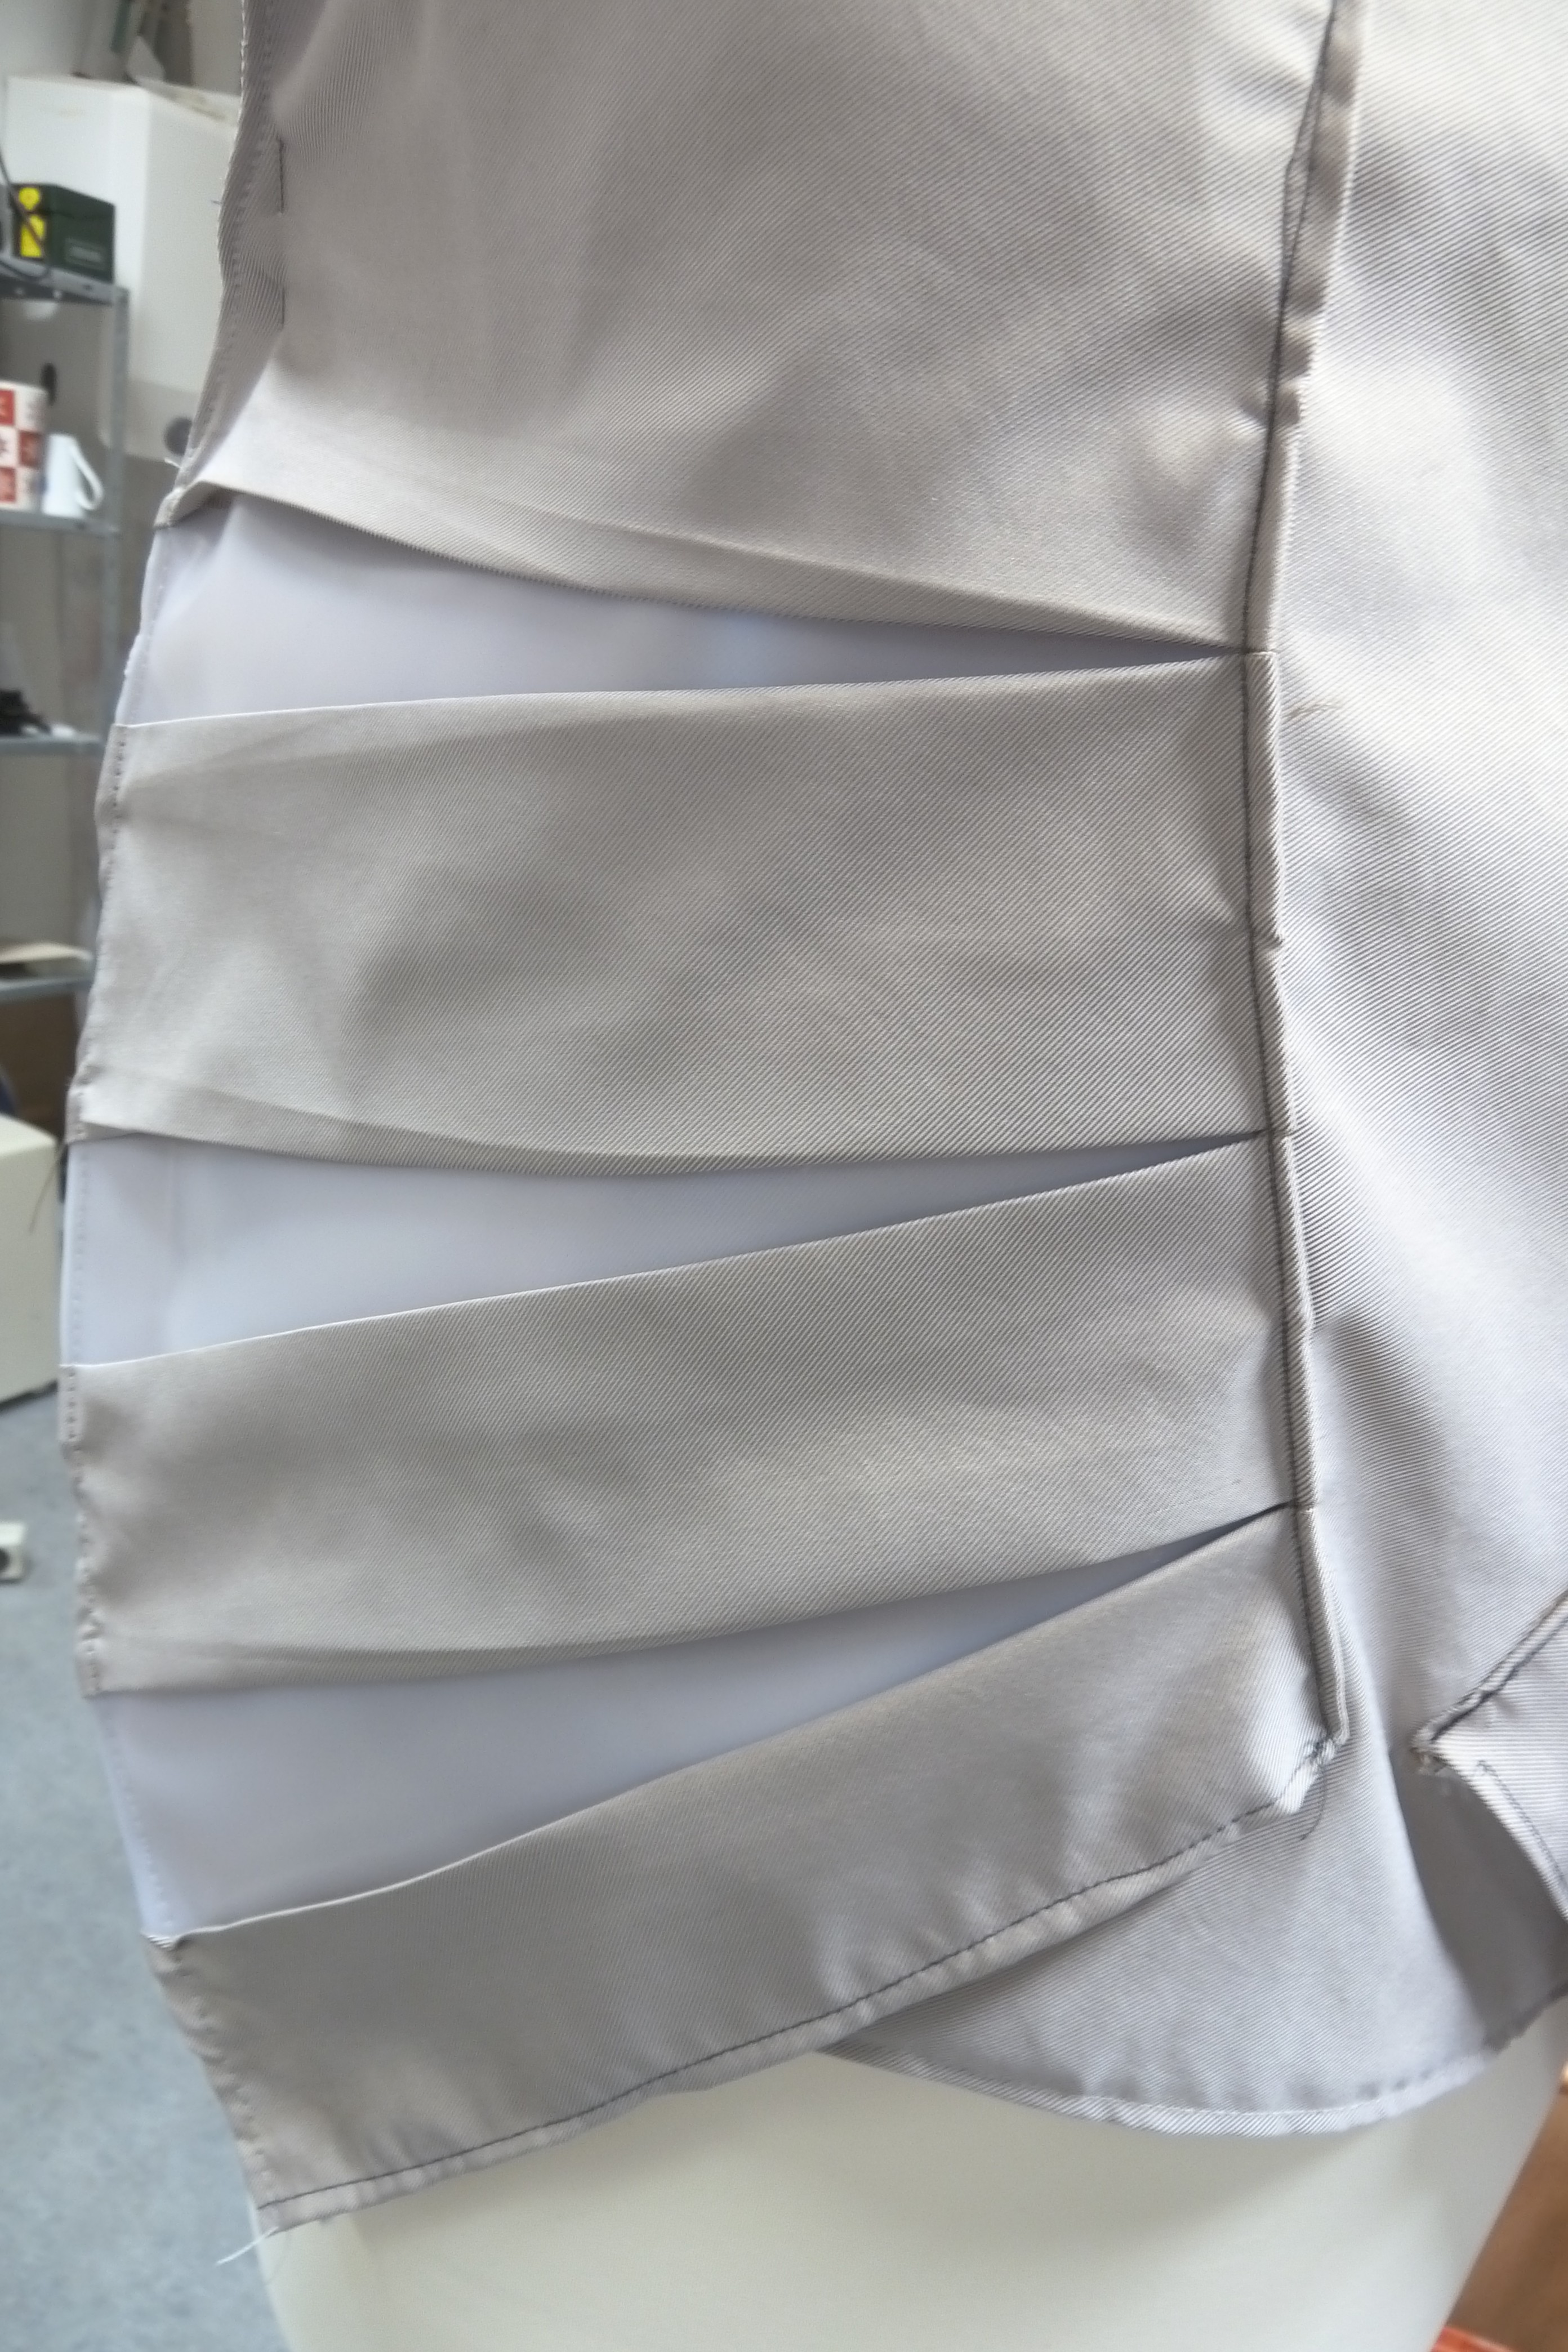
We added gill like folds to the vest to give it a futuristic/ organic look.


P1040969

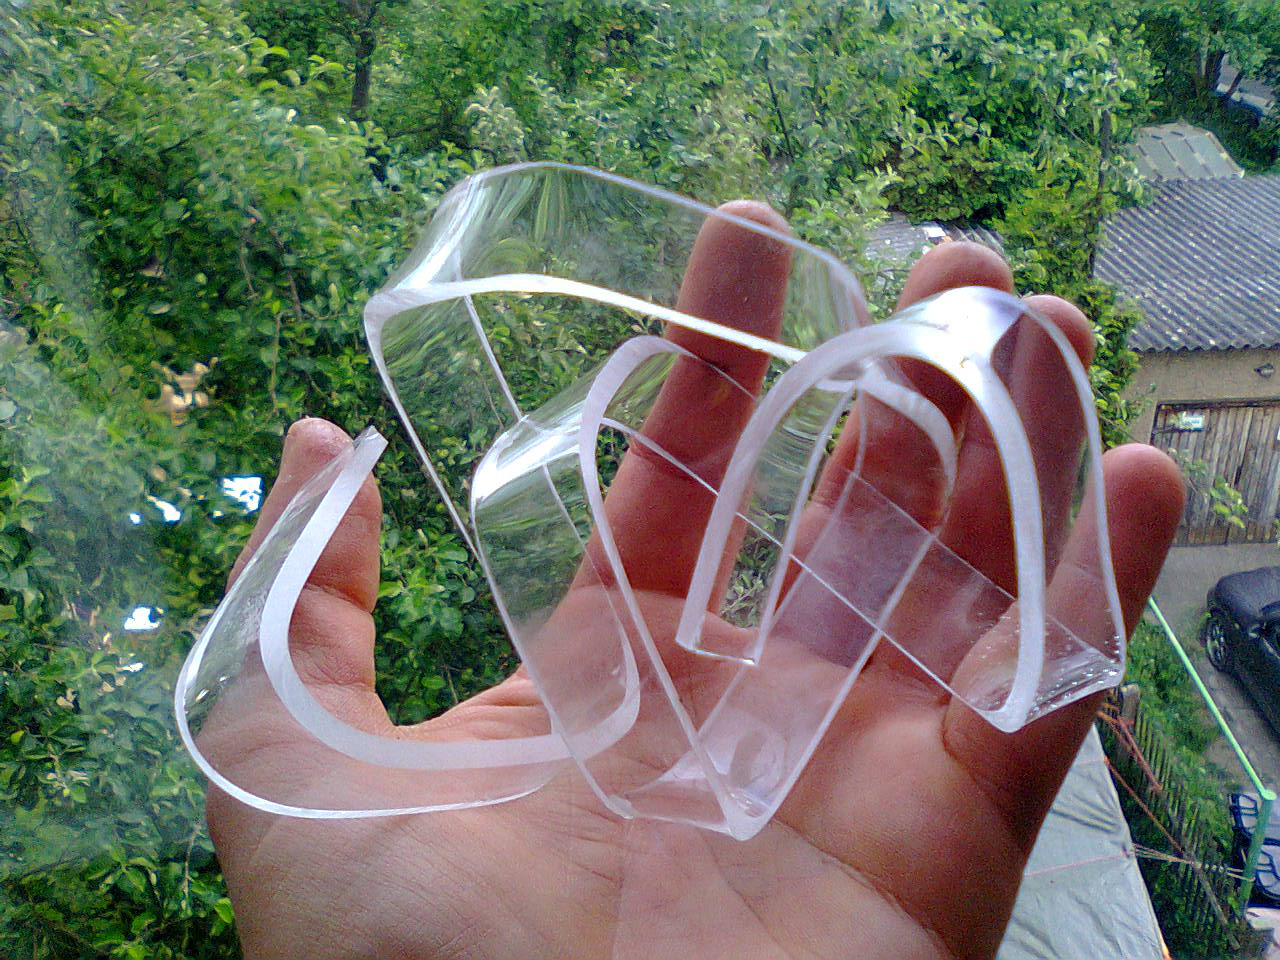
On the inside of the folds we attached some plastic sheet. It makes the vest much more rigid and adds interesting texture.

P1040970

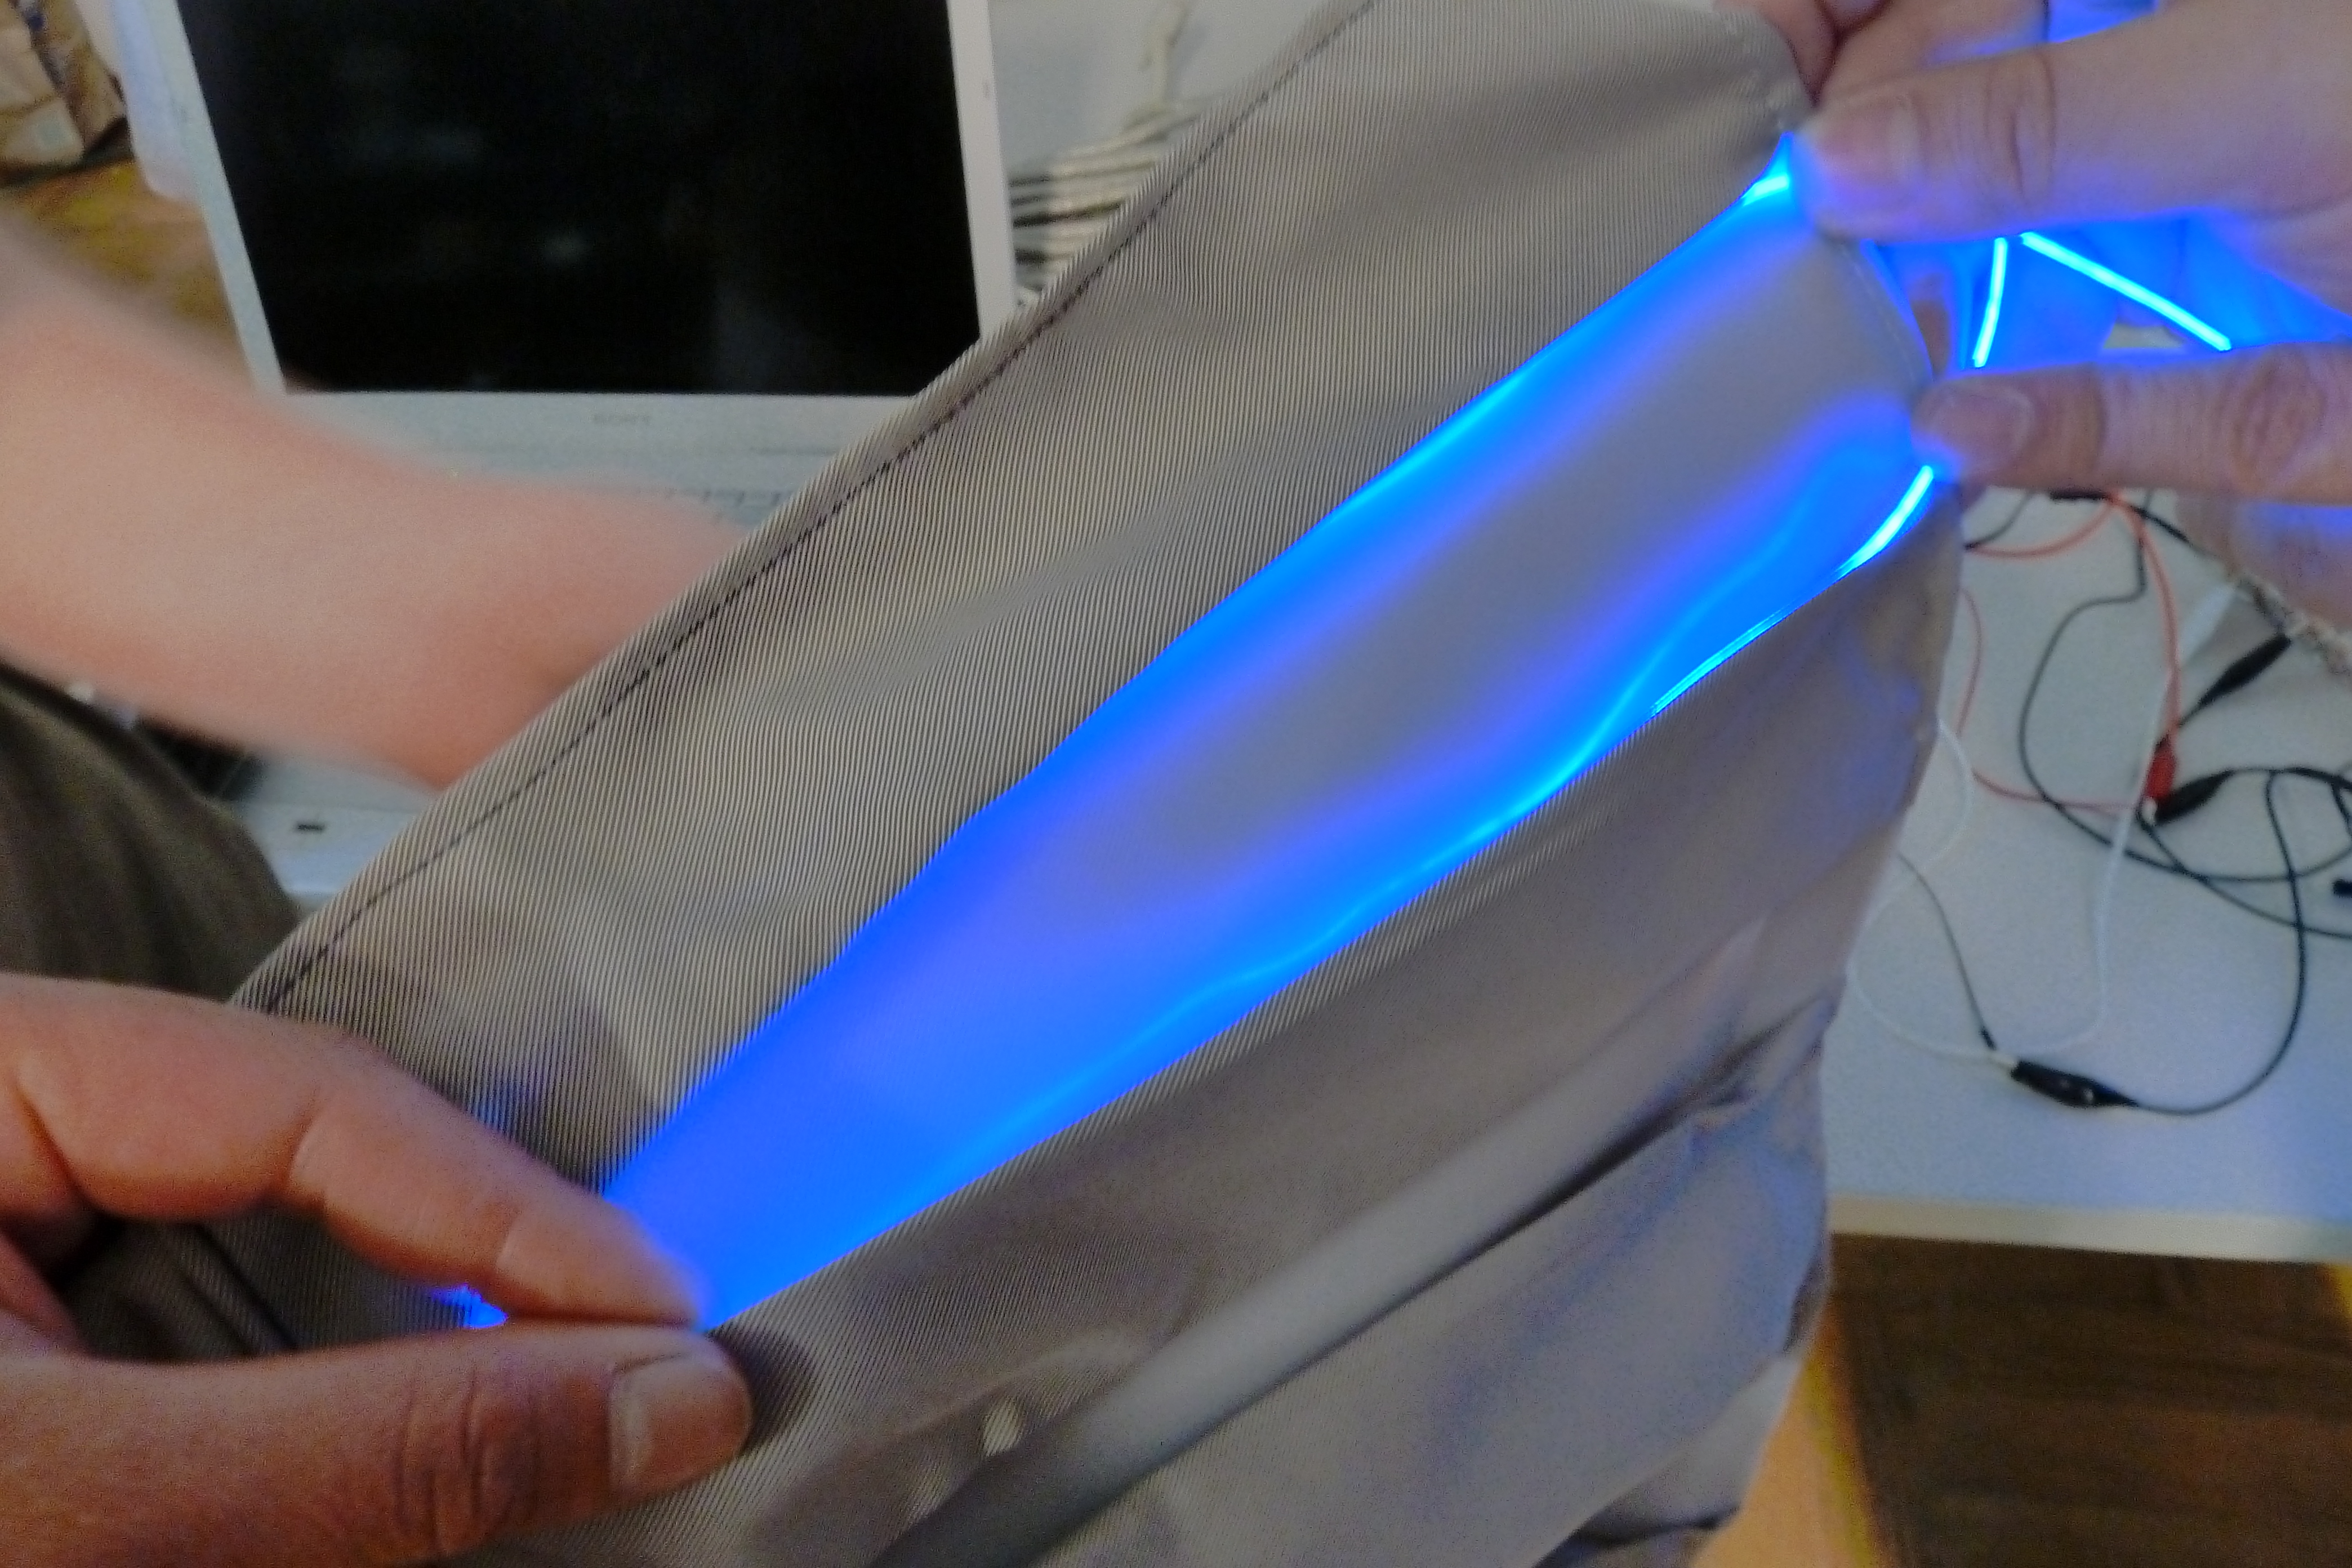
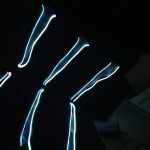
The plastic sheet distributes the light from the el wire very nicely as you can see here. All the folds on each side will be lit with blue and white el wire.

P1040974

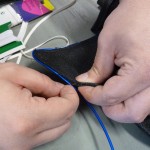
This might be a solution of how to attach the el wire inside the folds. Shrink tube or small rubber bands might be another solution.

P1040977

Finally we´ve jused the real material for the first real diver vest prototype! The fabric we bought is usually made for upholstery puposes. We turned it inside out for the right “fish leather” effect, since the now ouside is covered with this rubbery, almost sticky surface texture. Our sewing machines hate that fabric though! It doesn´t transport very well and is quite thick. It´s impossible to iron into shape as well. More difficulties that we had to deal with.

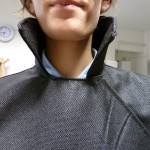
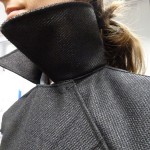
Also: We love stand-up collars, if you haven´t noticed.

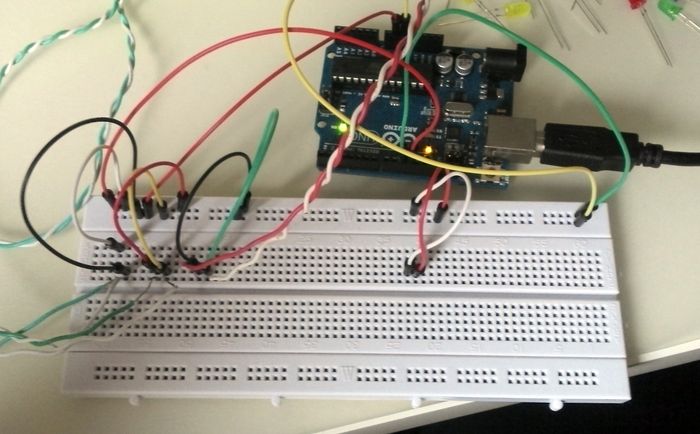
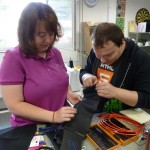
After the gills were added, Susann and Marco came into the textile workshop to add the electroluminescent wire to the vest!

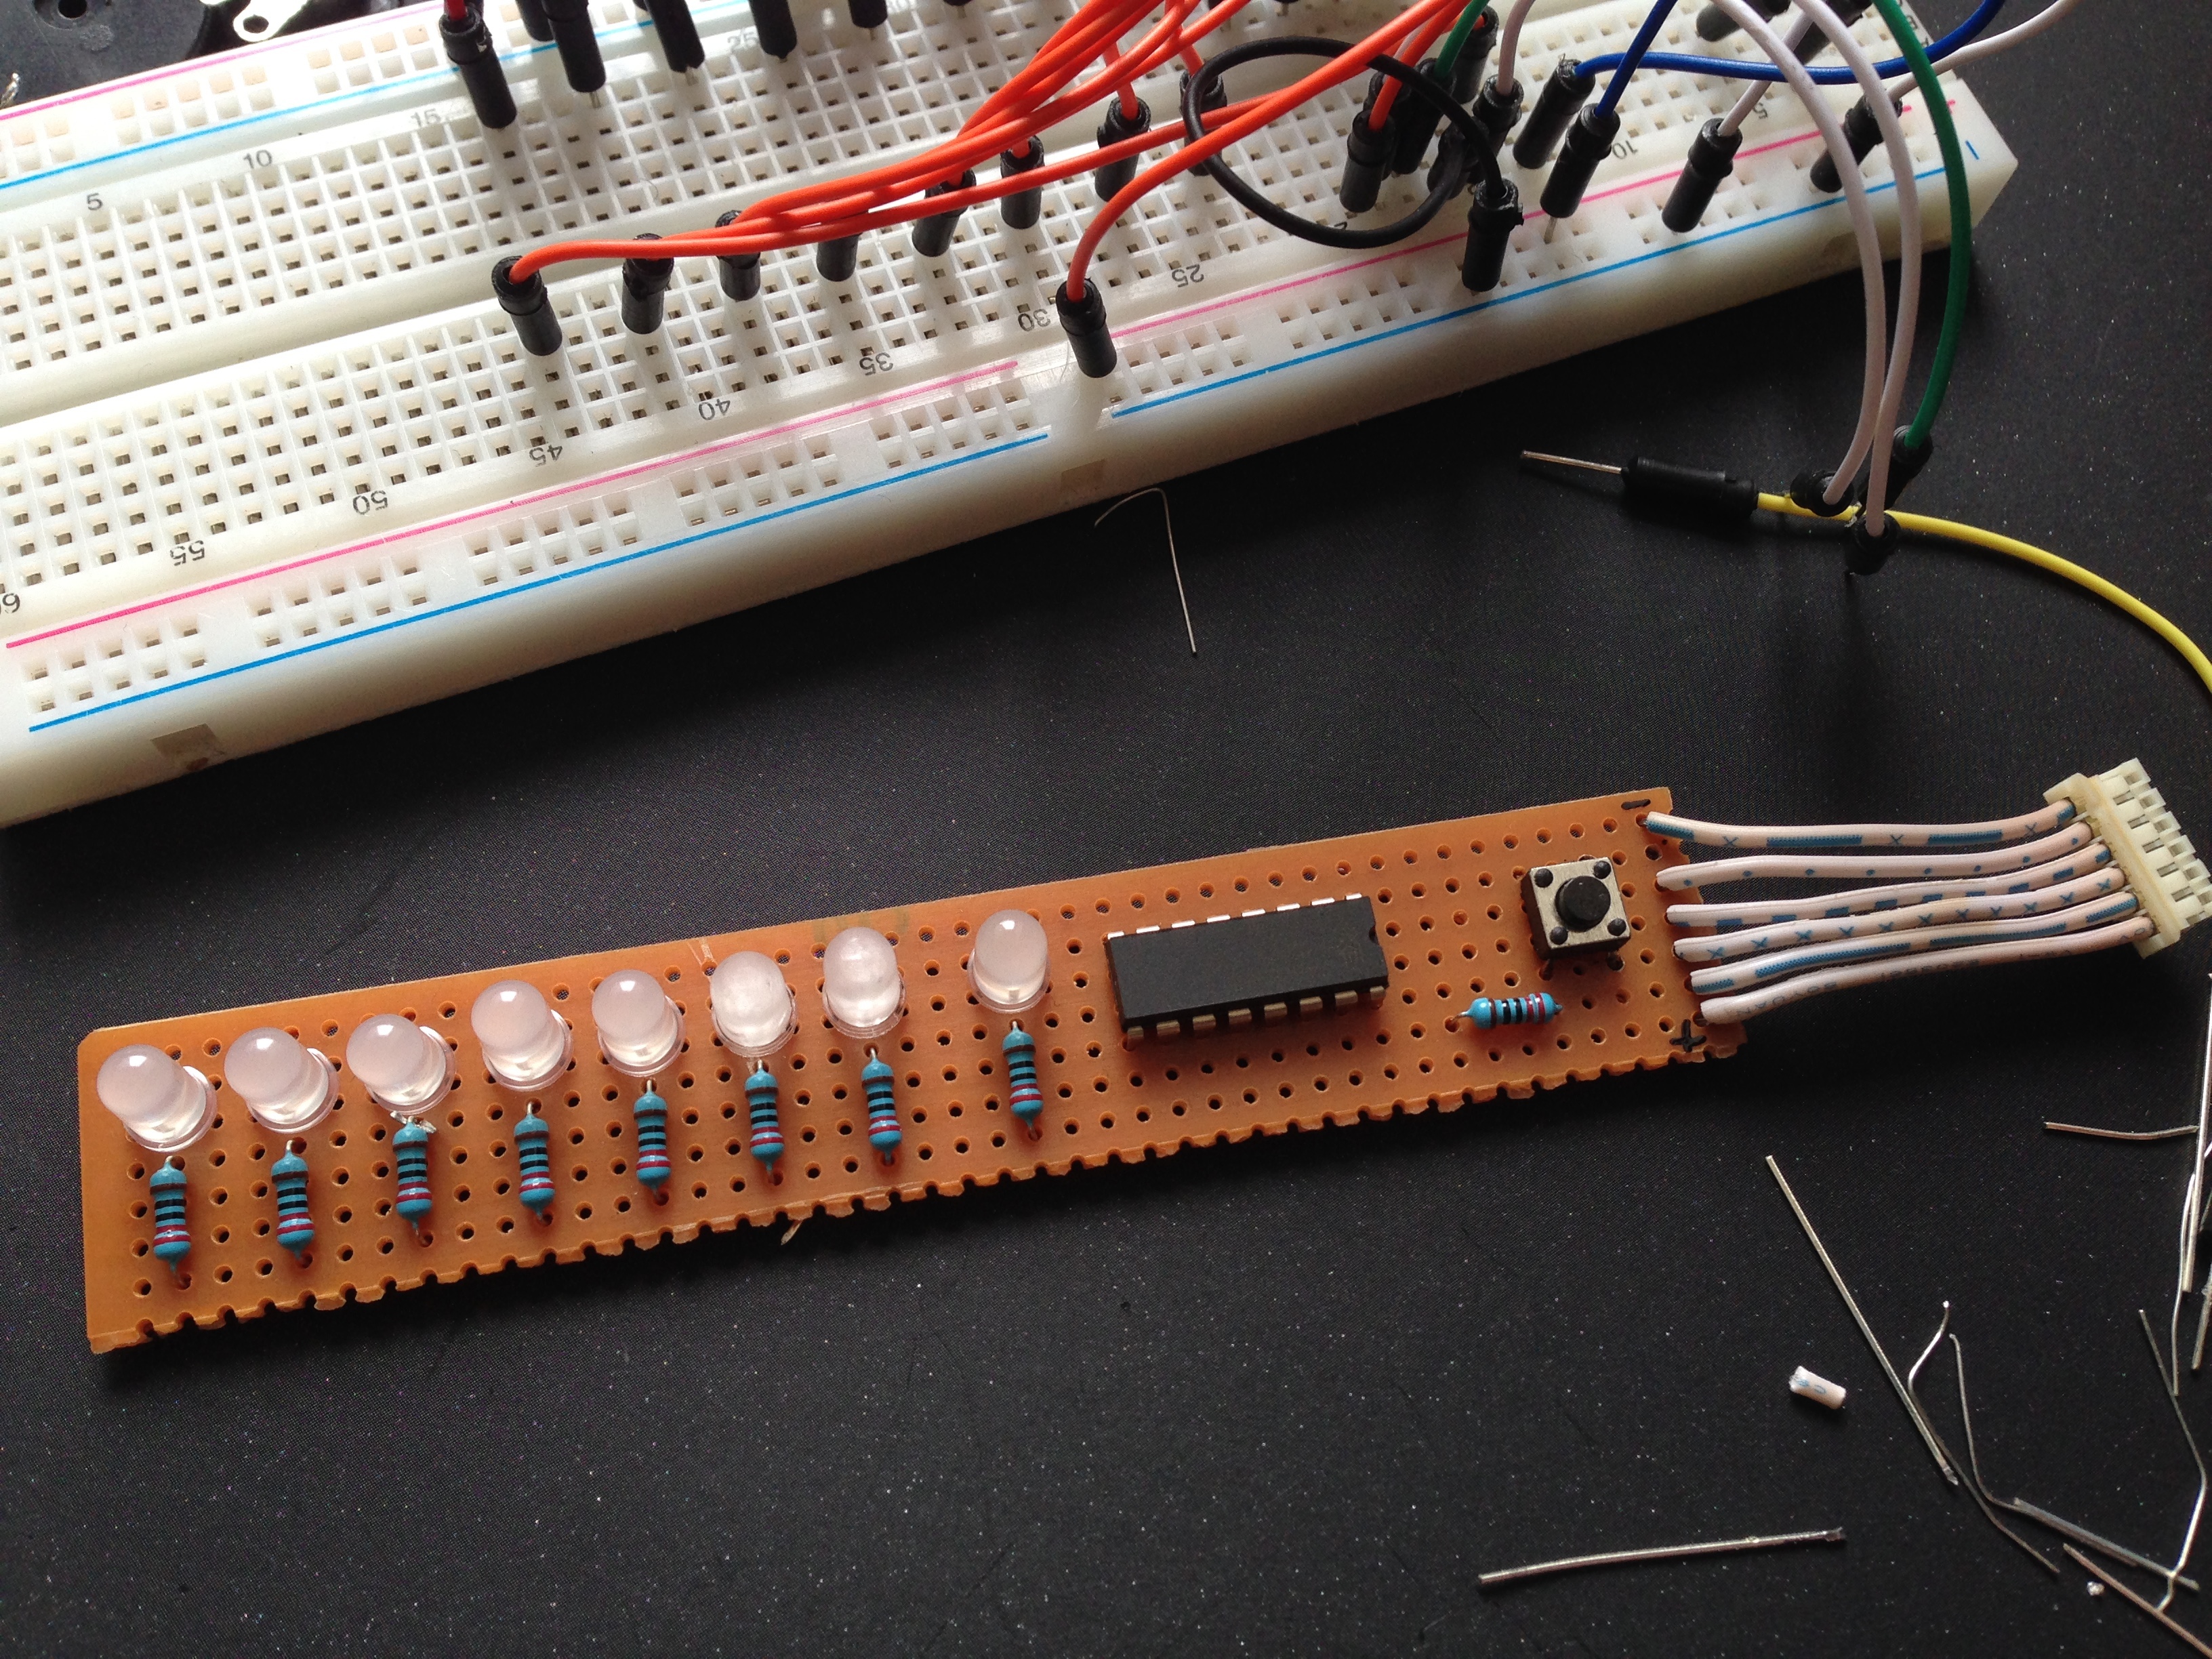
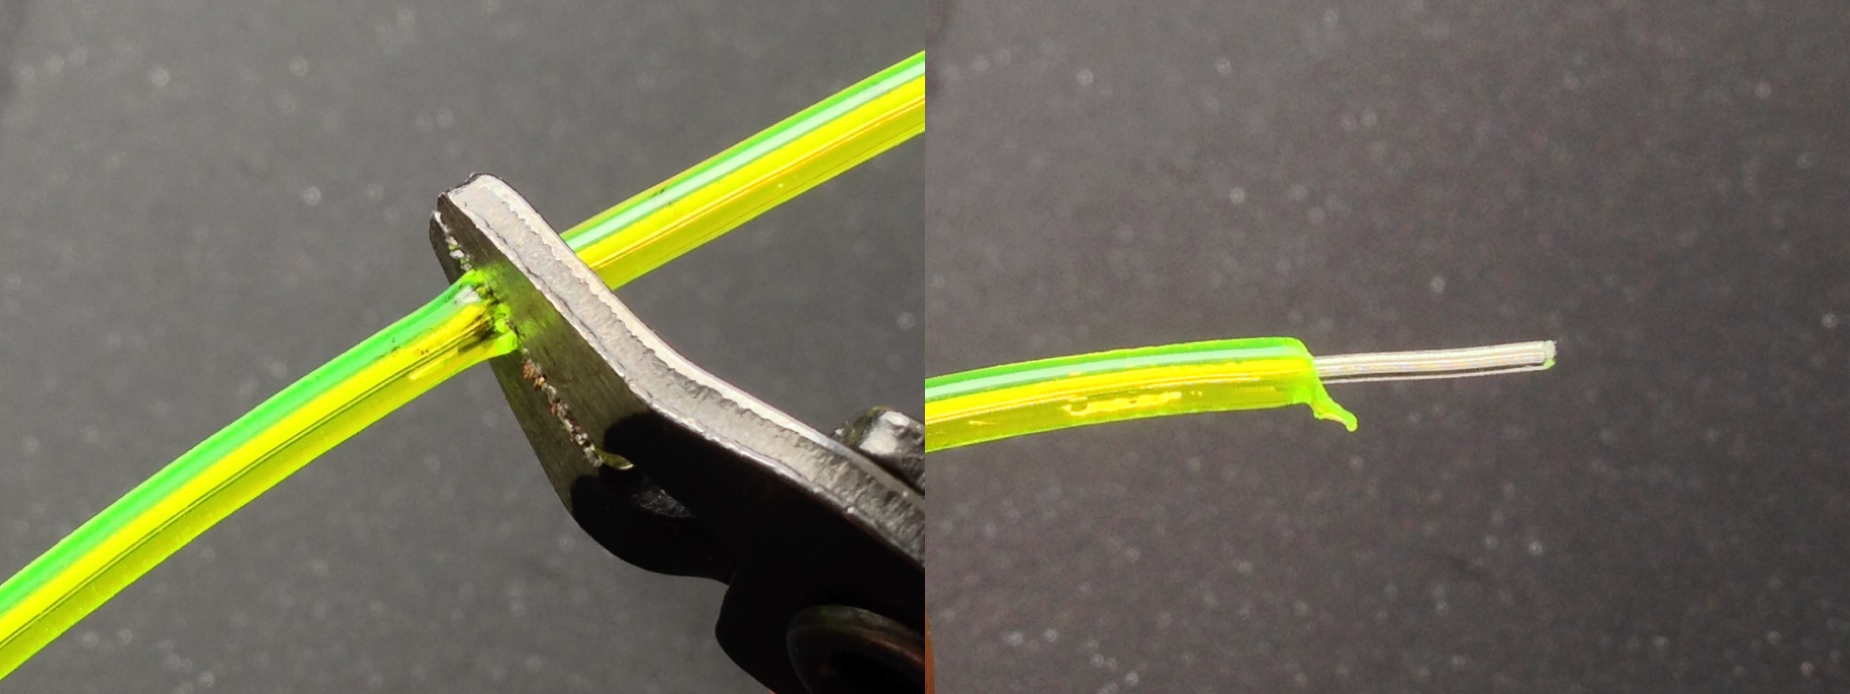
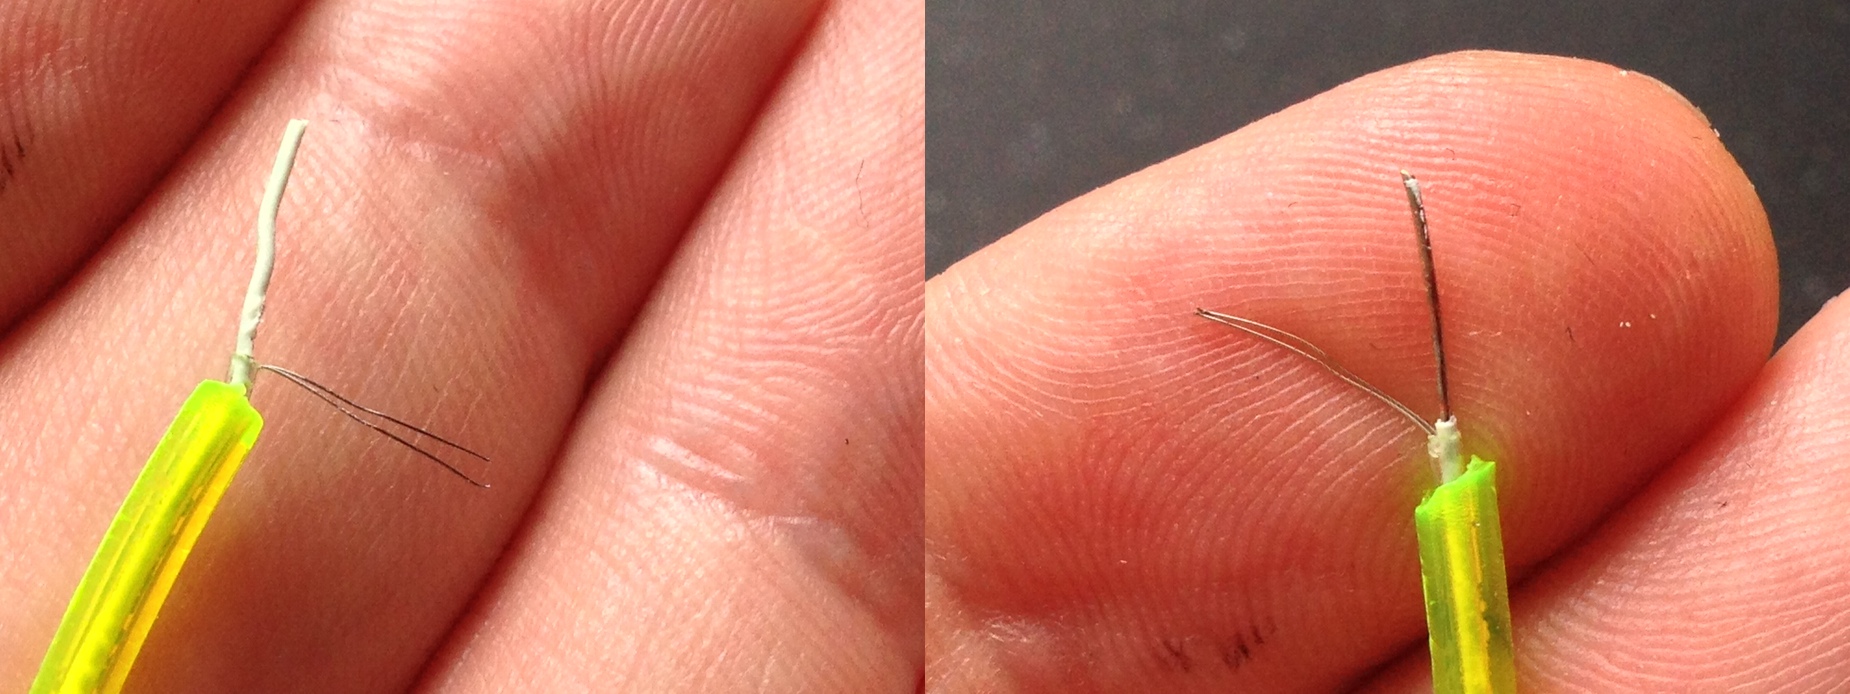
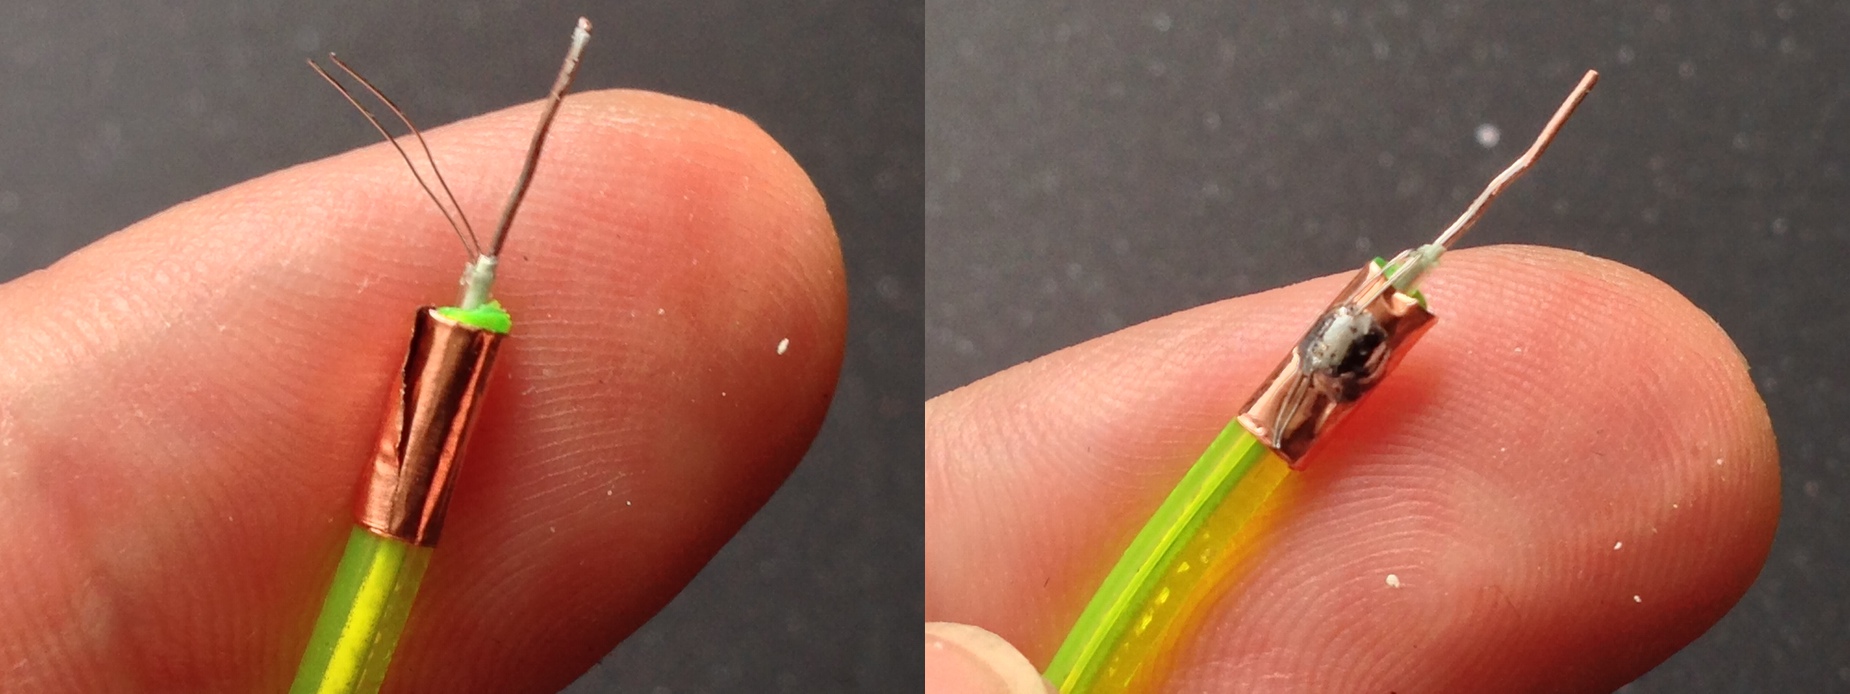
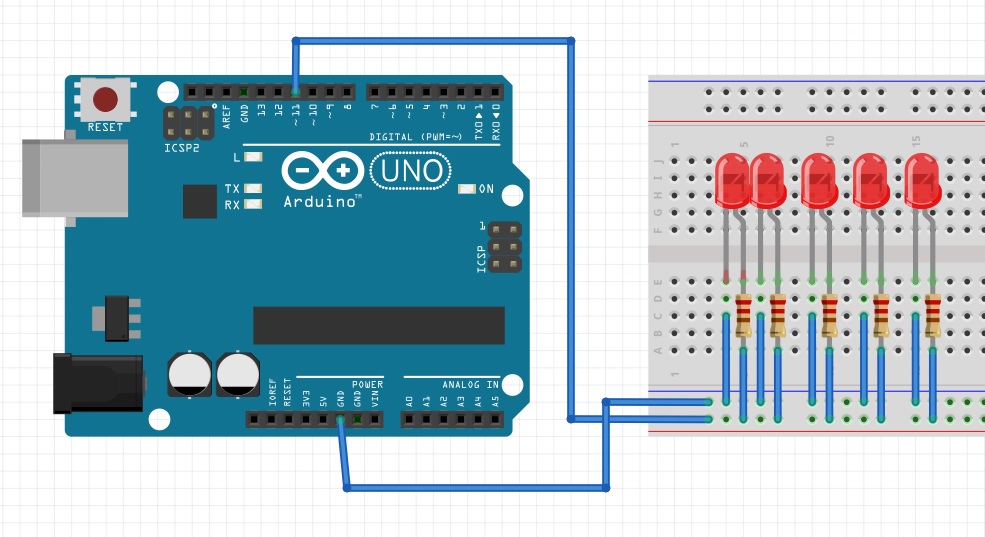
Technical Details on how the EL wire is connected to battery pack, Arduino, buttons, see post here.

Oxygen display is done

The final version of the oxygen display (as far as building is concerned) is done. Also the pattern code is ready only the delays have to be adjusted.

In the video you can see the basic animation. The display counts down until only the red led is on. Then  the code cycles between red led on/off until the button gets pressed. The button press initiates the refill animation.

The picture below shows the actual version of the display ready for integration.

2014-06-14 14.59.34

How to cut and reconnect el wire tutorial

This tutorial shows you how to cut el wire to a desired length and solder it to a new connector.

step12


Step 1

Cut the wire to the desired length and the strip at least one centimeter of the colored coating. You will see that the inner core is separated in a clear shell.

step34

Step 2

Gently cut the clear shell. Take caution to not cut the two angel hair wires. Once you removed the clear shell you are left with the phosphor coated core and the two angel hair wires.

step56

Step 3

Scrape off the phosphor from the core wire. Make sure the is no phosphor left

step78

Step 4

Put a small piece of copper tape around the end of the colored coating. Put a little bit of solder onto the copper and solder the two angel hair wires onto the copper.

step910

Step 5

Take a connector and solder the blank black wire to the core and the wire with the white stripes to the copper. Insulate both connections with heat shrink tubing. At last put a bigger piece of heat shrink tubing over the copper tape part and on the other end of the wire to prevent accidental shocks.

Enjoy

Character Description – Octopus

THE COSTUME WILL REFLECT THE CHARACTER WITH THE COLOR OF FABRIC AND STYLE OF THE COSTUME. ALTHOUGH IT IS AN UNDERSEA CREATURE, IT WILL BE A MECHANICAL ANIMAL COSTUME MIXED WITH HUMAN ASSOCIATION.

IT IS A DOMINANT CHARACTER, HE HAS POWER, VERY INTELLIGENT AND HE COULD BE DANGEROUS. THROUGH THESE CHARACTERISTICS THE COSTUME WILL TRY TO BE A CREATURE BETWEEN HUMAN AND ANIMAL.