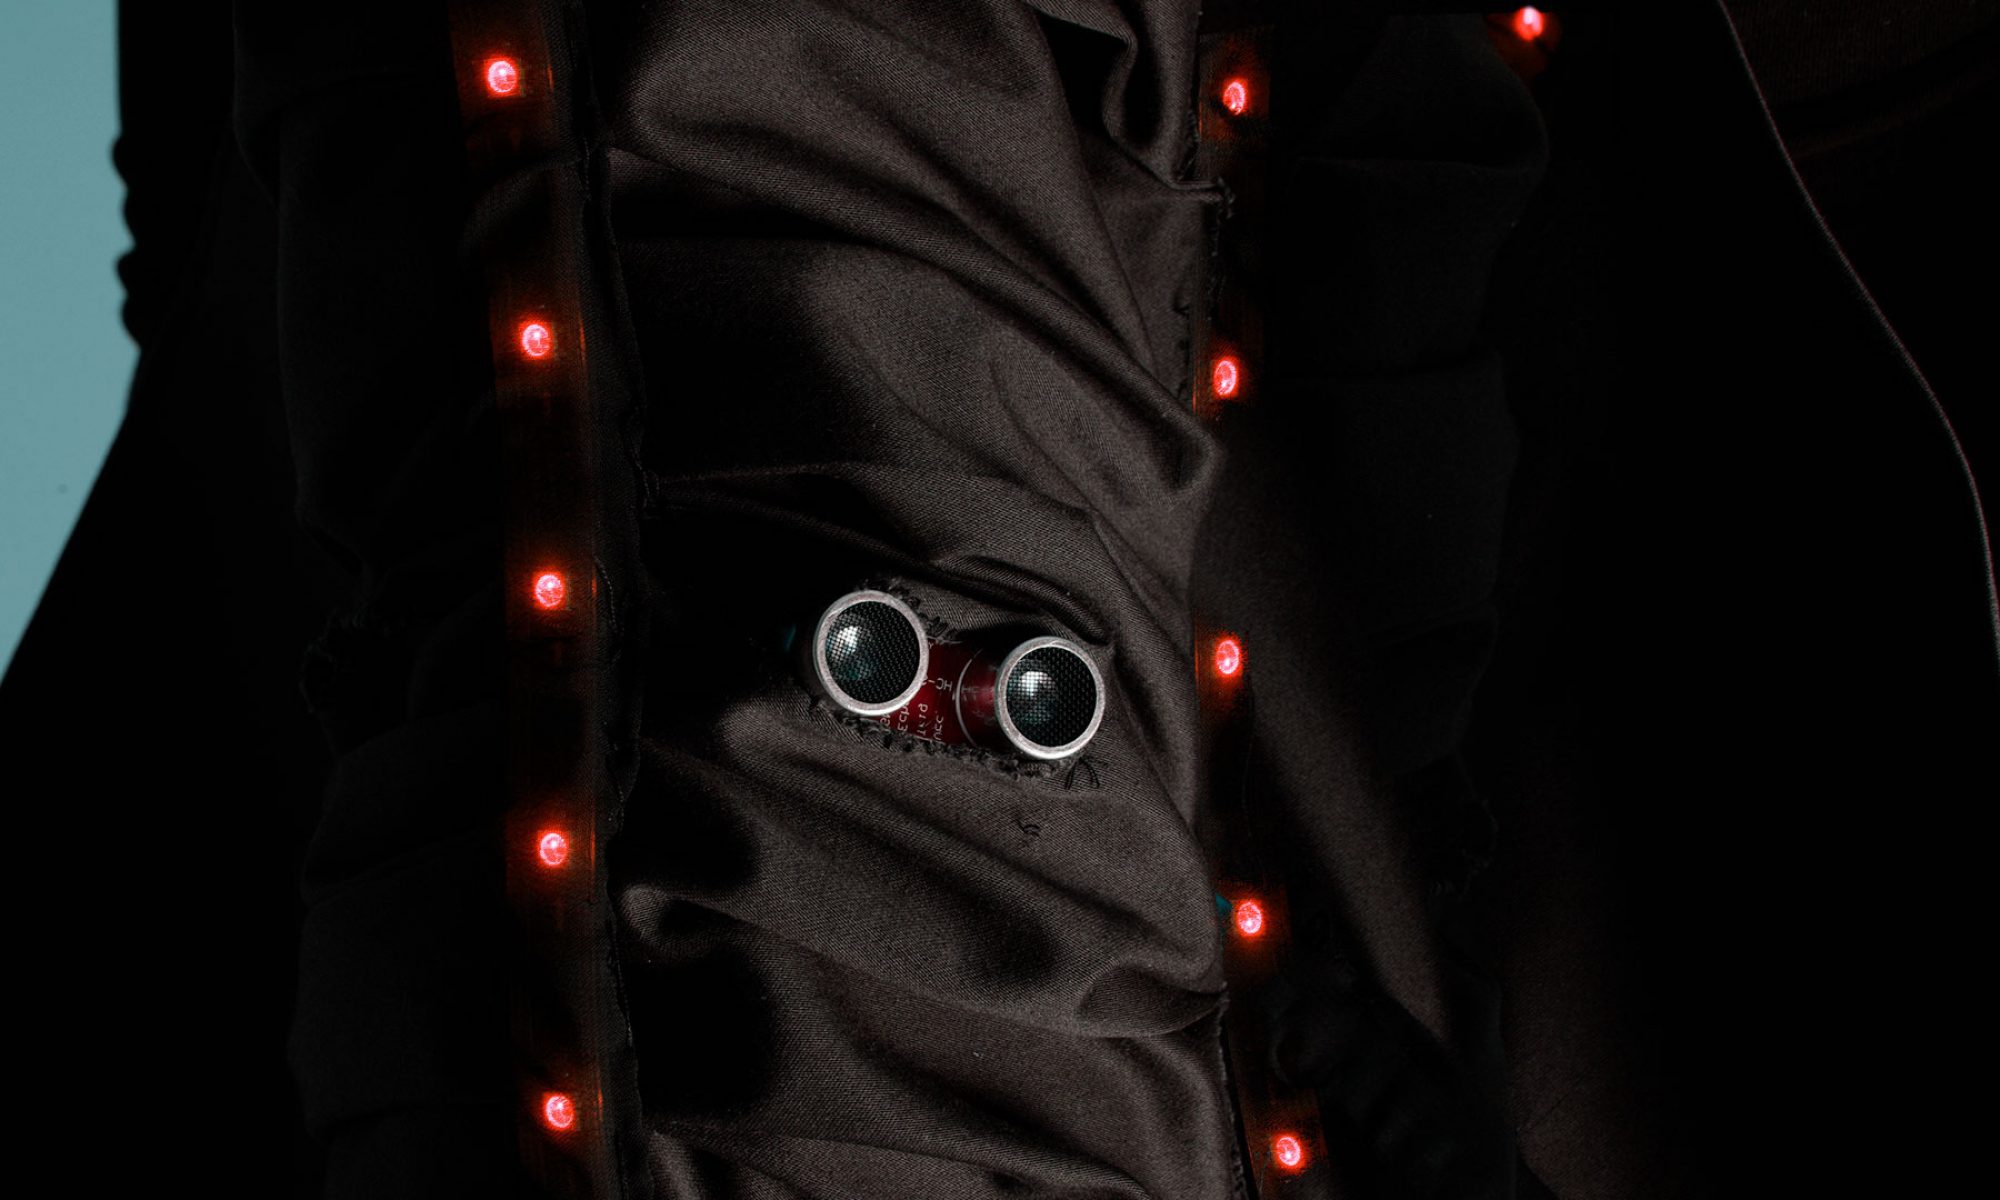
René and I were working on connecting the Neopixels and the distance sensor to a lily pad and tried out some different effects on the output.
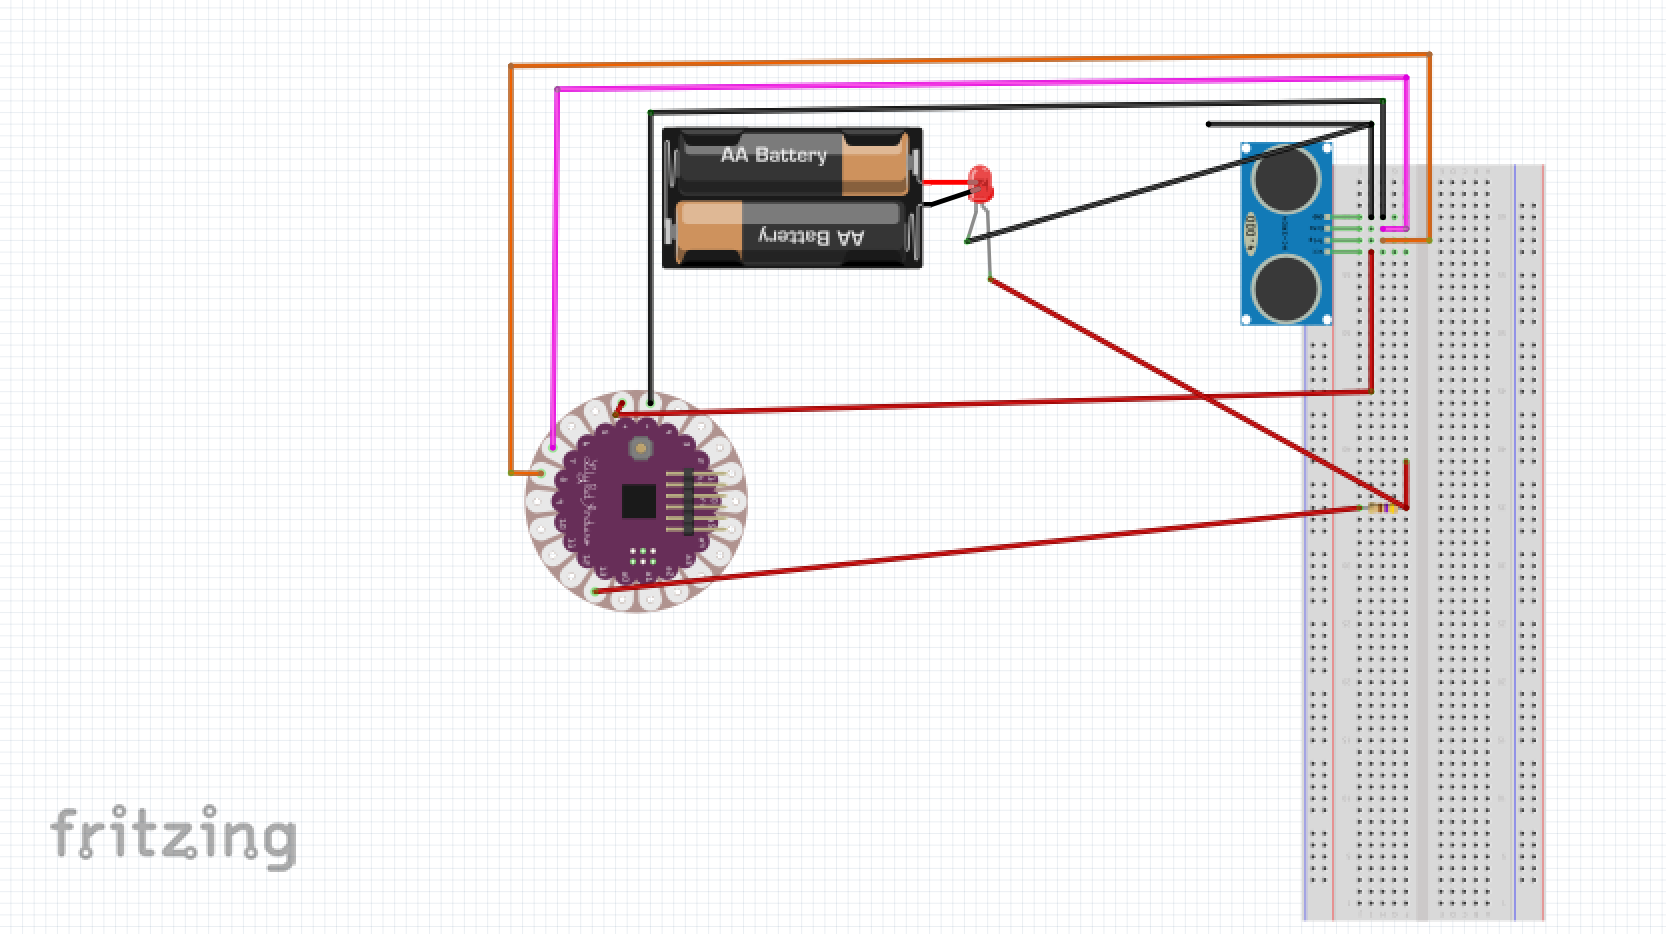
We built this circuit:
Note, that the single LED represents one 30-LED-per-meter Neopixel stripe. (As I was not able to find this component in the Fritzing library, I was forced to use this representation.)
We made the light turn into different colors on different distances. Therefore we used the Adafruit Neopixel library and modified and combined some of the example effects with the code for the distance sensor of this site. In the end, our code looked like this:
#include

#ifdef __AVR__

#include <avr/power.h>

#endif

#define echoPin 7 // Echo Pin

#define trigPin 8 // Trigger Pin

#define LEDPin 13 // Onboard LED

#define LEDPin2 12 // 2nd neopixel
Adafruit_NeoPixel strip = Adafruit_NeoPixel(30, LEDPin, NEO_RGBW + NEO_KHZ800);

Adafruit_NeoPixel strip2 = Adafruit_NeoPixel(30, LEDPin2, NEO_RGBW + NEO_KHZ800);
int maximumRange = 200; // Maximum range needed

int minimumRange = 0; // Minimum range needed

long duration, distance; // Duration used to calculate distance
void setup() {

Serial.begin (9600);

pinMode(trigPin, OUTPUT);

pinMode(echoPin, INPUT);

pinMode(LEDPin, OUTPUT); // Use LED indicator (if             required)
strip.begin();

strip.show();

strip2.begin();

strip2.show();

}
void loop() {

/* The following trigPin/echoPin cycle is used to determine the

distance of the nearest object by bouncing soundwaves off of it. */

digitalWrite(trigPin, LOW);

delayMicroseconds(2);
digitalWrite(trigPin, HIGH);

delayMicroseconds(10);
digitalWrite(trigPin, LOW);

duration = pulseIn(echoPin, HIGH);
//Calculate the distance (in cm) based on the speed of sound.

distance = duration/58.2;
if (distance >= maximumRange || distance <= minimumRange){

/* Send a negative number to computer and Turn LED ON to indicate "out of range" */
colorWipe(strip.Color(0, 160, 0, 60), 50); // rosa

colorWipe(strip2.Color(0, 160, 0, 60), 50); // rosa

}

else {

/* Send the distance to the computer using Serial protocol, and turn LED OFF to indicate successful reading. */
  if (distance > 61 && distance <= 90) {

colorWipe(strip.Color(255, 0, 0), 50); // Green

colorWipe(strip2.Color(255, 0, 0), 50); // Green

}

if (distance > 30 && distance <= 60) {

colorWipe(strip.Color(0, 255, 0), 50); // Red

colorWipe(strip2.Color(0, 255, 0), 50); // Red

}

if (distance > 15 && distance <= 30) {

colorWipe(strip.Color(0, 0, 255), 50); // Blue

colorWipe(strip2.Color(0, 0, 255), 50); // Blue

}

if (distance > 0 && distance <= 14) {

colorWipe(strip.Color(0, 0, 0, 255), 50); // White RGBW

colorWipe(strip2.Color(0, 0, 0, 255), 50); // White RGBW

}

}
}
void colorWipe(uint32_t c, uint8_t wait) {

for(uint16_t i=0; i<strip.numPixels(); i++) {

strip.setPixelColor(i, c);

strip.show();

strip2.setPixelColor(i, c);

strip2.show();

delay(wait);

}

}
Our first circuit started out with only one NeoPixel strip. The first output looked like this:
Afterwards we wanted to get two stripes working simultaneously or rather we wanted to check if there would be any
delay when we connect to stripes and tried to send a signal to both of them at the same time.
All in all it worked out quite good after we adjusted the code to the final version which is seen above.
Here you can see how that test worked:
To round it all up, maybe a few comments to our final code version.
We used and several if statements to specify which color should light up at which distance.
The colorWipe function changes the color of the NeoPixel strip completely, one LED at a time.
For this all to work we had to initialze both NeoPixel stripes in the setup via .begin and .show and we also
needed to tell the colorWipe function that it has to change strip 1 and 2.