| Line 2: | Line 2: | ||
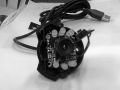
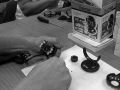
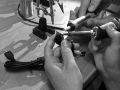
I took apart the webcam by removing all of the screws and taking apart all of the pieces that would come off freely. Next I had to use a plier to forcefully break off the rest of the plastic case of the cam until I only had the microchip and cam remaining. After this I used a solder to remove the 6 LED lights from the microchip. | I took apart the webcam by removing all of the screws and taking apart all of the pieces that would come off freely. Next I had to use a plier to forcefully break off the rest of the plastic case of the cam until I only had the microchip and cam remaining. After this I used a solder to remove the 6 LED lights from the microchip. | ||
<gallery> | |||
File:cam deconstruction1.jpg| | |||
File:cam deconstruction2.jpg| | |||
File:cam deconstruction 3.jpg| | |||
File:cam deconstruction4.jpg| | |||
</gallery> | |||
== Microscope Construction / Cardboard Model == | == Microscope Construction / Cardboard Model == | ||
Revision as of 23:44, 11 November 2012
Cam De-Construction
I took apart the webcam by removing all of the screws and taking apart all of the pieces that would come off freely. Next I had to use a plier to forcefully break off the rest of the plastic case of the cam until I only had the microchip and cam remaining. After this I used a solder to remove the 6 LED lights from the microchip.
- Cam deconstruction 3.jpg


Microscope Construction / Cardboard Model
I wanted to create a microscope that could be used similarly to a mouse during a live performance. My first model in cardboard was the most basic sketch of this concept using one screw in the middle to move the camera up and down.
