Web Cam De-Construction | 22.10.2012
I took apart the webcam by removing all of the screws and pieces that would come off freely. Next I had to use a plier to forcefully break off the rest of the plastic case around the cam until I only had the microchip and cam remaining. After this I used a solder to remove the 6 LED lights from the microchip.


Microscope Construction / Cardboard Model | 29.10.2012
I wanted to create a microscope that could be used similarly to a mouse during a live performance. My first model in cardboard was the most basic sketch of this concept using one screw in the middle to move the camera up and down.

3D Model | 5.11.2012
Using SketchUp I re-created my cardboard model in 3D. Along the way I made a couple of minor changes to my original concept.

Laser Cutter Model | 12.11.2012
The 3D printer was not available so I decided to re-design my model for the Laser Cutter. This design requires 3mm thick plexiglass so the microscope will be strong enough not to break during a live performance. Working with the limitations of the Laser Cutter gave me another opportunity to modify my design and to make some minor structural and engineering improvements.

You can download the file for the laser cutter here: Media:microscope lasercut1.pdf
Material Collection & Microscope Resolution Measurement | 19.11.2012
This week I began to collect samples (such as rotting water from flower vases at the cemetery and dirt and roots) to look at under the microscope.


I used my microscope to photograph my iPod Touch screen in order to make calculations of the magnification depth of my microscope.
To find out how big the surface is we are looking at, I captured a piece of a screen/display and counted the pixels. We tried an iPod Touch which has a widescreen with the following specs:
- resolution is 960 x 640 pixels
- physical size is 75 x 50 mm
Hence we can calculate the pixel density of the device:
- 0,078125 mm per pixel (or 12,8 pixels per mm)

On our screen capture through the microscope we see approximately 5,8 x 4,2 pixels of the screen (one pixel consists of a triplet of red, green and blue). Now we know that we are looking at a surface of ~ 0,45 x 0,33 mm.
To calculate the magnification factor the pixel density of the display must be taken into account.
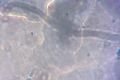
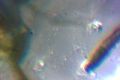
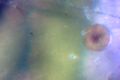
Microscopic Still Images & Video Studies | 23.11.2012
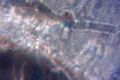
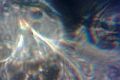
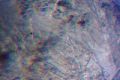
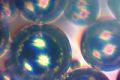
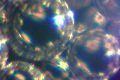
This gallery is a selection of still images collected from my first session of image collection using the microscope.
Red Berries sample 1
Red Berries sample 2
Red Berries sample 3

Red Berries sample 4
Window cleaner sample 1
Window cleaner sample 2
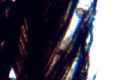
Feather sample 1
Feather sample 2
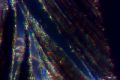
Sawdust sample 1
Sawdust sample 2
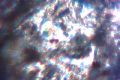
Moss sample 1
Moss sample 2


I edited together my favorite video footage taken from this same image collection session to create these initial studies. The first video is composed of water and sawdust and the second video is water and moss. The video is completely unprocessed, I only performed cuts to the footage.
<videoflash type=vimeo>54231433|420|280</videoflash>
<videoflash type=vimeo>54233001|420|280</videoflash>
Project Concept | 10.12.2012
During some experimentation while working with my microscope I observed that the microscope itself was very sensitive to movement - a breath, a shaking floor, etc.. This gave me an idea which is forming the concept for my Project Concept.
I would like to install my microscope onto a sub-woofer with a petri dish on it. The petri dish will have a mixture of pond water and sawdust. The vibrations in the petri dish will create an analog reactive visual feedback to any music that is played. This can be presented in two ways; a live audio-visual performance, or a stand-alone video and sound installation.

<videoflash type=vimeo>55232052|420|280</videoflash>
Final Project Presentation | 28.01.2013
Today I will present my final project in the form of an Open Office Presentation using the projector. I will be showing the results of my conceptual research, plus audio and photographic mock-ups of what I expect to achieve.
Over the next weeks I will publish my final Pd Patch here in the Wiki. At the moment my patch is not fully operational but I will publish it here regardless as a work in Progress;
Download Patch: Media:many worlds patch 01.pd
Documentation: Final Project
I combined my final project in this DIY-Microscopy class with my work in Dataflow I. You can visit my Dataflow I wiki page for more information on my final project.
Documentation: DIY-Microscopy Poster
Use the PDF link below to view the DIY-Microscopy Poster. Amel, Nils and I decided to create this poster as a guide and to provide an easy to read overview of our projects. The poster combines all of the important steps and tips that should be helpful for first time builders to avoid difficulties when they begin their own DIY-Microscopy project.
DIY-Microscopy Poster; Media:DIY DOCU LO Grafic 08.pdf