|WEEK ONE|
4/11/2020
Introduction to the BIO Lab
I examined a puddle of mud sample and a soil sample collected the evening before, and a purple mold sample that was already in the lab. We saw microorganisms in the mud sample.
Glossary
- magnification: making images appear larger
- resolution: ability to distinguish between two objects
- slide: flat rectangles of thin glass which hold the sample under the microscope
- sample: something you collect to examine
- specimen: the sample on the slide when you look at it through the microscope
- cover slip/cover glass: a smaller and thinner sheet of glass that is placed over the specimen
- light microscope: it uses light in order to see an image
- electron microscope: it uses electron beams to see images (you can see a virus)
- compound microscope: it has two sets of lenses (eyepiece lenses - objective lenses)
- objective lenses: a set of lenses with different magnifications (e.g., 4x, 10x, 40x - 4 times: lowest magnification, 40 times: highest magnification)
- total magnification: is given from the multiplication between eyepiece lens magnification and objective lens magnification (e.g., 10x ocular and 4x objective > 40x total magnification).
- coarse focus and fine focus: two knobs which raise or lower the stage which helps with focusing.
- stage knobs: the move from side to side which helps exploring/scanning the specimen.
- mounting: securing the sample on the slide
- dry mount: a simple kind of mounting where the object is merely placed on the slide (this mounting can be successfully used for viewing specimens like pollen, feathers, hairs, etc.)
- wet mount: the specimen is placed in a drop of water or other liquid held between the slide and the cover slip. (this method is commonly used to view microscopic organisms that grow in pond water or other liquid media).
- disposable pipette
- stage clips: clips which secure the slide
- lens paper: the only paper you can use to wipe lenses
- staining: a technique used to enhance contrast in samples
- immersion oil: able to increase resolution (applicable if you have a 100x objective lens)
- fixation: it refers to the process of attaching cells to a slide; it is often achieved either by heating or chemically treating the specimen. It kills microorganisms in the specimen, stopping their movement and metabolism while preserving the integrity of their cellular components for observation
- simple staining: a single dye is used to emphasize particular structures in the specimen
- differential staining: more dyes are used to emphasize particular structures in the specimen
6/11/2020
Brogen and I collected different samples in the Ilm Park and examined them in the lab (spider web, tree bark, river water, mushroom spores, wet leaves). We found microorganisms moving in the river water and some little bugs both in the tree bark and in the spider web samples invisible to the naked eye. Mushroom spores were really interesting.
I examined again the mud samples: microorganisms were still there.
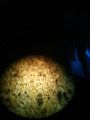
mushroom spores
mushroom spores
mushroom spores
mushroom spores
spider web
spider web


|WEEK TWO|
14/11/2020
Research: staining technique
Staining Microscopic Specimens Basic histological staining methods
Staining a technique we can take advantage of to enhance contrast and colour to the specimens; it is usally used to detect cellular structures or tissues, to distinguish characteristics you wouldn't see in a natural state.
Dyes are selected for staining depending on the chemical properties which determine how the dye will interact with the specimen. Dyes can be basic, acidic or a combination of the two. Acidic dyes carry a negative charge, so they bind to positively charged cells structure. On the other hand basic dyes carry a positive charge, so they bind to negatively charged cells structure.
A positive stain is a dye that will be absorbed by organisms, to make them stand out against the background (most commonly used). However, there are scenarios in which it is advantageous to use a negative stain, which is absorbed by the background but not by the cells or organisms in the specimen. Negative staining produces a silhouette of the organisms against a colourful background.


Commonly used basic dyes which serve as positive stains
- basic fuchsin
- crystal violet
- malachite green
- methylene blue
- safranin typically
Commonly used acidic dyes which serve as negative stains
- acid fuchsin
- eosin
- rose bengal
A simple stain will show all the organisms in a sample with the same colour, even if the sample contains more types of organisms. Differential staining, in contrast, distinguishes organisms based on their interactions with different stains, make them appear to be different colours.
Differential staining techniques commonly used
- Gram staining
- acid-fast staining
- endospore staining
- flagella staining
- capsule staining
15/11/2020
I would like to conduct some experiments related to the staining technique, and also find out how microorganisms react on stimuli.
|WEEK THREE|
17/11/2020
I am informing myself about some microorganisms and I found some interesting ones I would like to explore:
Stentor Protist
Stentor Protist: Reproduction, Anatomy & Habitat
They are shaped like little trumpets and they are made up of a single cell but some of them are large enough to be seen by naked eye. Usually found in ponds or lakes (freshwater environments). Interesting feature: they are remarkable for their regenerative power > when it is cut in half, each half is able to regenerate a half-sized cell that has its normal anatomy and will look the same way it did prior to being cut. There are green, blue and amethyst colored species.


Hydras
They are considered animals, predatory freshwaters microorgranisms; they can be found in ponds, lakek and other slow-moving waters. They feed on different creatures (e.g. insect larvae and small crustaceans) and they die only because of injuries, diseases, starvation or being eaten. Interesting feature: they can develop a mutualistic relationship with algae > the hydra feed on things that would otherwise predate on the algae, while the algae produce photosynthetic compounds that can be utilized as a food source by the hydra. ♥️


Diatoms
Diatoms: Tiny Factories You Can See From Space
Microalgae who generate about 40% of the oxygen produced on the planet each year. They are unicellular microorganisms and can take the shape of ribbons, starts, fans, zigzags and can be radially symmetric or bilaterally symmetric. You can find them in oceans, seas, lakes, streams and soils. They are commonly used in studies of water quality.

18/11/2020
Research: polarized light microscopy
Polarized light microscopy refers to a variety of techniques involving polarized light (e.g. illumination of the sample with polarized light).
These illumination techniques are most commonly used on birefringent or transparent samples where the polarized light interacts strongly with the sample, generating contrast with the background. Polarized light microscopy is used extensively in optical mineralogy.
Polarized light microscopy is capable of providing information on absorption color and optical path boundaries between minerals of differing refractive indices. Furthermore, the contrast-enhancing technique exploits the optical properties specific to anisotropy and reveals detailed information concerning the structure and composition of materials.
You can modify your light microscopy by adding a polarizer, positioned before the specimen, and an analyzer placed between the objective and the observation tubes.


20/11/2020
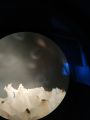
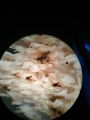
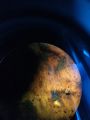
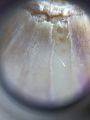
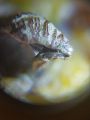
I am in quarantine and I cannot go to the Biolab, therefore I am conducting some online researches about microorganisms and I am exploring a little phone microscope which belong to my flatmate. Here are some pictures I've taken.
garlic
garlic
garlic

moth
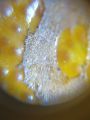
tangerine
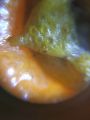
tangerine
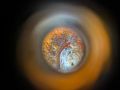
tangerine
tangerine
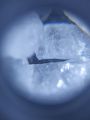
salt
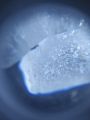
salt
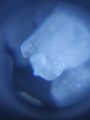
salt
salt


21/11/2020
Research: slime mold
Slime Molds: When Micro Becomes Macro
Heather Barnett: What humans can learn from semi-intelligent slime
There are different types of slim molds, but the one I am interested in is the Physarum polycephalum. Physarum polycephalum slim molds are these semi-intelligent microorganisms who grow and spread themselves into branches.
Slime mold will be found under cool, humid, and dark conditions on forest floors. They are found in nature on moist dung, wood, soil, and other vegetation. They feed on bacteria, protozoa, fungal spores, and other decaying organic material (they fancy also oats!).
They are brainless unicells, but they can learn and somehow make decisions. They pulse and through the microscope you can see streams which serve to transfer food inside them. Several scientist and artists have been conducting researches about slime molds and the way they behave, to apply some of their mechanisms to the computational field.


|WEEK FOUR|
23/11/2020
Research: Nematodes
In short, if all the matter in the universe except the nematodes were swept away, our world would still be dimly recognizable, and if, as disembodied spirits, we could then investigate it, we should find its mountains, hills, vales, rivers, lakes, and oceans represented by a film of nematodes. - by Nathan Cobb - nematologist.
4 out of every 5 animals that live our planet are nematodes.
Nematodes are multicellular roundworms who inhabit a broad range of environments; there are many types of nematodes, some are parasitic and free-living organisms that feed on living material (e.g. plants, insects or other nematodes). Nematodes have successfully adapted to nearly every ecosystem (soil, freshwaters, tropics, polar regions, ...), in fact they can regulate bacterial population and community composition (they may eat up to 5,000 bacteria per minute!). They can be also hermaphrodites, capable of self fertilization.
Important role played in the decomposition process. Sensitive to pollution.
The Fungus That Traps and Kills Nematodes
From a pond water sample, it has been found a nematode whose body had been trapped by a fungus. The fungus first punctured and expanded, paralyzing the nematode. Then he fed himself quickly, digesting the nematode's body from within.
25/11/2020
Amoebas
|WEEK FIVE|
30/11/2020
I went to the BIOLab today and I examined some natural samples that I collected on the Ilm Park because I was intended to explore the limits of the microscope, in terms of focus and resolution. Especially with high magnification and thick/3D specimens the microscope struggles in focusing element and this creates lots of interesting visual effects. I keep taken pictures with my phone more or less close to they eye-lenses to that I get chromatic aberration and some blurred parts.
Below some of the picture I have taken.


4/12/2020
As I would like to explore a bit more wet mounts and living microorganisms, I will start with some pond water that I will examine with the binocular microscope.
I decided to collect some pond water samples in weimar: I picked some drops in different parts of the pond and then stored them in 4 tubes to compare them. I prepared the specimens and then waited from 30min to 1 hour to examine all of them, in order to let them familiarize with the environment again.
Overall: a very few moving microorganisms and plenty of static microorganisms/segments of plants.
Here's what I found:
Tube 1:


Tube 2:


Tube 3:


Tube 4:


Conclusions: I am going to examine them again in a few days to see if something changed.
|WEEK SIX|
7/12/2020
Recommendations on where and how to sample to find microorganisms in action by Julian Chollet:
Always better to collect murky/turbid/not clear water and keep tubes/containers open, otherwise there might not be enough oxygen fro some microorganisms
- puddle of mud - mud samples, especially if taken from the bottom with some roots or plants are usually good to examine. You should add some water, shake it a bit and keep it from 2/4 days in a warm environment;
- soil - You can find plenty of soil microbes, especially in the uppermost layer. Add some water, shake it a bit and keep it from 2/4 days in a warm environment;
- pond water - pond samples are interesting too, where water is not clear and you can't see through, better if you take a part from the surface with a kind of film or a bigger part stored in a glass jar with also some plants/algae inside so that you can explore a kind of ecosystem.
- compost - you can find interesting stuff also in the bottom of your garbage bin, in tree barks holes or through degrading dead plants/leaves, where you can have moisture environments and probably worms. Add some water, shake it a bit and keep it from 2/4 days in a warm environment;
When you prepare the specimen and you have to put the slide cover do it gently, in order to prevent some microorganisms to be flattened. You can also facilitate this process by putting a hair or something else which helps to keep an empty space between cover slide and sample.
Advice on how to cultivate a slim mold:
- If you use a dry slim mold you should bring it back alive in a wet environment (agar/filter paper)
- Better not use old slim mold, the might become moldy fast
- Sterile environment (petri dish or bigger container)
- Don't feed it at the beginning
- Give it just 1 oat meal per day when it starts growing/moving, if you feed it too much (lots of oat meals) it will become moldy fast; when it is big enough you can give it more oats meal
- Don't forget about your slim mold! If you forget about it for a couple of days, it will be moldy.
Footage - samples collected and found
Collection of pictures I have taken with my phone camera examining samples both with the BIOLab microscopes and a tiny phone microscope so far:
File:Experiments-1.pdf Experiments-2
Photoshop editing
Below some artworks I created starting from some microscope pictures I've taken by simply changing some adjustments or overlap pictures on Photoshop.


11/12/2020
Today I went to the BioLAB and I examined some samples collected 2 days ago. I picked some muddy water and muddy/wet leaves samples, added some water drops, shake them a bit and and left them in the lab. 2 days ago I collected some compost and soil as well but I couldn't examine them, time flies!
Sascha kindly lent me his camera to film some little organisms moving in my specimens. It was funny, but also super hard to keep focused the area, in fact we figured out that the focus seen by the eye through the eye-lens is different from the output show by the camera. Below what I found.
Wet/muddy leaves


wet leaves - camera documentation
Muddy water


muddy water - phone documentation
Slime mold
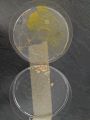
I also prepared in 2 new (not contaminated) petri dishes the ultimate environment for cultivating slime molds (Agar powder + water mixed together and heat up in the microwave) and put 1 oat flake with a part of a slim mold over it in the first petri dish and 2 oak flakes with 2 different slime molds over them in the second dish.
The slime molds were already alive from the previous 'dry' condition so that I could feed them with a few oat flakes.
13/12/2020
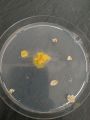
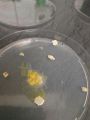
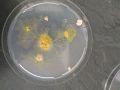
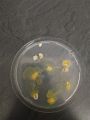
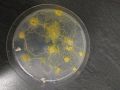
Below the progress of my slime molds I am cultivating. Condition: closed petri dish with agar, inside a shoes box.
SLIME MOLD 1
DAY 2
DAY 3 - 11:00
DAY 3 - 23:52
DAY 4


SLIME MOLD 2
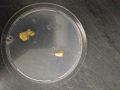
DAY 1
DAY 2
DAY 3 - 11:00
DAY 3 - 23:52
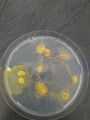
DAY 4


After 4 days this is the condition of my slime molds (no mold found):

|WEEK SEVEN|
16/12/2020
I was intended to examine through the microscope the compost sample collected in the bottom of my kitchen bin. It was a mixture of topsoil, onion and tangerine skin, shook it with some water drops and left for almost a week in the lab. Unfortunately, we are in a total lockdown from today, therefore I will not have access to the BioLab.
17/12/2020
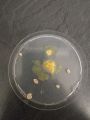
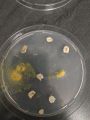
Slime mold
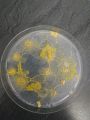
For what concerns my slime molds I created a new environment with water and agar in a new petri dish, attached to the original one, in order to let my slim mold move to the new environment, creating a bridge. I informed myself about how to cultivate a slime mold creating an ultimate environment for her, and one of the main rules consists in keep the environment clean in order to prevent mold. In doing so I had to keep the petri dishes open, inside of the shoe box, but after some days I found out a little moldy dark spot growing in the agar. I removed it and give my slime molds to Sisu because tomorrow I will leave Weimar coming back home for Christmas Holidays.
Below the progress.
SLIME MOLD 1
I set the new environment to let her create a bridge, but it was growing super fast in the opposite direction. (Maybe it felt the new petri dish like a dirty one and not appealing anymore)
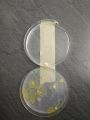
DAY 6
DAY 8
DAY 9


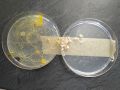
SLIME MOLD 2
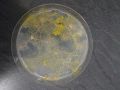
I set the new environment to let her create a bridge, but after one day open I decided to close the petri dish and put one oat flake in the other new dish, closed. Hence, I dropped the idea of the bridge for this slime mold and I didn't feed it for one whole day: the slime mold was escaping looking for food, you can see it from the growth on the walls of the petri dish.
DAY 6
DAY 7

DAY 8
DAY 9


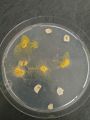
SLIME MOLD 3
The oat flake taken from slide mold 2, put in a new petri dish (left open for a day)

|WEEK EIGHT| & |WEEK NINE|
Slime mold
I left Weimar for Christmas break. But I want to show some slime mold pictures under the microscope that I personally took in the Biolab after some days of them growing. I think they are pretty amazing.


AI generated images
I collected many microscopy pictures so far. I have a dataset of more than 2300 images. I decided to lend a new slant to this project, moving from analog to digital.
I worked with an online software which takes advantage of machine learning (to be more precise StyleGan2) to synthetise new data starting from a massive dataset. Hence, I trained several different machine learning models started from different pre-trained dataset to start learning from, and then added my original microscopy dataset. I selected a parameter called steps which influences in a significant way the training process: it establishes the number of steps the model has to go through, so the timing required (of course the more it works the better.)
--- 1st attempt 3000 steps ---
Here I started from a pre-trained dataset of HQ landscapes and then selected my first microscopy dataset as custom dataset. The first dataset was based on less images - about 1200 - therefore I got as a result a less heterogeneous folder of images.
Output and notes: 1000 new samples images generated by this machine learning model which look like my images (although not that similar because based on an indefinite shape; this feature comes from the fact that my original images where quite blurred and dark, in fact my initial aim was to create analog errors! It is pretty amazing how the algorithm works in trying to reproduce the input).
Preview generated folder:


--- 2nd attempt 7000 steps ---
Here I started from a pre-trained dataset of HQ landscapes and then selected my second microscopy dataset as custom one. The second dataset was based on more images - 2300 - therefore I got as a result a more heterogeneous folder of images.
Output and notes: 1000 new samples images generated by this machine learning model which look like my images (they still have indefinite shapes instead of rounded ones, but they are more colorful and diverse);
Preview generated folder:


--- 3rd attempt 700 steps ---
Here I decided to change the pre-trained dataset with far away data in order to see what could have happened with something that different from the original images. Therefore, I used a pre-trained dataset of HQ faces and then selected the 2nd part of the microscope images I took - about 1100 - as custom dataset.
Output and notes: This model training process failed at some point (700 steps rather than 2000 set), but it worked however. 500 new samples images generated by this machine learning model which look like my images (they still have indefinite shapes instead of rounded ones, but they are more colorful and diverse);
Preview generated folder:


--- 4th attempt 8000 steps: ---
Here I decided to change the pre-trained dataset with closer data in order to see whether I could get an improvement. Therefore, I used the 1st folder generated by the ML model as pre-trained dataset and then selected the complete microscope dataset as custom one.
Output and notes: 1000 new samples images generated by this machine learning model which are really similar to my original images, rounded and detailed.
Preview generated folder:


Now I am trying to create some videos by shaping interpolation on the latent space, so smooth transitions between one generated picture and another, with different soundtracks under them.
|WEEK TEN|
07/01/2021
Some of the interpolation videos I made with different soundtracks over:
|WEEK ELEVEN|
12/01/2021
I made two others interpolation videos putting as a soundtrack a BBC documentary:
1st: Blue Planet
2nd: Black Holes
15/01/2021
My collection of videos is done. I thought it was nice to create a loop video with some of the interpolations playing together all in once, and so I did > Loop Interpolation Videos
|WEEK TWELVE|
18/01/2021
I edited two videos in speed and sound, adjusting some parameters to better match visual and sound: black holes blue planet 2
20/01/2021
I am creating a narrative that connects each video avoiding the linear common sense, in favor of dizzying the spectator. \WORK IN PROGRESS\
|WEEK THIRTEEN & FOURTEEN|
03/02/2021
The final narrative is ready here: Echoes