Introduction
Goal of the workshop was to repurpose a possible cheap USB webcam into a microscope. Max Neupert, the organizer of this workshop, told us how to achieve this and instructed us throughout the winter term 2012/13.
The basic concept is pretty simple: just disassemble the camera, mount the lens upside down and shoot some great photos with the new microscope.
Disassembling the Camera
The "Hama PC-Webcam AC-150" served as a basis, which costs about € 5 when ordering via Amazon. It has a resolution of 640x480 pixels and six LEDs to lighten the scene. Beyond this, the camera supports UVC (USB Video Class), which is important for viewing live images directly on the screen.
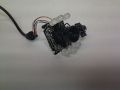
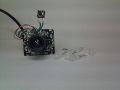
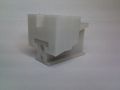
As mentioned before, the first step was to disassemble the camera. After cracking the case, six LEDs had to be removed. In order to do so, we had to heat the solder at the back side of the PCB (printed circuit board). The last important step was to mount the lens with hot glue upside down onto the PCB. If needed, one can solder flex (in German: Litze) with the remounted LEDs back on the PCB for beeing able to lighten the specimen.
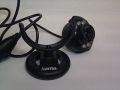
Unmounted from stand
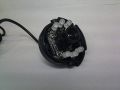
After cracking case (1)
After cracking case (2)
Unsoldered LEDs
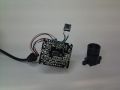
Unmounted lens
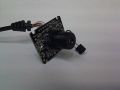
Remounted lens
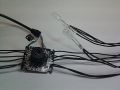
Flex with LEDs


The resulting microscope has a magnification area of 0.35 mm x 0.46 mm. This can be calculated by counting the visible pixels of a display with known ppi-specification. In my case the microscope shows 3x4 pixels with a length of 0.117 mm per pixel (HTC HD2 has 217 ppi).
Building a Case


Since a microscope is designed to show very small objects, it is not appropriate to hold the camera in the hand because of uncontrollable hand movements. Therefore, we needed to build a case that holds the microscope and gives the possibility to do little adjustments in height (that is our zoom).
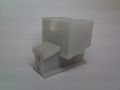
My approach basically consists of two sleds that lie on one another where the contact surface is a plane in the angle of 15 degrees to the table. Pushing the lower carriage to the left will force the upper carriage to move upwards. The first image on the right shows a technical side view drawing, the second one shows a rendered image.

After building a prototype out of Balsa wood, I was able to prove that the construction works fine. However, some minor changes have been applied to the model before printing the parts with a RapMan 3D printer. In the image below, that shows the two printed sleds carrying the microscope, one can notice that a M4 threaded rod was stuck through the lower sled and two counter nuts were fastened at each side of the sled, whereas the original plan was to have a screw head lying in a little pocket.

A M4 thread has a pitch of 0.7 mm, which means that one rotation about its own axis will move the lower sled 0.7 mm and consequently the upper sled about 0.2 mm. As a result, the microscope can be adjusted very fine in its height. However, compared to the cases built by my fellow students (see Works), my approach is quite complicated and a bit more expensive just to fulfil the same functionality.
Note: Unfortunately the 3D printer became damaged; so, the case itself is built out of Balsa wood and could not be printed during this course. The sleds were printed before the printer fell off the table.
Sleds at upper position
Sleds at lower position


WebcamCapture Application

Because of the lack of simple applications which just show the current image of the webcam, I wrote a little program that does exactly this.
The application can be downloaded here, but note that the program only runs under Windows and .NET Framework 4 has to be installed.
Usage:
- Space bar - Save image to file
- R - Record video to AVI file
- N - Add suffix to filename (so you can identify your object later on)
- Escape - Exit application
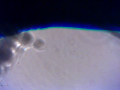
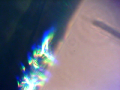
First images
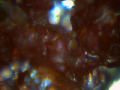
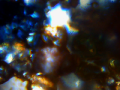
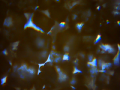
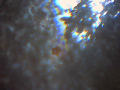
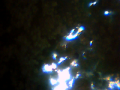
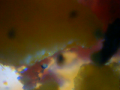
Here are my first images taken with the microscope. Unfortunately, on almost all images one can see a blob (probably hot glue). I decided to do some better work with a totally new camera, but this one produced even worse images since it had a lower resolution and magnification.
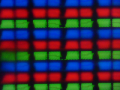
Display of HTC HD2
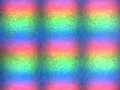
Glass of iPhone
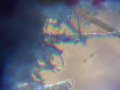
Paper shred

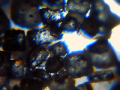
Hair
Knife blade (1)
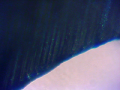
Knife blade (2)
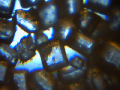
5 Euro note
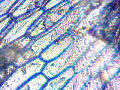
Onion skin


Here is a video of moving bubbles in a drop of water of the river Ilm.
<videoflash type="vimeo">62989767|640|480</videoflash>
First artistical tries

In her talk about the basics of microscopy, Adriana showed us some nice images captured with microscopes such as the ones on this site. Since I liked the way the artists colored their specimen, I asked myself how to achieve a similar effect with possible cheap equipment.
So, I considered to dye sugar, salt and meal with food coloring and then take gaudy images of it. In the photo to the right, one can see the condiments drying at a radiator after coloring.
Here is a gallery of some images I shot:
Usual sugar

Blue colored sugar
Red colored sugar
Sugar in multiple colors

Usual salt
Blue colored salt
Yellow colored salt

Salt in multiple colors
Usual meal
Green colored meal
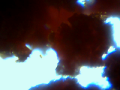
Red colored meal
Meal in multiple colors


Some of the images are nice-looking, but after all I am not satisfied with the results. One big problem I noticed when taking these photos, is that the camera has an automatic white balance; so, it was the best to always keep the Petri dish in motion, which made it quite hard to capture good photos.
Microscopic World: Waterdrops
When playing around with the colored condiments, I wondered how it would look like when one gives a drop of water onto salt and sugar. Here is the result:
<videoflash type="vimeo">55721018|628|480</videoflash>
More Approaches
After having built the microscope and knowing its strengths and weaknesses, I started to think about more things to with this and other microscopes. Here are some ideas I wanted to follow:
3D microscopy
Basically, there are three methods for getting 3D images of your specimen:
- having a special lens so that the camera is able to look at the specimen from multiple view points at only one certain point in time (see this article),
- using two cameras to get two images at one certain point in time, or
- using only one camera and move either the camera or the specimen after capturing the first photo to capture another one at a different point in time.
The special lens is far too expensive for our little project. For the second method, one would need two very tiny cameras or a mirror system to achieve good results. Since we cannot mount cameras and/or mirrors with such a high precision, this approach did not work either. Same holds for the third one.
Low-Cost Microscopes for Schools
Today almost every teenager owns a smartphone with a camera on board. Max came up with the idea that it might be really interesting to use this camera with a special mounted lens to have a low-cost microscope for school lessons, particularly in biology teaching. With my old smartphone I just tinkered a little around, but could only try very few lenses lying around with really bad results. However, this idea should definitely be followed in the future with more knowledge about complex lens systems.
Making Electricity Visible
This one is quite easy: I wanted to create a spark and view it under the microscope. One could even try to melt sugar to caramel, or burn a piece of paper and record a slow motion video of this process. Unfortunately, I have not found a battery in an appropriate price range that was strong enough to produce a spark that is visible. Maybe this approach can be followed by someone who has an old car battery standing around.
Tracking Blobs
Currently, I am working on a Pure Data patch to help Max with a blob tracking algorithm. Since I am new to Pd, I just did not finish my work yet, but I will upload the patch as soon as it works.