Making of Microscope
> The first plan <

To control a height in detail, I choose a screw and legs like tripod. Inside of Set #1 I would put into a camera and I thought it can be control a height through turning of legs. To be useful I put into a spring between set #1 and outside frame. After a while, I found that it could be difficult, impossible to control it. I had to change a plan.
3D Model


> The second plan - Design with Google sketch up <
As a picture camera is fixed with bottom by 2 legs and I set extra bottom part only for focusing. Spring is for moving of outside cover up and down. If be turned right, then outside cover goes up. And if be turned left, it goes down because of elasticity of spring.
Test model from carton and transparent plastic film


Focusing of this step is making 2 different cover and function how to be no rubbing. A gap between them is under 1mm.
Episode


During making of lens i got some problem. a surface of lens is stained with some superglue!!! I tried to erase it. but it was going wrong. so i change my mind... i broke a lens. i thought it is just protect-lens and for wide angle. but i also worried to be worst myself. i hope one eureka! or buy new thing.
and then i yelled ‘eureka’.
lasercutting design
After seeing of 3D printed things I considered that the surface of it is so rough and it can make some rubbing. Therefore I decided to use a laser-cutting machine instead of 3d-printing, because I need a smooth surface between in- and outside cover.
.jpg)
A plan to laser-cutting with Adobe Illustrator (The material is clear acryl with thickness of 3mm)
Assembling


Because it is not possible to make one outside cover by 3d-printing, and to make a cylinder by laser-cut, I had to find an alternative. Finally I got a frame of ribbon for outside cover(White stick in top-photo). Base of this size I designed inside parts of cover for laser-cutting.
completion of Microscope


DONE!
test images and video
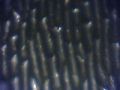
image captions
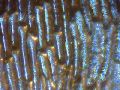
image captions
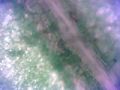
image captions
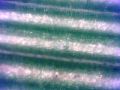
image captions
image captions
image captions
image captions

image captions

image captions


The first group of object for a test shot is things around me and info-guide from Max. Handy screen, wings of a deaf bugs, soil, leaves, hair, skin of onion and from my lips, spit, earwax from my cat etc.
<videoflash type="vimeo">54235417|640|480</videoflash>
Finding my project
I took a picture another objects what I choose and found by myself. There were ice cream, strawberry jam, rotten milk, salt, urine, blood. Then I mixed 2 things of that. Clay and dish soap, jam and milk, salt and papper. On its way I tried to mix a milk and olive oil but it didn’t and separated each other. And they have shown something special to me. A bubble and a drop of milk in olive oil have moved very slowly and silky. A form of that is perfect circle.

Second test video of class 'DIY-Microscopy' at Bauhaus Uni Weimar, Germany.
I give a title "cell division". I have shaken hard one drop of water with black watercolor in olive oil and it is divided finely. After a while it's started to merge together.
Edited on reverse and regulated speed. (Origin length of video is 36min.)
Second test shot
<videoflash type="vimeo">55711862|640|480</videoflash>
Project > Circle <
example one scene from movie "sunshine"(danny boyle) http://www.youtube.com/watch?v=dp7z8Gvexas

At the second previous test shot (http://vimeo.com/55711862) I set a theme about the creature and birth of everything. I defined the most form of everything of the world is circle, like a somatic and red blood cell and it grows up a planet or the sun. And it is also one of basic form of moment when something created or be born. I look for perfect circle around of us what we can see though our eyes.
I asked myself from where start to create and we came. It can be created by the God or by ourself.
<videoflash type="vimeo">61795628|720|480</videoflash> A content of narration is genesis 1:1 ~ 31 in Bible