This is a short list to quickly highlight the principles when using images in the wiki. For a detailed help see the Mediawiki Help on Images.
- First thing you do is to edit the page where you want to use a picture. Do the uploading later.
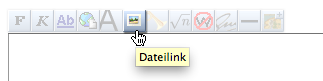
- Type [[File:Your descriptive filename here.jpg]] or use the insert file button in the toolbar
- The table below gives you an overview on the layout options you have when including images.
- Once you edited and saved your page you have a greyed out image link like this one File:Not yet existant image.png. If you click on it it will direct you to the upload page. Where you can Upload the yet missing File. The filename of the uploaded image will be renamed to the one you have written in the article, it is not necessary that they match. (Example: you write in the wiki

[[File:Michael Mustermann Projekt XY.png]] and later you can upload a file called DSC894732.png. Your File will be renamed automatically, just the filetype needs to match) Make sure you upload a reasonable file size and resolution so it can also be used for printing at a later point.
| Description | You type | You get |
| Simple Image in 100%. (The dpi of the image will be ignored, every pixel information will be displayed) | [[File:Pelly.jpg]] | 
|
| Scale the image to exactly 250 pixels in width | [[File:Pelly.jpg|250px]] |
|
| Scale the image to thumbnail size | [[File:Pelly.jpg|thumb]] | |
| Thumbnail size and caption below the image | [[File:Pelly.jpg|thumb|Caption for the Image]] | |
| Float the thumbnail on the left side | [[File:Pelly.jpg|left|thumb|Caption for the Image]] |