EmilioAguas (talk | contribs) |
EmilioAguas (talk | contribs) No edit summary |
||
| (13 intermediate revisions by the same user not shown) | |||
| Line 47: | Line 47: | ||
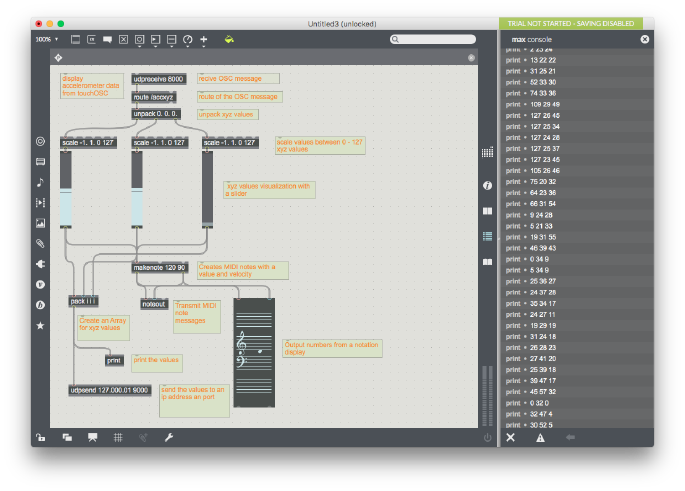
- after those values goes to the make note object that creates a midi tone with a velocity to transmit the values as sound we create a note out object and also to visualize this in a musical scale we use an n-slider object. | - after those values goes to the make note object that creates a midi tone with a velocity to transmit the values as sound we create a note out object and also to visualize this in a musical scale we use an n-slider object. | ||
-Finally the pack object is | -Finally the pack object is used to create an array of integers and send it to the second laptop with the udpsend object. | ||
-Tip: is useful to create a print object just to see in the console how the data is sent | |||
<br style="clear:both;"> | |||
====Max Video Patch==== | |||
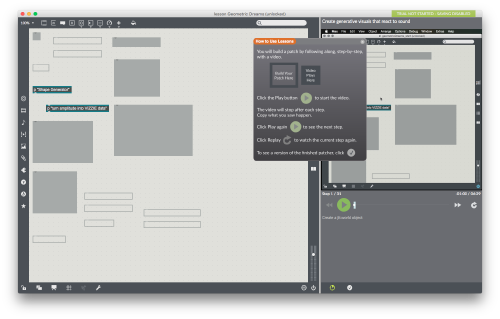
The following patch was create using the lessons under the browse lessons button on the right side of the patcher window. The tutorial is the one called ''geometric dreams'' | |||
[[File:08.Video_Patch_Geometry.png |thumb| left| 500px | Geometric dreams lesson]] | |||
[[File:09.step_by_step_patch.png |thumb| left| 500px | Step by step patch tutorial]] | |||
<br style="clear:both;"> | |||
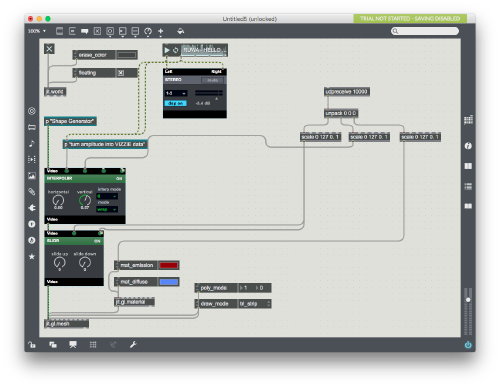
After completed the tutorial and have the complete patch you can change the music to get more interesting results and now you just need to create the receiver object and attached to different controllers. | |||
[[File:06.Max_Video_Patch.png |thumb| left| 500px |Max/Jitter patch]] | |||
[[File:05.Max_Video_Patch.png |thumb| left| 520px |Max/Jitter patch with window visualizer]] | |||
<br style="clear:both;"> | |||
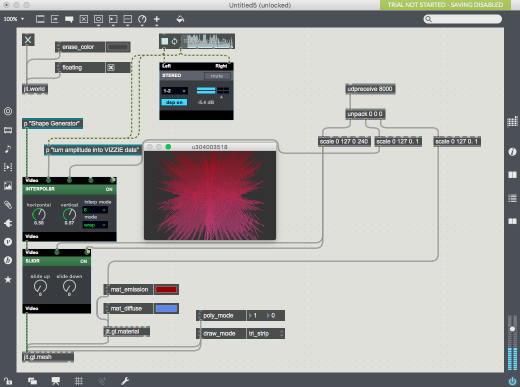
To receive data from the first laptop we need an udprecive object with the port 9000 in this case, because we are sending from the same port, then add an unpack object to split the values in three again and three scale objects to resample the data, to be useful so the data is going to change from 0 to 127 to 0 till 1 using float values. | |||
In this example the acceleration on the X axis is controlling the slide up and slide down the SLDR object, the Y axis acceleration is not been used and the Z axis acceleration is changing the mat emission object to make darker or brighter the visuals and also change their colors. | |||
- Tip with the eraser object set it up to a dark color as a background and change the values on the mat emission and mat diffuse to get a brighter color to make contrast. | |||
- To get the same results as the picture on the visualizer window, set the draw mode in trip_strip and fix the vertical pan on 55 in INTERPOL8R object. | |||
== Video Result == | |||
Coming soon ... | |||
Latest revision as of 15:37, 6 June 2016
Group Tasks
-Emilio Aguas: Input development (Processing or TouchOSC), Sound output implementation (Max/Msp sound patch)
-Fiona Mortimer: Visual output implementation and music development (Max/Msp/Jitter video patch)
-Eduardo Oliviera: Visual output implementation and music development (Max/Msp/Jitter video patch)
Concept idea
- Thinking about an external input we came up with the idea to use our voices as an input. Something like take the change in the decibels every time you speak into a mic. but after several trials it was better to take another direction so we decided to take the acceleration data from a mobile device and do something with that.
In our case we took the path to manipulate the acceleration values in X, Y and Z axis, so with that in mind we tried to develop an sound output that was loud and annoying like when a hornet pass by flying and also generate a swarm and chaotic visual output of this same concept.
Data flow diagramm
Tips...
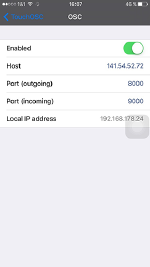
On the mobile phone the outgoing port it's set up on 8000 so for the first laptop we need the same port number, on the first laptop the outgoing port is the 9000, so the receiving port in the second laptop should be 9000.
Step by step implementation
TouchOSC
1. Download and install touchOSC into your mobile device android or iphone:
Iphone
Android"
2. Set up your on your mobile device
- under connections tap on osc, then enabled and on host assign the Ip address of the first laptop, and assign the outgoing port to 8000
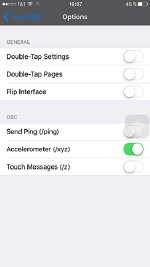
- after, under options panel tap it and enabled the accelerometer (/xyz)
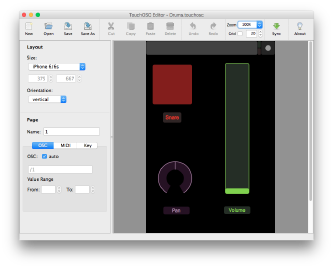
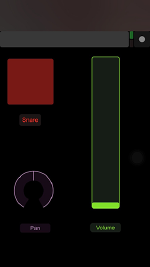
- then choose a layout or create your own with TouchOsc editor if you need more info about touch osc here is a Editor tutorial
-finally go to the layout to start sending the acc data via OSC protocol
Max Sound Patch
Max/Msp sound patch
- In this patch at the top you have the receiver object with the port 8000, then the route from the acceleration "/accxyz".
- then with unpack object the values are split in three and all of them are float values between -1.0 and 1.0, for these values to be useful we are going to scale it now from 0 till 127 so the data now are integers, we use the sliders as a visual aid to see the behaviour of the acc values.
- after those values goes to the make note object that creates a midi tone with a velocity to transmit the values as sound we create a note out object and also to visualize this in a musical scale we use an n-slider object.
-Finally the pack object is used to create an array of integers and send it to the second laptop with the udpsend object.
-Tip: is useful to create a print object just to see in the console how the data is sent
Max Video Patch
The following patch was create using the lessons under the browse lessons button on the right side of the patcher window. The tutorial is the one called geometric dreams
After completed the tutorial and have the complete patch you can change the music to get more interesting results and now you just need to create the receiver object and attached to different controllers.
To receive data from the first laptop we need an udprecive object with the port 9000 in this case, because we are sending from the same port, then add an unpack object to split the values in three again and three scale objects to resample the data, to be useful so the data is going to change from 0 to 127 to 0 till 1 using float values.
In this example the acceleration on the X axis is controlling the slide up and slide down the SLDR object, the Y axis acceleration is not been used and the Z axis acceleration is changing the mat emission object to make darker or brighter the visuals and also change their colors.
- Tip with the eraser object set it up to a dark color as a background and change the values on the mat emission and mat diffuse to get a brighter color to make contrast.
- To get the same results as the picture on the visualizer window, set the draw mode in trip_strip and fix the vertical pan on 55 in INTERPOL8R object.
Video Result
Coming soon ...

