GMU:Tutorials/Performance Platform/Recording Tracking Data: Difference between revisions
| Line 7: | Line 7: | ||
<br>1. Make sure to close the curtains (and windows) in the DBL (if the light situation changes you will have to re-capture the background again) [https://www.uni-weimar.de/medien/wiki/index.php5?title=GMU:Tutorials/Performance_Platform/Tracking_Platform_Calibration&action=edit calibration tutorial] <br> | <br>1. Make sure to close the curtains (and windows) in the DBL (if the light situation changes you will have to re-capture the background again) [https://www.uni-weimar.de/medien/wiki/index.php5?title=GMU:Tutorials/Performance_Platform/Tracking_Platform_Calibration&action=edit calibration tutorial] <br> | ||
<br>2. Make sure the cameras are on by checking that the switch is plugged in a and on(green lights are on) ''see photo 1.1'' | <br>2. Make sure the cameras are on by checking that the switch is plugged in a and on(green lights are on) | ||
''see photo 1.1'' | |||
<br> | <br> | ||
Revision as of 14:29, 24 August 2016
Intro
This tutorial will guide you through the steps necessary to Record Tracking Data with Captury.
Step 1: Check the physical Set up
1. Make sure to close the curtains (and windows) in the DBL (if the light situation changes you will have to re-capture the background again) calibration tutorial
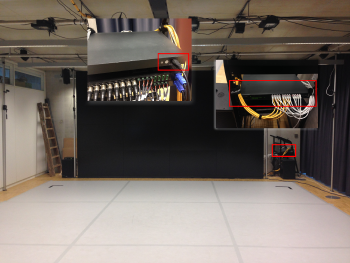
2. Make sure the cameras are on by checking that the switch is plugged in a and on(green lights are on)
see photo 1.1
3. Turn on the computer in the lefthand side. (see photo)
Step 2: Login and Start Captury
1. In case you do not know the password for the user login, ask a person who does. If you managed the login, the desktop appears.
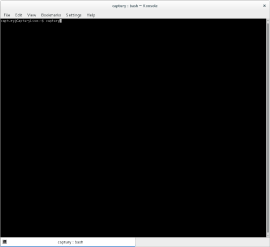
2. You have to start the Captury tracking software from the console by typing in "captury" (see photo)
There are currently two different versions of The Captury installed.
If you want to work with the old version, type captury in the console.
If you want to work with the new version, type captury-new in the console.
TUTORIAL UNDER CONSTRUCTION
COMING SOON!
5-Seting up Captury to Record
-Click tracking (Photo)
-Have your performer stand with there arms out -click and hold the <new> (this will create a new skeleton for the person you will be tracking) and drag it onto the performer in one of the cameras (for tracking more than one person, please refer to -------------) -If the skeleton does not apply properly to the performer, select the Low Latency option. -If you wish to view advanced options for skeleton optimizartion, click the advanced option icon near the top right of the screen that is next to the X and looks like a Cog.
6- Recording
Once the tracking skeleton has been properly applied to your performer you are ready to record the tracking motion data.
Create or select a folder from the list where you tracking motion data will be recorded
. Ensure that the Record Motion box , if you wish to record Videos as well ensure that the Record Videos is checked as well.
click the large record button to record the tracking motion data. Ensure that the Record Motion box
When you are done hit stop.
After you are finished recording your tacking data, ensure that your recording is named appropriately and use the tag system accordingly

