GMU:Tutorials/Performance Platform/Tracking Platform Rigging: Difference between revisions
Jonasjuelch (talk | contribs) No edit summary |
Jonasjuelch (talk | contribs) No edit summary |
||
| Line 5: | Line 5: | ||
== Recording the Data == | == Recording the Data == | ||
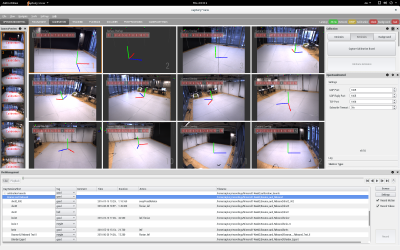
To record data in the captury you have to choose your folder and create a new shot. If you don't have a folder yet, you can create one by accessing the Shot Manager which is found in the lower area and scroll to the bottom of the list, where you find the button <new directory> | To record data in the captury you have to choose your folder and create a new shot. | ||
If you don't have a folder yet, you can create one by accessing the Shot Manager which is found in the lower area and scroll to the bottom of the list, | |||
where you find the button <new directory> | |||
[[Image:JJ_tutblend_1.png|400px]] | [[Image:JJ_tutblend_1.png|400px]] | ||
| Line 22: | Line 25: | ||
Now you can start tracking data with the captury! | Now you can start tracking data with the captury! | ||
JJ_tut_blendfbx.jpg | |||
== Blender Export == | == Blender Export == | ||
| Line 28: | Line 31: | ||
All your recorded data is stored in the folder you just created. | All your recorded data is stored in the folder you just created. | ||
In it you will find a .obj file and a .fbx file, along with some other files. | In it you will find a .obj file and a .fbx file, along with some other files. | ||
The .fbx file has your motion data stored, so if you want to use the animation data from the captury this is the file you need. The .obj file holds the standard 3D Model, that is provided by the captury software. | |||
The .fbx file has your motion data stored, so if you want to use the animation data from the captury this is the file you need. | |||
The .obj file holds the standard 3D Model, that is provided by the captury software. | |||
[[Image:JJ_tut_folder.jpg|100px]] | [[Image:JJ_tut_folder.jpg|100px]] | ||
Import the .fbx file | |||
'''Import the .fbx file''' | |||
To import the .fbx file, go to file>import>FBX(.fbx). | |||
A new window opens and asks you to select a .fbx file. Use the file browser to select your .fbx file. | |||
Make sure that you selected the Armatures button in the lower left corner. | |||
When you hit the 'Import FBX' Button it will import your animation. It can take some time so be patient. | |||
Now you have a armature/skeleton and 3D object (the same as in the .obj file) | |||
[[Image:JJ_tut_blendfbx.jpg|100px]] | |||
[[Image:JJ_tut_blendfbx2.jpg|100px]] | |||
[[Image:JJ_tut_blendfbx3.jpg|100px]] | |||
Revision as of 16:53, 2 August 2016
Using Tracking Data in Blender
Recording the Data
To record data in the captury you have to choose your folder and create a new shot.
If you don't have a folder yet, you can create one by accessing the Shot Manager which is found in the lower area and scroll to the bottom of the list, where you find the button <new directory>
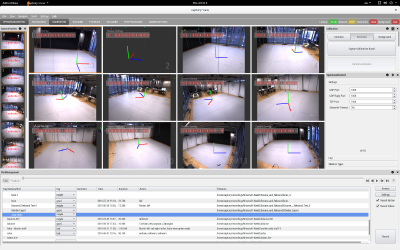
If your folder is set, you can create a new shot by clicking on the button with the label <new shot>
This will create a new folder on the computer in which all your tracking data will be stored. You can see the path of your folder listed on the right side.
Now you can start tracking data with the captury!
JJ_tut_blendfbx.jpg
Blender Export
All your recorded data is stored in the folder you just created. In it you will find a .obj file and a .fbx file, along with some other files.
The .fbx file has your motion data stored, so if you want to use the animation data from the captury this is the file you need.
The .obj file holds the standard 3D Model, that is provided by the captury software.
Import the .fbx file
To import the .fbx file, go to file>import>FBX(.fbx).
A new window opens and asks you to select a .fbx file. Use the file browser to select your .fbx file.
Make sure that you selected the Armatures button in the lower left corner.
When you hit the 'Import FBX' Button it will import your animation. It can take some time so be patient.
Now you have a armature/skeleton and 3D object (the same as in the .obj file)


