| (42 intermediate revisions by the same user not shown) | |||
| Line 20: | Line 20: | ||
Resistance can be in series and parallel. | Resistance can be in series and parallel. | ||
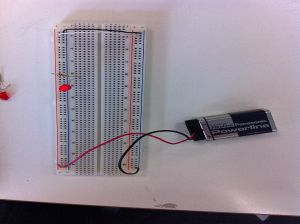
[[File:1LED.jpg|left|thumb| | [[File:1LED.jpg|left|thumb| 1 LED]] | ||
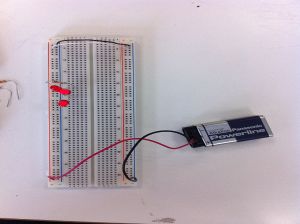
[[File:3LEDseries.jpg|left|thumb| | [[File:3LEDseries.jpg|left|thumb| 3 LED in series]] | ||
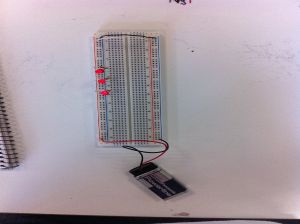
[[File:3LEDparallel.jpg|left|thumb| 3 LED in parallel]] | |||
'''''555 Timer in Astable Mode''''' | |||
[[File:555timerastable.jpg|400px]] | |||
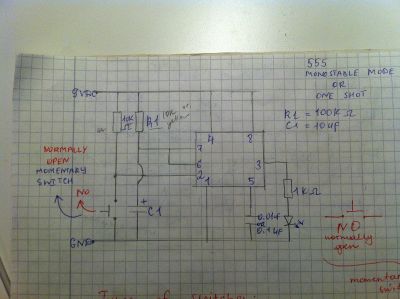
'''''555 Timer in Monostable Mode''''' | |||
[[File:555timermonostable.jpg|400px]] | |||
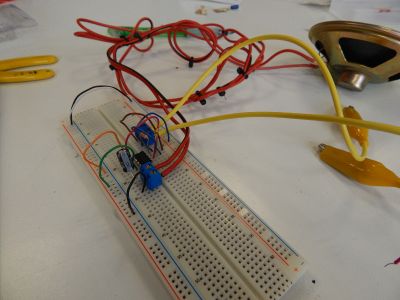
We have built in class circuit 555 Timer in Astable Mode with speaker as an output from pin 3 and with aligator clips from pin 6 and 7. | |||
[[File:pin367.jpg|400px]] | |||
==Day 2 (14.06.14)== | |||
'''''Types of Switches (ключ – переключатель/включатель):''''' | |||
* SPST – Single Pole Single Throw | |||
* SPDT – Single Pole Double Throw | |||
* DPDT – Double Pole Double Throw | |||
* Tilt Switch | |||
* Rotary Switch | |||
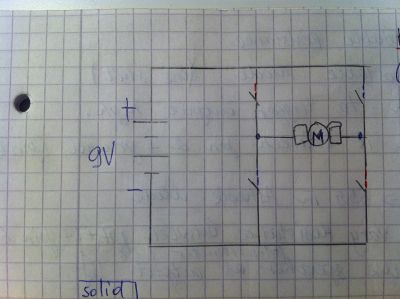
H-Bridge (H-Мост) – in that circuit motor can change directions with the switch. | |||
[[File:Hbridge.jpg|400px]] | |||
==Day 3 (15.06.2014)== | |||
'''''Assignment:''''' Super Conceptual Switch or Variable Resistance + Diagram/Schematic | |||
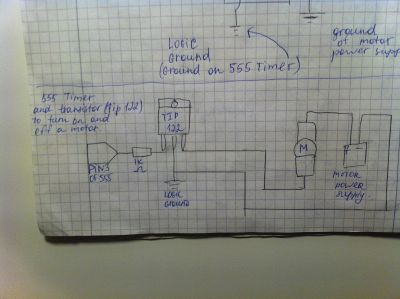
555 Timer and transistor (Tip 122) | |||
[[File:tip122.jpg|400px]] | |||
==ASSIGNMENT== | |||
So I chose to do Assignment 2 - "Variable Resistance" | |||
The first idea that came to my mind was to use pickles, because they are very good conductors. | |||
In the beginning of developing that idea, I did a few tests to see how it will work with one or two pickles. | |||
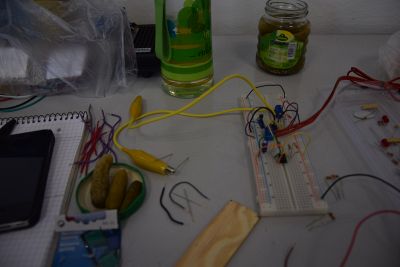
So to the both ends of the alligator clips I attached needles, and then I was poking with them my pickles to see which sounds it will give me. While I was testing, I did some changes for the size of the resistance and capacitors. | |||
[[File:picklestest1.jpg|400px]] | |||
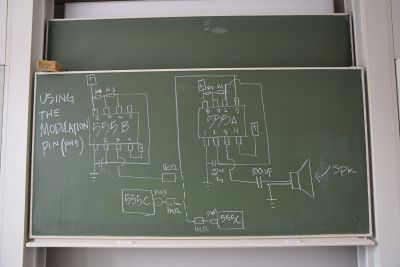
During the open lab on Thursday, I got some important tips from Darsha Hewitt on how I can develop my work. And also the same day I learned how to build circuit with two 555 Timers. And I decided to use that for more interesting sounds in my work. | |||
[[File:two555timers.jpg|400px]] | |||
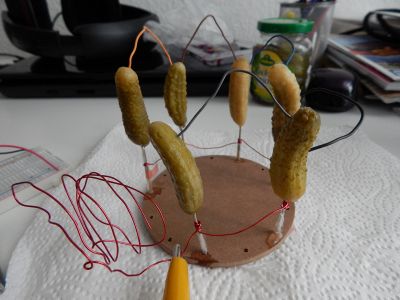
Therefore, from two pickles, my installation grew up until 6 pieces of pickles, that are connected from the bottom with one long wire. Moreover, they are connected to each other from the top with five short wires. One aligator clip is connected to the beginning of that long wire, the other has a needle, with which you can poke all pickles to hear different sounds. | |||
Below you can see the close-up image of all pickles together on the round brown plate (or board) | |||
[[File:sixpickles.jpg|400px]] | |||
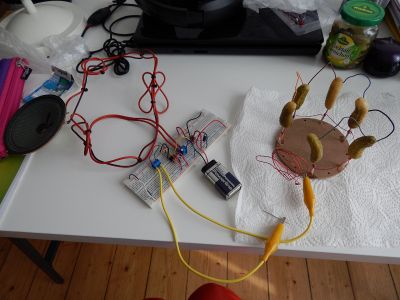
And here is how the whole work looks like: | |||
[[File:thewholework.jpg|400px]] | |||
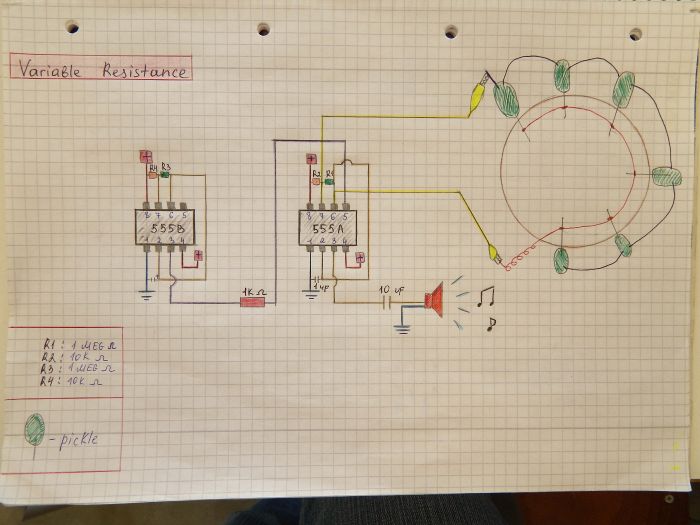
My Diagram for this assignment: | |||
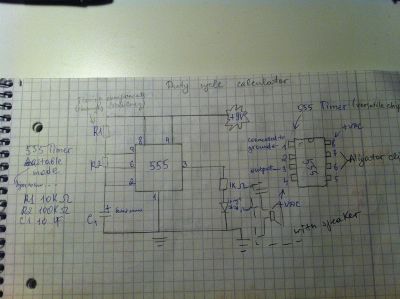
[[File:mydiagram.jpg|700px]] | |||
Testing my installation: | |||
<videoflash>vQWXQCzgnK8&feature=youtu.be</videoflash> | |||
==SUMMARY== | |||
For the summary, the installation "Crazy pickles" consisted of 10 pickles (from small to a big size) that were used as a variable resistance with two 555 timers circuit in astable mode. | |||
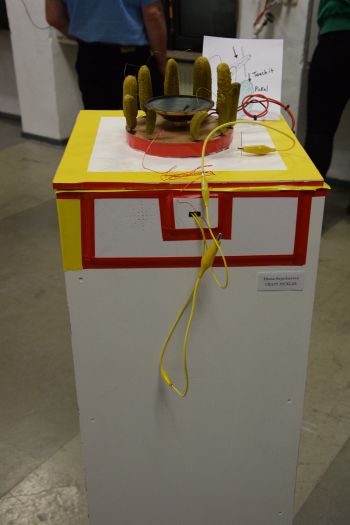
It was installed on the special exhibition pedestal, which had the perfect hight for people to interract with this installation. | |||
All pickles were connected with wire from the top as well as from the bottom. | |||
Before each day of the summmary pickles were refreshed. | |||
[[File:pedestalpickles.jpg|350px]] | |||
It was my first time participating in the exhibition and in summary. To be honest, it was such a great experience to see how people react to my installation as well as to installations from my classmates. Moreover, was a plesure to asnwer for all question from visitiors if they didn't understand something or they wanted to know more. | |||
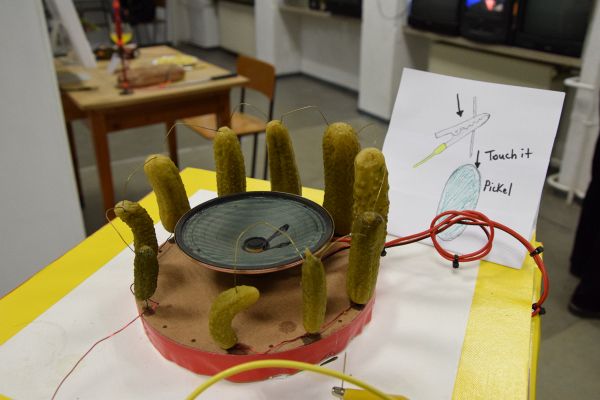
On the first day my installation didn't have any description on how to use it. The next day a small picture with a drawing of aligator clip and pickle was added for better understanding. | |||
[[File:closeup.jpg|600px]] | |||
here how the installation was working at the summary: | |||
<videoflash>96Fxo0qnOVM&feature=youtu.be</videoflash> | |||
Latest revision as of 21:18, 16 July 2014
MY DOCUMENTATION
Day 1 (13.06.14)
Important terms:
- DC – Direct Current (постоянный ток)
- AC –Alternating Current (переменный ток)
- С - Capacitor (конденсатор)
- R – Resistance (сопротивление)
- F – Farad (Фарад)
- LED – Light Emitting Diode (светодиод)
Types of Resistors:
- 1K Ohm – brown/black/red
- 10K Ohm – brown/black/orange
- 100K Ohm - brown/black/yellow
- 1MEG Ohm - brown/black/green
Resistance can be in series and parallel.
555 Timer in Astable Mode
555 Timer in Monostable Mode
We have built in class circuit 555 Timer in Astable Mode with speaker as an output from pin 3 and with aligator clips from pin 6 and 7.
Day 2 (14.06.14)
Types of Switches (ключ – переключатель/включатель):
- SPST – Single Pole Single Throw
- SPDT – Single Pole Double Throw
- DPDT – Double Pole Double Throw
- Tilt Switch
- Rotary Switch
H-Bridge (H-Мост) – in that circuit motor can change directions with the switch.
Day 3 (15.06.2014)
Assignment: Super Conceptual Switch or Variable Resistance + Diagram/Schematic
555 Timer and transistor (Tip 122)
ASSIGNMENT
So I chose to do Assignment 2 - "Variable Resistance"
The first idea that came to my mind was to use pickles, because they are very good conductors.
In the beginning of developing that idea, I did a few tests to see how it will work with one or two pickles.
So to the both ends of the alligator clips I attached needles, and then I was poking with them my pickles to see which sounds it will give me. While I was testing, I did some changes for the size of the resistance and capacitors.
During the open lab on Thursday, I got some important tips from Darsha Hewitt on how I can develop my work. And also the same day I learned how to build circuit with two 555 Timers. And I decided to use that for more interesting sounds in my work.
Therefore, from two pickles, my installation grew up until 6 pieces of pickles, that are connected from the bottom with one long wire. Moreover, they are connected to each other from the top with five short wires. One aligator clip is connected to the beginning of that long wire, the other has a needle, with which you can poke all pickles to hear different sounds.
Below you can see the close-up image of all pickles together on the round brown plate (or board)
And here is how the whole work looks like:
My Diagram for this assignment:
Testing my installation:
<videoflash>vQWXQCzgnK8&feature=youtu.be</videoflash>
SUMMARY
For the summary, the installation "Crazy pickles" consisted of 10 pickles (from small to a big size) that were used as a variable resistance with two 555 timers circuit in astable mode. It was installed on the special exhibition pedestal, which had the perfect hight for people to interract with this installation. All pickles were connected with wire from the top as well as from the bottom. Before each day of the summmary pickles were refreshed.
It was my first time participating in the exhibition and in summary. To be honest, it was such a great experience to see how people react to my installation as well as to installations from my classmates. Moreover, was a plesure to asnwer for all question from visitiors if they didn't understand something or they wanted to know more.
On the first day my installation didn't have any description on how to use it. The next day a small picture with a drawing of aligator clip and pickle was added for better understanding.
here how the installation was working at the summary:
<videoflash>96Fxo0qnOVM&feature=youtu.be</videoflash>
