GMU:Diy biolab drivers license SoSe26/Daria Lukianchuk: Difference between revisions
No edit summary |
No edit summary |
||
| Line 39: | Line 39: | ||
[[File:First experiment timelapse.mp4|left|thumb]] | [[File:First experiment timelapse.mp4|left|thumb]] | ||
== Second Experiment (11.05) == | |||
Since I already understood what my workflow is like, now I could create more precise plan. I wanted to film around 11 hours of timelapse (660 frames), so I'll stay in the BioLab almost the whole day. When I arrived at 6am I wanted to check two Petri dishes from my first experiment and then decide if I'll continue with them or create new ones. | |||
/// | |||
//// | |||
Revision as of 06:57, 11 May 2026
Slime Mold and Colored Nutrients
In the second lecture of our 'Diy biolab drivers license' course, students saw live how slime mold transfers nutrients within its body. Firstly the flow goes in one direction, after a while stops and then moves in another direction. Since this is how a slime mold grows and distributes nutrients to every part of its body, I wondered: what if the slime mold were to consume multicolored food—would it change its color as a result? And what if there were several different colors involved? Would distinct color boundaries be visible, or would there be soft transitions? Or would the slime mold simply turn a single, uniform color?
That's exactly why I started my experiments. For that I needed:
- slime mold
- Petri dishes
- oat flakes
- agar
- food coloring
- camera
My final goal is to film the process of growing with camera. With the video/timelapse It will be very clear to see how slime mold change colors.
First experiment (08.05)
During the first try it was important for me to understand my workflow in the lab and already test my idea practically.
First of all medium for slime mold had to be prapared. I'll use 2% agar solution.
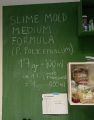
Formula in BioLab for slime mold medium
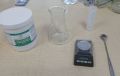
All ingredients are prepared. Agar-agar, laboratory glassware for measurement and mixing, scale and spoon

Agar and water mixed together


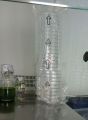
After that agar must be heated and then poured into Petri dishes.
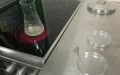
Heating agar
Sterile Petri dishes

Two Petri dishes filled with agar


When agar medium is ready it's time to put slime mold, oat flakes, and food coloring inside. Around two weeks before the experiment some of the students took slime mold with them to home, and I was one of them. During this time slime mold grew very well, and I'll use it as "mother culture" for my experiment.
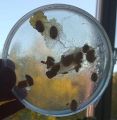
"Mother culture" for my experiment
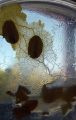


I took some parts from the Mother Culture and placed them in two Petri dishes. For the coloring process I took liquid food coloring (four colors) and judging by their composition, I assume that slime mold should like this—since the dye consists primarily of syrup and sugar. After placing slime mold and oat flakes inside Petri dishes I made a couple of color drops on top of flakes.

Taking part of the Mother Culture
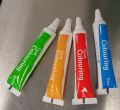
Liquid food coloring
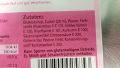
Composition of food colorings (primarily made from sugar)

Placing everything in Petri dish


.jpg)

When Petri dished were ready, it was the time to prepare camera set-up for timelapse filming. After reading some manuals and instructions I was able to set settings, that camera makes one photo each minute. For the first experiment I decided to make 48 frames (48 minutes of filming), which in the end will be 2 seconds video. My teacher also suggested to feed mother culture to make it stronger for the future.
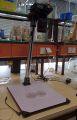
Camera set-up with placed Petri dishes

Feeding Mother Culture to make it stronger


.jpg)

After filming I exported it to my laptop and made a video out of the footage. By the way, instead of 48 photos, there were somehow 96 on the memory card—and on the video itself, constant flashes were visible. I saw in the camera setting "Anti-flickering mode", so maybe I need to enable it next time.
Second Experiment (11.05)
Since I already understood what my workflow is like, now I could create more precise plan. I wanted to film around 11 hours of timelapse (660 frames), so I'll stay in the BioLab almost the whole day. When I arrived at 6am I wanted to check two Petri dishes from my first experiment and then decide if I'll continue with them or create new ones.
////