| Line 1: | Line 1: | ||
=== Respiring Reflections === | === Respiring Reflections === | ||
[[File:Winterwerkschau video close up.mp4|left|thumb]] | [[File:Winterwerkschau video close up.mp4|left|thumb]] | ||
This project is called "'''Respiring Reflections'''", a bubble machine which is connected to Pothos plants ( | ''This project is called "'''Respiring Reflections'''", a bubble machine which is connected to Pothos plants (Epipremnum aureum) in an enclosed environment to simulate respiring cycle of the plants.'' | ||
[[File:Winterwerkschau video front 1.mp4|left|thumb]] | [[File:Winterwerkschau video front 1.mp4|left|thumb]] | ||
| Line 11: | Line 11: | ||
=== First Experiments and Plants Observations === | === First Experiments and Plants Observations === | ||
In the beginning of our semester, we were given some seeds to be grown at home. This was our first experiments for this class. I was growing Chia seeds (and also apple seeds that didn't really grow into anything) on a piece of cotton and inside a plastic bag | In the beginning of our semester, we were given some seeds to be grown at home. This was our first experiments for this class. I was growing Chia seeds (and also apple seeds that didn't really grow into anything) on a piece of cotton and inside a plastic bag. During our first experiments in growing seeds, we documented our plants' progress. I documented it in form of pictures and diary entries. Other than the Chia seeds, I also grew Pothos plants (''Epipremnum aureum'') from cuttings. | ||
===== Chia seeds ===== | ===== Chia seeds ===== | ||
| Line 141: | Line 141: | ||
=== Motivation === | === Motivation === | ||
[[File:Bubble machine sketch idea.jpg|thumb|318x318px]] | [[File:Bubble machine sketch idea.jpg|thumb|318x318px]] | ||
It was a bit confusing and challenging to try combining/connecting plants and electronics somehow. But what I noticed during my plants' observation was that I was interested in the respiration process of my plants. The idea was to make a bubble machine which can visualize it. I think bubbles matche the concept of respiration, since they are somewhat transparent, just like respiration. With the bubbles, I was trying to simulate or reflect the respiration, hence the project name "'''Respiring Reflections'''". | |||
During the process of growing my Pothos plants (''Epipremnum aureum'') from cuttings (Stecklinge) and documented their growth, I started to think: "Are my plants breathing? They seem fine, their leaves are green... but are they really okay?" The idea was that the soap bubbles quantity would be produced according to the CO<sub>2</sub> level of the plants' enclosed environment, divided into three categories: Low, Medium and High CO<small>2</small> level. When the CO<small>2</small> level in the plants' environment rises, then there will be more soap bubbles. In order to do so, I watched videos and read blogs/forums related to the DIY bubble maker machine, until I had a plan on the materials needed and how to make it. | During the process of growing my Pothos plants (''Epipremnum aureum'') from cuttings (Stecklinge) and documented their growth, I started to think: "Are my plants breathing? They seem fine, their leaves are green... but are they really okay?" The idea was that the soap bubbles quantity would be produced according to the CO<sub>2</sub> level of the plants' enclosed environment, divided into three categories: Low, Medium and High CO<small>2</small> level. When the CO<small>2</small> level in the plants' environment rises, then there will be more soap bubbles. In order to do so, I watched videos and read blogs/forums related to the DIY bubble maker machine, until I had a plan on the materials needed and how to make it. | ||
| Line 392: | Line 392: | ||
=== Respiring Reflections - Final Prototype (Winterwerkschau) === | === Respiring Reflections - Final Prototype (Winterwerkschau) === | ||
To build the final prototype for the Winterwerkschau, I decided to change the casing material to transparent acrylic sheets. I think it matches the concept that everything is transparent/translucent. Before building the real physical final prototype, I tried out several online tools to help me, such as 3D sketch plan, 2D blueprint and optimization software to cut the acrylic sheets, to know how much materials I needed. Because the dimension of my final prototype will depend on the bubble sticks (attached to the rotating stepper motor), and also the length of the breadboard, I decided to use half-size breadboard instead of a full-size one, since the full-size will be redundant for | To build the final prototype for the Winterwerkschau, I decided to change the casing material to transparent acrylic sheets. I think it matches the concept that everything is transparent/translucent. Before building the real physical final prototype, I tried out several online tools to help me, such as 3D sketch plan, 2D blueprint and optimization software to cut the acrylic sheets, to know how much materials I needed. Because the dimension of my final prototype will depend on the bubble sticks (attached to the rotating stepper motor), and also the length of the breadboard, I decided to use half-size breadboard instead of a full-size one, since the full-size will be redundant for this project. The wiring diagram helped me to consider this, since I wouldn't need that much space of the breadboard. The half-size breadboard minimized the length (or depth) dimension of my prototype a lot. In building the final prototype, I learned a lot how to be creative in finding solutions with common materials or tools that I could find in the lab (either diyElectronics Lab in B15 or Electronics Lab in M5), at home or in the city. I'm glad that I made it work in the end:) | ||
[[File:Winterwerkschau video front 2.mp4|left|thumb]] | [[File:Winterwerkschau video front 2.mp4|left|thumb]] | ||
[[File:Winterwerkschau video close up.mp4|left]] | [[File:Winterwerkschau video close up.mp4|left]] | ||
| Line 404: | Line 404: | ||
=== Self-reflection and Lessons Learned === | === Self-reflection and Lessons Learned === | ||
I learned a lot in this class, from developing the concept, electronics, prototyping, and coding. This project was a good challenge for me to tackle, since I didn't take a lot of prototyping courses. | |||
===== Prototyping hurdles ===== | ===== Prototyping hurdles ===== | ||
Technically it was challenging, since it was the first time I learned ESP32, plus I broke my first one in this class... But lessons learned, always make a wiring diagram and triple check everything | Technically it was challenging, since it was the first time I learned ESP32, plus I broke my first one in this class... But lessons learned, always make a wiring diagram and triple check everything. I usually only deal with digital problems, so prototyping with electronics and physical mechanical things adds dimension in the project, which means when I encounter a problem, that problem could be in any dimension and I couldn't really pinpoint where. Throughout the class, I experienced that problems can arise anywhere: cables, ESP32, understanding of mechanical/physical things, materials, tools, device specification that needs specific usage in the code, etc. But that's just the art of prototyping, as my friend said. We're not doing a finished line of production, so enjoy the ups and downs, the successes and failures. Fail fast is also better. | ||
I feel like I spent most of my time designing and planning for my prototypes rather than building the prototypes, both for the cardboard prototype (first prototype) and also the final one. I wasn't sure how it was supposed to be made, but I kept thinking about the measurements and the mechanisms so that I could make them work, at least logically in my mind. Sometimes even night and day, that I got a little bit overwhelmed. In the end though, I compromised the accuracy aspect and focused more on the functionality/mechanical things to make it work. "Just try it out" was definitely a motto for this project. | I feel like I spent most of my time designing and planning for my prototypes rather than building the prototypes, both for the cardboard prototype (first prototype) and also the final one. I wasn't sure how it was supposed to be made, but I kept thinking about the measurements and the mechanisms so that I could make them work, at least logically and visually in my mind. Sometimes even night and day, that I got a little bit overwhelmed. In the end though, I compromised the accuracy aspect and focused more on the functionality/mechanical things to make it work. "Just try it out" was definitely a motto for this project. | ||
===== Learnings from my Pothos plants ===== | ===== Learnings from my Pothos plants ===== | ||
| Line 415: | Line 415: | ||
=== Future Work === | === Future Work === | ||
If I had to think about this project and relate it to my study program, I would have difficulties. I'm not exactly experienced in speculative design, and perhaps I'm not interested in that area in the future as well, but who knows. However, it might be a bit far-fetched, but I could imagine my bubble machine as an outdoor "smart home system" that visualizes the respiration of houseplants, since indoor can be messy. Bubbles can be fun to look at, especially for children. During the Winterwerkschau, I enjoyed witnessing that people of all ages enjoying the bubbles, | If I had to think about this project and relate it to my study program, I would have difficulties. I'm not exactly experienced in speculative design, and perhaps I'm not interested in that area in the future as well, but who knows. However, it might be a bit far-fetched, but I could imagine my bubble machine as an outdoor "smart home system" that visualizes the respiration of houseplants, since indoor can be messy. Bubbles can be fun to look at, especially for children. During the Winterwerkschau, I enjoyed witnessing that people of all ages enjoying the bubbles, especially children. Some of my friends also reported this to me and it was heartwarming. And maybe add some indicators, to indicate if something goes wrong with the plants (so that the owner(s) can check). This idea can be elaborated further, which indicator(s) can be used, what kind of thresholds, what indicates "healthy" and "sick" plants, etc. A mechanism that could be added would be to refill the soap liquid from time to time. During Winterwerkschau I refilled it manually. | ||
=== References === | === References === | ||
Revision as of 10:56, 21 February 2025
Respiring Reflections
This project is called "Respiring Reflections", a bubble machine which is connected to Pothos plants (Epipremnum aureum) in an enclosed environment to simulate respiring cycle of the plants.


First Experiments and Plants Observations
In the beginning of our semester, we were given some seeds to be grown at home. This was our first experiments for this class. I was growing Chia seeds (and also apple seeds that didn't really grow into anything) on a piece of cotton and inside a plastic bag. During our first experiments in growing seeds, we documented our plants' progress. I documented it in form of pictures and diary entries. Other than the Chia seeds, I also grew Pothos plants (Epipremnum aureum) from cuttings.
Chia seeds
- Chia seeds growth gallery

24.10.2024

24.10.2024

25.10.2024

25.10.2024

26.10.2024

26.10.2024

26.10.2024

27.10.2024

27.10.2024

28.10.2024

28.10.2024

29.10.2024

30.10.2024

31.10.2024

03.11.2024

04.11.2024

10.11.2024


| Date | Note |
|---|---|
| 24.10.2024 | Planted chia seeds on cotton. |
| 25.10.2024 | Start sprouting. |
| 26.10.2024 | Grow more at night, more sprouting (first green leaf buds can be seen). Some drops of water added. |
| 27.10.2024 | Second watering at noon. Leaf buds can be seen more clearly, getting taller. |
| 28.10.2024 | Sprouting, ca. 3cm. Leaning towards light source. Third watering. |
| 29.10.2024 | Leaves started opening. Leaning towards light source. Darker leaves? |
| 30.10.2024 | Leaves started opening. |
| 31.10.2024 | Leaves opening, grow taller. |
| 01.11.2024 | Stem getting weaker? |
| 02.11.2024 | Curly stem due to various light sources? |
| 03.11.2024 | Weaker stem, getting lower. |
| 04.11.2024 | Some start to die. Current concern: room too cold for plants? Too much water added? |
| 09.11.2024 | Almost all stems grow lower than previously. Fungi visible in cotton area. Dying? |
| 10.11.2024 | I think they are rotting... Brown color visible on the cotton, where the stems are. |
| 11.11.2024 | Declared rotten. |
Pothos cuttings (Epipremnum aureum), Jade variation; Pearls & Jade variation
Jade variation: green-colored leaves; Pearls & Jade variation: green and white pattern leaves

Pothos - Jade

Pothos - Pearls & Jade

Pothos Seramis medium


| Date | Note |
|---|---|
| 03.11.2024 | 2 media: water & Seramis medium |
| 07.11.2024 | Start rooting? Might need more time to observe. |
| 09.11.2024 | Roots seem longer (growing), 1 leaf turned yellow (Pearls & Jade variant). Seramis medium plants seem okay (leaves are still green), but roots are difficult to observe (burried by the Seramis medium). Don‘t want to move them around, afraid of disturbing any natural process of it. |
| 13.11.2024 | A root is forming at the cut place (Pearls & Jade in water). I become optimistic that they could survive the winter. Roots are growing longer for others. Seramis medium: Pearls & Jade one growing lower (leaf), Jade one is still green. |
| 14.11.2024 | Yellow leaf in 1 Pearls & Jade starts to rot... Maybe I should cut it. Others are doing okay, white roots start showing from lowest root buds. New root buds are emerging.
Yellow leaf cut. |
| 15.11.2024 | Roots grow longer. |
| 18.11.2024 | Yellow leaf cut becoming brown. Also becoming brown (closed): a stem extension without leaf, so only 1 stem with leaves grow further. More roots grown. In Seramis medium: look stable, stems seem strong. New root buds emerged in water medium. Stems seem going stronger. Grown roots got longer. I think they will survive winter. They seem to grow more while i was gone, but maybe it was just a trick of perception, since I would compare them with the last time I saw them. |
| 19.11.2024 | Today I tried out the CO2 sensor on my house plants in the Seramis medium. I was afraid that they would not last, because until today I haven‘t seen any root grows, yet the leaves are still green and the stems seem strong. With the CO2 sensor, I could observe that the CO2 values went up and down, so I would assume that they are breathing just fine:) maybe they need more time to grow roots in the Seramis medium. I feel glad that I could observe the CO2 value changes, which means there was gas exchange inside the closed environment. However, my question: are the plants really okay with that amount of CO2? What is the ideal amount for them to survive? |
| 21.11.2024 | The stem of Jade Pothos in the Seramis medium seems stronger and lifting up the leaf. I think they are okay. Haven‘t tried out the CO2 sensor on them again since last time, but the leaves are still as green. The grown roots of the Pothos in the water are growing longer. I think the Pearls & Jade Pothos are getting more upright and taller (water medium). The one in the Seramis medium looks a little bit down... |
| 24.11.2024 | Pearls & Jade Pothos in water medium is growing a new leaf. The Jade Pothos in the Seramis medium is growing taller. Pearls & Jade in Seramis medium is growing something I‘m not sure what that is. New stem maybe? |
| 27.11.2024 | I‘m sure they grow in their own time. Some are showing new root growth, although not really visible. But white roots are showing a little bit. Root buds are showing in the Seramis medium Pearls & Jade plant. After cutting some more from the existing cuttings, all look healthier than previously. Maybe it helps. The shorter the way to the leaf, the better for the plants? |
| 02.12.2024 | Jade plant in the Seramis medium is growing root. So glad that they are growing just fine. Other Pothos in the water medium are growing roots as well. |
| 09.12.2024 | Pearls & Jade Pothos in the Seramis looks dying... Trying to revive it in the water medium. Mushy stem/root bud cut, put into the water with the rest. |
Note: In the end, only 1 group of Pearls & Jade Pothos survived and grew a new leaf, that is the one which had 3 leaves in the beginning of cutting. The other ones I experimented with (by only growing 1 leaf or 2) were rotten. Lesson learned: always grow as a group, compared to Jade Pothos (they can be grown as single leaf). Propagating in water was faster to grow roots, but Jade Pothos also survived in Seramis medium. Younger leaves were faster in growing new leaves, maybe because of more growth hormones?
Another observation is that, because I propagated them in 2 different media (water and Seramis medium), the roots that grew depend on the medium. The roots in water propagation grew smooth as one long root, whereas those in Seramis medium were branched and tend to grow deeper into the Seramis medium.
Motivation

It was a bit confusing and challenging to try combining/connecting plants and electronics somehow. But what I noticed during my plants' observation was that I was interested in the respiration process of my plants. The idea was to make a bubble machine which can visualize it. I think bubbles matche the concept of respiration, since they are somewhat transparent, just like respiration. With the bubbles, I was trying to simulate or reflect the respiration, hence the project name "Respiring Reflections".
During the process of growing my Pothos plants (Epipremnum aureum) from cuttings (Stecklinge) and documented their growth, I started to think: "Are my plants breathing? They seem fine, their leaves are green... but are they really okay?" The idea was that the soap bubbles quantity would be produced according to the CO2 level of the plants' enclosed environment, divided into three categories: Low, Medium and High CO2 level. When the CO2 level in the plants' environment rises, then there will be more soap bubbles. In order to do so, I watched videos and read blogs/forums related to the DIY bubble maker machine, until I had a plan on the materials needed and how to make it.
You can find my initial project mood board here: https://miro.com/app/board/uXjVLBm7F8w=/?share_link_id=117991010729
Materials
- ESP32
- Breadboard (half-size)
- CO2 sensor MH-Z19C
- Stepper motor 28BYJ-48
- Stepper motor driver module ULN2003
- PWM fan AMD Ryzen 7 1700
- 10kΩ resistor
- Power supply 12 volts
- Buck converter 12 volts to 5 volts
- Acrylic sheets
- Bubble sticks
- Soap bubble liquid
- Lots of cables...

CO2 sensor MHZ-19C

Stepper motor 28BYJ-48 + stepper motor driver module ULN2003

PWM fan AMD Ryzen 7 1700
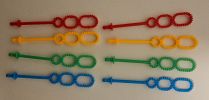
Bubble sticks


Wiring Diagram

During the process of making the bubble machine, unfortunately I broke my ESP32... I'm still not sure why, but perhaps it was due to false wiring. Thus I made this wiring diagram so that the wiring could be clear. I tried some free tools to make wiring diagram, such as but in the end I stick with EasyEDA to make this. The wiring diagram helps me a lot in reproducing the wiring I wanted to do, as well as to ask opinion from Christian or someone else for consultation.
Since I wanted this installation to be a standalone one, I powered the ESP32 with the power suppy of 12 volts, through a buck converter of 5 volts, 1 Ampere. For this, I went to an electronics store in Erfurt (Bastlerland) and showed my wiring diagram for this project. The guy in that store recommended me this solution and I followed it.
Codes
To program the ESP32, I used Visual Studio Code with PlatformIO extension. Here are the codes I uploaded to the ESP32 to run the bubble machine:
Bubble machine
main.cpp:
#include <Arduino.h>
#include <AccelStepper.h>           // Load the AccelStepper library
#include "MHZ19.h"
#include <HardwareSerial.h>

#define motorPin1  12               // IN1 pin on the ULN2003 driver
#define motorPin2  14               // IN2 pin on the ULN2003 driver
#define motorPin3  27               // IN3 pin on the ULN2003 driver
#define motorPin4  26               // IN4 pin on the ULN2003 driver

AccelStepper stepper(AccelStepper::HALF4WIRE, motorPin1, motorPin3, motorPin2, motorPin4);

#define BAUDRATE 9600

/*CO2 sensor*/
#define RX_PIN 16  //wire green here (8)
#define TX_PIN 17  //wire blue here (9)

/*CO2 sensor variables*/
MHZ19 myMHZ19;
HardwareSerial mySerial(2);
unsigned long getDataTimer = 0;
void verifyRange(int range);

int CO2;
int8_t Temp;

int currentCategory = -1;  // To store the current CO2 category

int newCategory;

void setup() {
  // put your setup code here, to run once:
  Serial.begin(9600);               // initialize the serial monitor

  stepper.setMaxSpeed(1000.0);      // set the max motor speed
  stepper.setSpeed(100);            // set the current speed/initial speed

  mySerial.begin(BAUDRATE);    // sensor serial

  /*CO2 sensor*/
  myMHZ19.begin(mySerial);     // pass to library
  myMHZ19.autoCalibration();

}

void loop() {
  // put your main code here, to run repeatedly:
  stepper.runSpeed();

  /*CO2 sensor and stepper motor speed logic*/
  if (millis() - getDataTimer >= 250)  //refresh rate: 250ms
    {
        //int CO2;

        /* note: getCO2() default is command "CO2 Unlimited". This returns the correct CO2 reading even
        if below background CO2 levels or above range (useful to validate sensor). You can use the
        usual documented command with getCO2(false) */

        CO2 = myMHZ19.getCO2(false);                             // Request CO2 (as ppm)

        Serial.print("CO2 (ppm): ");
        Serial.println(CO2);

        //int8_t Temp;
        Temp = myMHZ19.getTemperature();                     // Request Temperature (as Celsius)
        Serial.print("Temperature (C): ");
        Serial.println(Temp);

        getDataTimer = millis();

        // determine the category of CO2
        if (CO2 < 900) {    // lower threshold: 900 ppm
          newCategory = 0;  // Low CO2
        } else if (CO2 < 1000) {   // higher threshold: 1000 ppm
          newCategory = 1;  // Medium CO2
        } else {
          newCategory = 2;  // High CO2
        }

        // switch category if the current category is no longer valid
        if (newCategory != currentCategory) {
          currentCategory = newCategory;
          switch (currentCategory) {
            case 0:
              stepper.setSpeed(100);  // Slowest speed
              break;
            case 1:
              stepper.setSpeed(300); // Medium speed
              break;
            case 2:
              stepper.setSpeed(500); // Fastest speed
              break;
          }
        }
  }
}
platformio.ini:
[env:esp32dev]
platform = espressif32
board = esp32dev
framework = arduino
lib_deps =
	waspinator/AccelStepper@^1.64
	wifwaf/MH-Z19@^1.5.4
Calibration
To determine the thresholds for my bubble machine, I uploaded a calibration script to the ESP32 and let the CO2 sensor run in the enclosed plants' casing for minutes until the values are somewhat "stable" and not deviating too much from the previous ones:
main.cpp:
#include <Arduino.h>
#include "MHZ19.h"
#include <HardwareSerial.h>

#define BAUDRATE 9600

/*CO2 sensor*/
#define RX_PIN 16  //wire green here (8)
#define TX_PIN 17  //wire blue here (9)

/*CO2 sensor variables*/
MHZ19 myMHZ19;
HardwareSerial mySerial(2);
unsigned long getDataTimer = 0;
unsigned long timeElapse = 0;
void verifyRange(int range);

int CO2;
int8_t Temp;

int minCO2 = 1500;    // save min CO2 value
int maxCO2 = 400;     // save max CO2 value

int range;

void setup() {
  // put your setup code here, to run once:
  Serial.begin(9600);
  mySerial.begin(BAUDRATE);    // sensor serial

  /*CO2 sensor*/
  myMHZ19.begin(mySerial);     // pass to library
  myMHZ19.autoCalibration();
  timeElapse = 6e5;            // wait 10mins to calibrate
  Serial.println("Calibrating... (10mins)");
  delay(timeElapse);

}

void loop() {
  // put your main code here, to run repeatedly:
      if (millis() - getDataTimer >= 1000)  // Check if interval has elapsed (non-blocking delay() equivalent)
    {

        CO2 = myMHZ19.getCO2(); // get CO2 value

        Serial.print("CO2 (ppm): ");
        Serial.println(CO2);

        if(CO2 < minCO2){   // if current CO2 value is lower than the min value: save the new value as the min
          minCO2 = CO2;
        }

        if(CO2 > maxCO2){   // if current CO2 value is higher than the max value: save the new value as the max
          maxCO2 = CO2;
        }

        Serial.print("Min CO2: ");
        Serial.println(minCO2);

        Serial.print("Max CO2: ");
        Serial.println(maxCO2);

        int8_t Temp;    // Buffer for temperature
        Temp = myMHZ19.getTemperature();    // Request Temperature (as Celsius)

        Serial.print("Temperature (C): ");
        Serial.println(Temp);

        range = maxCO2 - minCO2;  // calculate the range

        Serial.print("Range: ");
        Serial.println(range);

        Serial.print("Lower threshold: ");
        Serial.println(minCO2 + (range * 1 / 3));   // lower threshold

        Serial.print("Higher threshold: ");
        Serial.println(minCO2 + (range * 2 / 3));   // higher threshold

        getDataTimer = millis();  // Update interval
    }

}
platformio.ini:
[env:esp32dev]
platform = espressif32
board = esp32dev
framework = arduino
lib_deps = wifwaf/MH-Z19@^1.5.4
Respiring Reflections - First Prototype and First Trials
For the bubble machine itself, I needed a fan, a rotating motor, bubble sticks and a container for the soap bubble liquid. To produce more soap bubbles, the motor needs to rotate faster. The bubble sticks need to dip into the soap bubble liquid and then they will pick up the soap liquid to be blown in front of a fan to produce bubbles. To test out this logic, I made the first prototype out of cardboard. This turned out to be helpful for consideration of measurements for the final prototype. Other than the bubble machine as a whole, I also did trials on the CO2 sensor in the plants' enclosed environment. Moreover, I tried to experiment with the closeness of the fan to the bubble sticks, for it to be able to blow bubbles. Through the trials, I found that the fan was strong enough to blow the bubbles only in specific areas, with a certain closeness. Therefore, I needed to consider and experiment with the distance and placement of the fan towards the rotating bubble sticks.


Respiring Reflections - Final Prototype (Winterwerkschau)
To build the final prototype for the Winterwerkschau, I decided to change the casing material to transparent acrylic sheets. I think it matches the concept that everything is transparent/translucent. Before building the real physical final prototype, I tried out several online tools to help me, such as 3D sketch plan, 2D blueprint and optimization software to cut the acrylic sheets, to know how much materials I needed. Because the dimension of my final prototype will depend on the bubble sticks (attached to the rotating stepper motor), and also the length of the breadboard, I decided to use half-size breadboard instead of a full-size one, since the full-size will be redundant for this project. The wiring diagram helped me to consider this, since I wouldn't need that much space of the breadboard. The half-size breadboard minimized the length (or depth) dimension of my prototype a lot. In building the final prototype, I learned a lot how to be creative in finding solutions with common materials or tools that I could find in the lab (either diyElectronics Lab in B15 or Electronics Lab in M5), at home or in the city. I'm glad that I made it work in the end:)

3D plan - Tinkercad

2D blueprint - cuttle.xyz
Optimization software - CutLogic 2D

Respiring Reflections - Winterwerkschau


Self-reflection and Lessons Learned
I learned a lot in this class, from developing the concept, electronics, prototyping, and coding. This project was a good challenge for me to tackle, since I didn't take a lot of prototyping courses.
Prototyping hurdles
Technically it was challenging, since it was the first time I learned ESP32, plus I broke my first one in this class... But lessons learned, always make a wiring diagram and triple check everything. I usually only deal with digital problems, so prototyping with electronics and physical mechanical things adds dimension in the project, which means when I encounter a problem, that problem could be in any dimension and I couldn't really pinpoint where. Throughout the class, I experienced that problems can arise anywhere: cables, ESP32, understanding of mechanical/physical things, materials, tools, device specification that needs specific usage in the code, etc. But that's just the art of prototyping, as my friend said. We're not doing a finished line of production, so enjoy the ups and downs, the successes and failures. Fail fast is also better.
I feel like I spent most of my time designing and planning for my prototypes rather than building the prototypes, both for the cardboard prototype (first prototype) and also the final one. I wasn't sure how it was supposed to be made, but I kept thinking about the measurements and the mechanisms so that I could make them work, at least logically and visually in my mind. Sometimes even night and day, that I got a little bit overwhelmed. In the end though, I compromised the accuracy aspect and focused more on the functionality/mechanical things to make it work. "Just try it out" was definitely a motto for this project.
Learnings from my Pothos plants
In this class, this is the first time I grew Pothos plants from cuttings as a part of my experiment. I learned resilience and adaptability from them, especially from the Jade variation. They are so resilient, and they all survived winter. In contrary, only one of the Pearls & Jade variation survived until now, but I learned that for Pearls & Jade variation, they should be propagated in a few leaves as a group instead of single leaves. This should increase their survival chances. The roots that grew depend on the medium as well, in water propagation they grew smooth, whereas those in Seramis medium were branched and grew deeper into the Seramis medium. It reminds me that adaptability is an important survival trait.
Future Work
If I had to think about this project and relate it to my study program, I would have difficulties. I'm not exactly experienced in speculative design, and perhaps I'm not interested in that area in the future as well, but who knows. However, it might be a bit far-fetched, but I could imagine my bubble machine as an outdoor "smart home system" that visualizes the respiration of houseplants, since indoor can be messy. Bubbles can be fun to look at, especially for children. During the Winterwerkschau, I enjoyed witnessing that people of all ages enjoying the bubbles, especially children. Some of my friends also reported this to me and it was heartwarming. And maybe add some indicators, to indicate if something goes wrong with the plants (so that the owner(s) can check). This idea can be elaborated further, which indicator(s) can be used, what kind of thresholds, what indicates "healthy" and "sick" plants, etc. A mechanism that could be added would be to refill the soap liquid from time to time. During Winterwerkschau I refilled it manually.
References
CO2 sensor MH-Z19C
- https://www.neumueller.com/datenblatt/neumueller/MH-Z19C.pdf (Datasheet)
- https://randomnerdtutorials.com/esp32-uart-communication-serial-arduino/ (Concept, wiring, code)
PWM fan AMD Ryzen 7 1700
- Arduino Fan Control using High Frequency 25kHz PWM // 4-Wire CPU Fans - YouTube (Concept, wiring, code); adapted to ESP32
Stepper motor 28BYJ-48 and stepper motor driver module ULN2003
- https://randomnerdtutorials.com/esp8266-nodemcu-stepper-motor-28byj-48-uln2003/ (Concept, wiring, code); adapted to own implementation