No edit summary |
No edit summary |
||
| (7 intermediate revisions by the same user not shown) | |||
| Line 15: | Line 15: | ||
==== '''Day 1 Prepare agar medium flat jars''' ==== | ==== '''Day 1 Prepare agar medium flat jars''' ==== | ||
For reference to the original experiment, please see [https://www.top-ev.de/wp-content/uploads/2021/12/Prepare-agar-medium-flat-jars-v.2.0.pdf Prepare agar medium flat jars] | Objective: Prepare a versatile nutritional medium for mushroom cultivation. | ||
Materials: Flat jar, wadding, agar-agar, malt extract powder, marker, distilled water, pressure cooker, precision scale (0,1 g), aluminum foil. | |||
<u>Step 1: Calculate Ingredient Ratios</u> | |||
{| class="wikitable" | |||
|+ | |||
!Component | |||
!Quantity | |||
! | |||
!Custom Quantity | |||
|- | |||
|Malt Extract (Nutrient source) | |||
|2g | |||
|x | |||
| | |||
|- | |||
|Agar-agar (Footing for the growth - 3D support) | |||
|2g | |||
|x | |||
| | |||
|- | |||
|Distilled water | |||
|100ml | |||
|x | |||
| | |||
|} | |||
<u>Step 2: Weigh Ingredients And Mix Into Flask</u> | |||
* Use a scale to measure the required ingredients accurately. | |||
* Construct a container using clean aluminum foil or paper. | |||
* Combine the ingredients in a flask or jar, ensuring thorough mixing. | |||
* Create a hole in the lid and insert cotton wadding to enable pressure cooking and facilitate air exchange for the mushrooms. | |||
* Pour enough of the mixture into each container to cover the bottom adequately. (A thicker agar layer consumes more materials but prevents drying during long-term fridge storage.) | |||
* Seal the jars and cover the lids with aluminum foil to prevent microbes from reaching the air filter later on. | |||
<u>Step 3: Sterilize In Pressure Cooker</u> | |||
* Add a few centimeters of water into the pressure cooker, ensuring the vessels are submerged but not floating. Close the cooker and reach the designated temperature and pressure point (121°C, 15 PSI). (Avoid using airtight containers in the pressure cooker to prevent bursting; always refer to the pressure cooker manual for proper usage.) | |||
* Reduce the heat to maintain a gentle boil and keep it at the minimum temperature to ensure the water continues to boil. | |||
* Wait for 40 minutes from the point when pressure and heat are reached. | |||
* Turn off the heating source and allow the cooker to cool down naturally. HINT: Avoid releasing pressure suddenly as it may cause the medium to overboil. | |||
* Once the cooker is slightly warm, release the remaining pressure (there should be none), open the lid, and carefully remove the medium. | |||
* Let the jars cool down naturally before storing them in the fridge. | |||
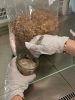
<u>Step 4: Add Mycelium & Incubate</u> | |||
<gallery widths="100" heights="100"> | |||
File:AddingMtojars4.jpg | |||
File:AddingMtojars3.jpg | |||
File:AddingMtojars2.jpg | |||
File:AddingMtojars1.jpg | |||
File:Prepared mushroom 1.jpg | |||
</gallery>For reference to the original experiment, please see [https://www.top-ev.de/wp-content/uploads/2021/12/Prepare-agar-medium-flat-jars-v.2.0.pdf Prepare agar medium flat jars] | |||
==== '''Day 2 Preparation of Grain Spawn''' ==== | ==== '''Day 2 Preparation of Grain Spawn''' ==== | ||
| Line 39: | Line 92: | ||
|multiplier | |multiplier | ||
|g | |g | ||
|} | |}<u>Step 2: Soak rice Grains and Add Gypsum</u> | ||
<u>Step 2: Soak rice Grains and Add Gypsum</u> | |||
* Pour boiling distilled water over rice grains and allow them to soak for a minimum of one hour to absorb the water fully. | * Pour boiling distilled water over rice grains and allow them to soak for a minimum of one hour to absorb the water fully. | ||
* Drain any excess liquid. | * Drain any excess liquid. | ||
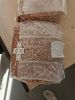
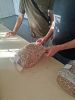
* Combine the gypsum with the soaked rice grains, ensuring thorough mixing<gallery> | * Combine the gypsum with the soaked rice grains, ensuring thorough mixing | ||
* Transfer the mixture into a heat-resistant glass jar. | |||
* Create a ventilation hole in the lid and insert cotton wadding for mushroom air exchange. | |||
* Seal the jars and cover the lid with aluminum foil. | |||
<gallery widths="100" heights="100"> | |||
File:Rice solo.jpg | |||
File:Gypsum.jpg | |||
</gallery><gallery widths="100" heights="100"> | |||
File:Mixed rice 2.jpg | File:Mixed rice 2.jpg | ||
File:Mixed rice 3.jpg | File:Mixed rice 3.jpg | ||
File:Mixed rice.jpg | File:Mixed rice.jpg | ||
</gallery> | </gallery><gallery widths="100" heights="100"> | ||
File:Reis prep 1.jpg | File:Reis prep 1.jpg | ||
File:Reis prep 2.jpg | File:Reis prep 2.jpg | ||
File:Reis prep 4.jpg | File:Reis prep 4.jpg | ||
File:Reis prep 3.jpg | File:Reis prep 3.jpg | ||
</gallery> | </gallery><gallery widths="100" heights="100"> | ||
File:Lit-cotton.jpg | File:Lit-cotton.jpg | ||
File:Lit2.jpg | File:Lit2.jpg | ||
</gallery> | </gallery><u>Step 3: Sterilize In Pressure Cooker</u> | ||
<u>Step 3: Sterilize In Pressure Cooker</u><gallery> | * Sterilize in the pressure cooker for 1 hour (Avoid airtight containers, as they may burst!) | ||
* Remove the lid from the cooker and let the jars cool down (Adding mycelium now could cause it to cook). | |||
* While cooling, sterilize surfaces, materials, tools, and hands with disinfectants or alcohol. | |||
<gallery widths="100" heights="100"> | |||
File:Preasure cooking 1.jpg | File:Preasure cooking 1.jpg | ||
File:Pressure cooking 2.jpg | File:Pressure cooking 2.jpg | ||
</gallery><u>Step 4: Add Mycelium</u><gallery> | </gallery><u>Step 4: Add Mycelium</u> | ||
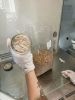
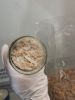
* Cut a large piece of agar-mycelium from the PD and place it onto the surface of the grain (Select a piece from the outer part of the mycelium where young and fast-spreading hyphae are present). (Do not worry about transferring some agar as well; no harm will occur.) | |||
* Seal the jar with its lid. | |||
<gallery widths="100" heights="100"> | |||
File:Prepared mushroom 3.jpg | File:Prepared mushroom 3.jpg | ||
File:Prepared mushroom 2.jpg | File:Prepared mushroom 2.jpg | ||
| Line 80: | Line 139: | ||
File:Cutting flowhood 1.jpg | File:Cutting flowhood 1.jpg | ||
</gallery><u>Step 5: Incubate</u> | </gallery><u>Step 5: Incubate</u> | ||
* Incubate the jar at room temperature in dark conditions. | |||
* After 3-6 days, consider gently mixing the grains to facilitate faster growth, either by using sterilized spoons to stir within the jar or by gently shaking to break up clumps. | |||
* Depending on the jar's size and the speed of growth, expect full colonization to occur within 1 to 3 weeks. | |||
For reference to the original experiment, please see [https://www.top-ev.de/wp-content/uploads/2021/12/Prepare-rye-jars-v2_1-1.pdf Preparation of Grain Spawn] | For reference to the original experiment, please see [https://www.top-ev.de/wp-content/uploads/2021/12/Prepare-rye-jars-v2_1-1.pdf Preparation of Grain Spawn] | ||
==== '''Day 3 Preparation of a Small Bag with Substrate''' ==== | ==== '''Day 3 Preparation of a Small Bag with Substrate''' ==== | ||
Objective: Prepare a sterile small bag to expand mycelium for fructification, fabrication, or as an inoculant for larger vessels. | |||
Materials for 1 bag: See below, bucket that can hold 5 L (for mixing), jar with clean grain spawn, substrate, '''alcohol(?)''', autoclavable plastic bags, gloves, distilled water (approx. 2,5x the dry weight of the substrate).# | |||
<u>Step 1: Weigh the Substrate</u> | |||
* Combine the solid components in a bowl and weigh them. | |||
* Add distilled water to the mixture. | |||
* Mix thoroughly, ensuring to break down any chunks and evenly distribute the moisture throughout the substrate. | |||
* Transfer the substrate into a filter bag or an autoclavable container equipped with an air filter. | |||
{| class="wikitable" | |||
|+ | |||
!Main Data | |||
! | |||
|- | |||
|Total dry weight | |||
|4500 | |||
|- | |||
|Grain spawn | |||
|15% | |||
|- | |||
|Gypsum | |||
|1% | |||
|} | |||
{| class="wikitable" | |||
|+ | |||
!Ingredient | |||
!Weight | |||
!Composition | |||
!% | |||
|- | |||
|Hemp | |||
|2646 | |||
|70% | |||
|59% | |||
|- | |||
|Bran | |||
|1134 | |||
|30% | |||
|25% | |||
|- | |||
|Straw | |||
| | |||
| | |||
| | |||
|- | |||
|Spawn | |||
|675 | |||
| | |||
|15% | |||
|- | |||
|Gypsum | |||
|37.8 | |||
| | |||
|1% | |||
|- | |||
|Total | |||
|4492.8 | |||
|100% | |||
|100% | |||
|- | |||
|Water | |||
|5670ml | |||
| | |||
| | |||
|} | |||
<gallery widths="100" heights="100"> | |||
File:Mixing desk.jpg | |||
File:BaseMaterial1.jpg | |||
File:BaseMaterial3.jpg | |||
File:Mixing everything1.jpg | |||
File:Mixing everything2.jpg | |||
File:Mixing everything3.jpg | |||
File:Filling bags.jpg | |||
File:Bags1.jpg | |||
File:Filling bag6.jpg | |||
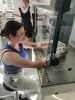
</gallery><u>Step 2: Sterilise</u> | |||
* Sterilize the bag by pressure cooking it for 50 minutes. | |||
* After sterilization, allow the bag to cool down. Note that the substrate can retain heat for several hours, so always squeeze it gently to assess the temperature at the center. <gallery widths="100" heights="100"> | |||
File:Bags autoclayed.jpg | |||
</gallery> | |||
<u>Step 3: Mix In Mycelium</u> | |||
* If using grain spawn, break it down by shaking the jar or by using a sterile or flamed spoon to mix the grains. | |||
* If the liquid culture is not already fragmented, mix the contents well with a sterile or flamed spoon. | |||
* Pour or spread the inoculant into the bag and seal it. | |||
* Roll the bag to thoroughly mix the contents.<gallery widths="100" heights="100"> | |||
File:Bagsmixing1.jpg | |||
File:Bagsmixing2.jpg | |||
File:Bagsmixing3.jpg | |||
File:Bagsmixing5.jpg | |||
File:Bagsmixing6.jpg | |||
File:Bagsmixing7.jpg | |||
File:Bagsmixing8.jpg | |||
File:Bagsmixing9.jpg | |||
File:Bagsmixing10.jpg | |||
File:Bagsmixing11.jpg | |||
</gallery> | |||
<u>Step 4: Incubate</u> | |||
* Incubate in darkness for 1 to 6 weeks. | |||
* Check the progress of the mycelium every two to three days, and monitor for any signs of contamination. | |||
For reference to the original experiment, please see [https://www.top-ev.de/wp-content/uploads/2021/12/Prepare-small-mycelium-bags-v.2.0-1.pdf Preparation of a Small Bag with Substrate] | For reference to the original experiment, please see [https://www.top-ev.de/wp-content/uploads/2021/12/Prepare-small-mycelium-bags-v.2.0-1.pdf Preparation of a Small Bag with Substrate] | ||
==== '''Day 4 Fabrication of a solid object made of mycelium composite materials''' ==== | ==== '''Day 4 Fabrication of a solid object made of mycelium composite materials''' ==== | ||
For reference to the original experiment, please see [https://www.top-ev.de/wp-content/uploads/2021/09/Fabrication-of-a-solid-object-made-of-mycelium.pdf Fabrication of a solid object made of mycelium composite materials] | For reference to the original experiment, please see [https://www.top-ev.de/wp-content/uploads/2021/09/Fabrication-of-a-solid-object-made-of-mycelium.pdf Fabrication of a solid object made of mycelium composite materials] | ||
Latest revision as of 12:27, 15 May 2024
Tinder mushrooms, belonging to the genus Fomes, are a type of hard, woody fungi commonly found on decaying trees. A notable species, Fomes fomentarius, has potential applications in various modern industries, including the production of sustainable materials for construction, furniture design, and fashion accessories. Researchers are exploring its use in creating eco-friendly leather alternatives and innovative biocomposites. This mushroom's versatility highlights its significance in the pursuit of sustainable and renewable resources.


Images: Wikipedia https://www.zvnder.com/ https://marikoppanen.com/
Myco-Tetris
Myco-Tetris, a project by Alessandro Volpato, is an interactive initiative involving the public in manufacturing fungal composites, aiming to stimulate biotechnology research and encourage sustainable design. By engaging in activities like playing, building, and learning about fungi, visitors contribute to co-design efforts and applied research in fungal biotechnology.
As the course "Growing Microorganisms for Bioart Projects SoSe24," we are continuing with the Myco-Tetris project, and this document serves as our day-by-day documentation. The actual work spans four meetings, capturing our progress and insights throughout the process.
Day 0 Prepare Agar Medium Petri Dishes
The preparation of agar medium Petri dishes was already completed in advance, allowing the course participants to skip this step. For reference to the original experiment, please see Prepare Agar Medium Petri Dishes
Day 1 Prepare agar medium flat jars
Objective: Prepare a versatile nutritional medium for mushroom cultivation.
Materials: Flat jar, wadding, agar-agar, malt extract powder, marker, distilled water, pressure cooker, precision scale (0,1 g), aluminum foil.
Step 1: Calculate Ingredient Ratios
| Component | Quantity | Custom Quantity | |
|---|---|---|---|
| Malt Extract (Nutrient source) | 2g | x | |
| Agar-agar (Footing for the growth - 3D support) | 2g | x | |
| Distilled water | 100ml | x |
Step 2: Weigh Ingredients And Mix Into Flask
- Use a scale to measure the required ingredients accurately.
- Construct a container using clean aluminum foil or paper.
- Combine the ingredients in a flask or jar, ensuring thorough mixing.
- Create a hole in the lid and insert cotton wadding to enable pressure cooking and facilitate air exchange for the mushrooms.
- Pour enough of the mixture into each container to cover the bottom adequately. (A thicker agar layer consumes more materials but prevents drying during long-term fridge storage.)
- Seal the jars and cover the lids with aluminum foil to prevent microbes from reaching the air filter later on.
Step 3: Sterilize In Pressure Cooker
- Add a few centimeters of water into the pressure cooker, ensuring the vessels are submerged but not floating. Close the cooker and reach the designated temperature and pressure point (121°C, 15 PSI). (Avoid using airtight containers in the pressure cooker to prevent bursting; always refer to the pressure cooker manual for proper usage.)
- Reduce the heat to maintain a gentle boil and keep it at the minimum temperature to ensure the water continues to boil.
- Wait for 40 minutes from the point when pressure and heat are reached.
- Turn off the heating source and allow the cooker to cool down naturally. HINT: Avoid releasing pressure suddenly as it may cause the medium to overboil.
- Once the cooker is slightly warm, release the remaining pressure (there should be none), open the lid, and carefully remove the medium.
- Let the jars cool down naturally before storing them in the fridge.
Step 4: Add Mycelium & Incubate


For reference to the original experiment, please see Prepare agar medium flat jars
Day 2 Preparation of Grain Spawn
Objective: Prepare grain substrate in a jar to produce biomass.
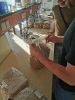
Materials: pressure cooker, scale, distilled water, rice grains, gypsum (CaSO4 - calcium sulphate), spoon, plate with well-growing mycelium, scalpel, gloves, ethanol, jar, wadding
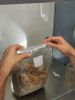
Step 1: Weigh Materials
| Component | Quantity | Component Quantity Custom Quantity | |
|---|---|---|---|
| rice grain | 30 | multiplier | g |
| Calcium sulphate (gypsum) | (2%) 0.6g | multiplier | g |
Step 2: Soak rice Grains and Add Gypsum
- Pour boiling distilled water over rice grains and allow them to soak for a minimum of one hour to absorb the water fully.
- Drain any excess liquid.
- Combine the gypsum with the soaked rice grains, ensuring thorough mixing
- Transfer the mixture into a heat-resistant glass jar.
- Create a ventilation hole in the lid and insert cotton wadding for mushroom air exchange.
- Seal the jars and cover the lid with aluminum foil.


Step 3: Sterilize In Pressure Cooker
- Sterilize in the pressure cooker for 1 hour (Avoid airtight containers, as they may burst!)
- Remove the lid from the cooker and let the jars cool down (Adding mycelium now could cause it to cook).
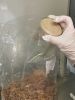
- While cooling, sterilize surfaces, materials, tools, and hands with disinfectants or alcohol.


Step 4: Add Mycelium
- Cut a large piece of agar-mycelium from the PD and place it onto the surface of the grain (Select a piece from the outer part of the mycelium where young and fast-spreading hyphae are present). (Do not worry about transferring some agar as well; no harm will occur.)
- Seal the jar with its lid.


Step 5: Incubate
- Incubate the jar at room temperature in dark conditions.
- After 3-6 days, consider gently mixing the grains to facilitate faster growth, either by using sterilized spoons to stir within the jar or by gently shaking to break up clumps.
- Depending on the jar's size and the speed of growth, expect full colonization to occur within 1 to 3 weeks.
For reference to the original experiment, please see Preparation of Grain Spawn
Day 3 Preparation of a Small Bag with Substrate
Objective: Prepare a sterile small bag to expand mycelium for fructification, fabrication, or as an inoculant for larger vessels.
Materials for 1 bag: See below, bucket that can hold 5 L (for mixing), jar with clean grain spawn, substrate, alcohol(?), autoclavable plastic bags, gloves, distilled water (approx. 2,5x the dry weight of the substrate).#
Step 1: Weigh the Substrate
- Combine the solid components in a bowl and weigh them.
- Add distilled water to the mixture.
- Mix thoroughly, ensuring to break down any chunks and evenly distribute the moisture throughout the substrate.
- Transfer the substrate into a filter bag or an autoclavable container equipped with an air filter.
| Main Data | |
|---|---|
| Total dry weight | 4500 |
| Grain spawn | 15% |
| Gypsum | 1% |
| Ingredient | Weight | Composition | % |
|---|---|---|---|
| Hemp | 2646 | 70% | 59% |
| Bran | 1134 | 30% | 25% |
| Straw | |||
| Spawn | 675 | 15% | |
| Gypsum | 37.8 | 1% | |
| Total | 4492.8 | 100% | 100% |
| Water | 5670ml |


Step 2: Sterilise
- Sterilize the bag by pressure cooking it for 50 minutes.
- After sterilization, allow the bag to cool down. Note that the substrate can retain heat for several hours, so always squeeze it gently to assess the temperature at the center.

Step 3: Mix In Mycelium
- If using grain spawn, break it down by shaking the jar or by using a sterile or flamed spoon to mix the grains.
- If the liquid culture is not already fragmented, mix the contents well with a sterile or flamed spoon.
- Pour or spread the inoculant into the bag and seal it.
- Roll the bag to thoroughly mix the contents.


Step 4: Incubate
- Incubate in darkness for 1 to 6 weeks.
- Check the progress of the mycelium every two to three days, and monitor for any signs of contamination.
For reference to the original experiment, please see Preparation of a Small Bag with Substrate
Day 4 Fabrication of a solid object made of mycelium composite materials
For reference to the original experiment, please see Fabrication of a solid object made of mycelium composite materials