What is Wekinator?
Wekinator is an open source machine learning programme with a simple interface which allows you to use any OSC output and input. Have a look at these quick tutorial videos made by the creator, Rebecca Fiebrink.
http://www.wekinator.org/videos/
Facial Expression Recognition (using a webcam, not the performance platform)
First Download Wekinator and openFrameworks (you will need to also download an IDE such as Xcode in order to run openFrameworks)
Instructions for downloading and setting up both of those can be found here: http://www.wekinator.org/downloads/ http://openframeworks.cc/download/
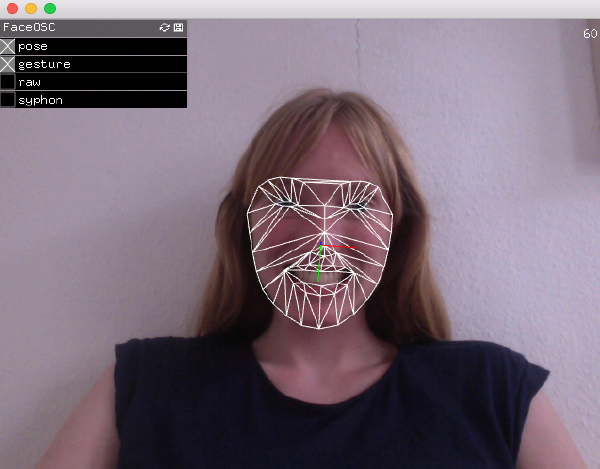
For Facial Gestures, you can use FaceOSC which runs on openFrameworks and can be downloaded here https://github.com/kylemcdonald/ofxFaceTracker/releases
This programme can be used with a webcam and tracks the position data of facial features, sending the values as OSC.
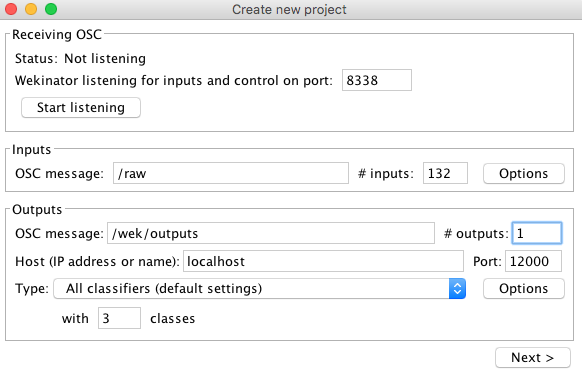
Now, open Wekinator and listen for incoming OSC messages from FaceOSC. It will send 66 pairs of xy values, i.e 132 values each frame. Set Wekinator to listen to port 8338 and for the input message /raw, and choose 132 for number of inputs. For this example I have chosen 1 output with 3 classes under a classifier output. (You can choose anything depending on what sort of output you want). This output will assign one of three images to three different facial expressions.
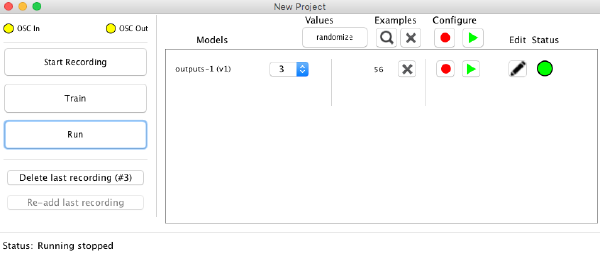
In Wekinator, click next. You will now come to a screen with a dropdown menu next to outputs. Select 1, make your desired facial expression and press start recording. Try recording around 20 examples and then select 2 in the dropdown menu. Now make your second desired facial expression and record again. Do this again for option 3. Now press Train. When training is finished, the status circle will turn green and you can press run. You should notice that when you make one of your three chosen facial expressions, the dropdown menu automatically changes to 1, 2 or 3. If this is happening for the wrong expressions, you may need to add more examples. If this is the case, stop running and repeat the previous steps. Keep adding examples until you get the accuracy you want.
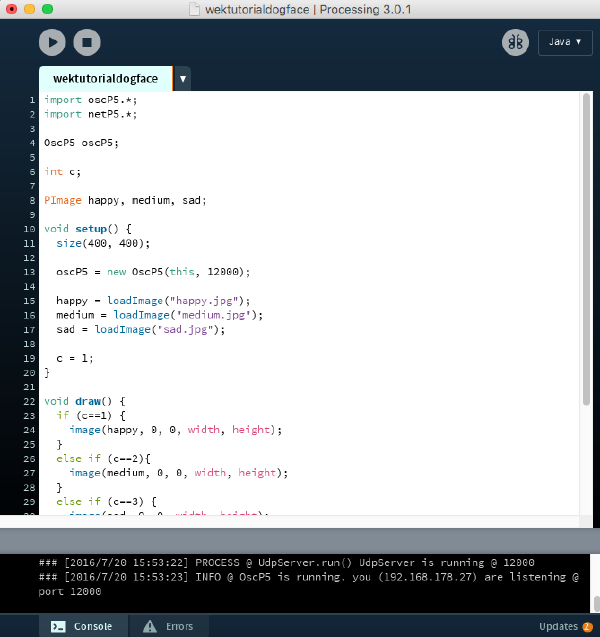
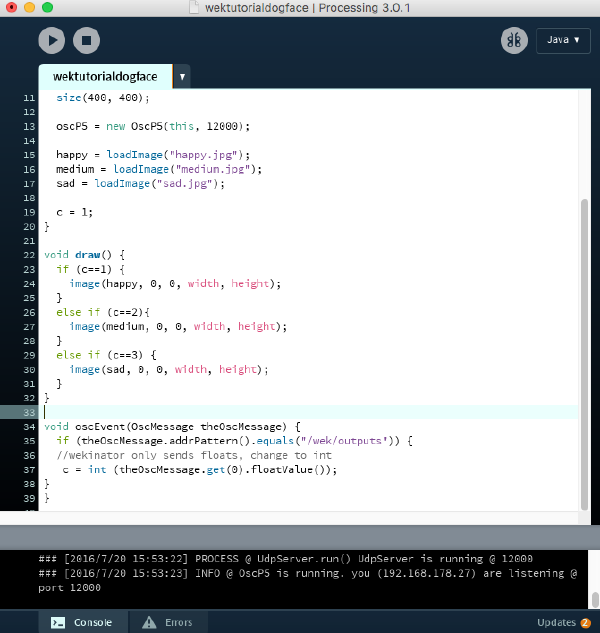
Now for an output! Here is a simple output example I made in processing for one classifier with three classes. Just load the sketch with three images and change “happy.jpg" etc to match your file names.
IMPORTANT: Wekinator sends values as floats, not ints - so if you are writing an output sketch, you will have to convert.
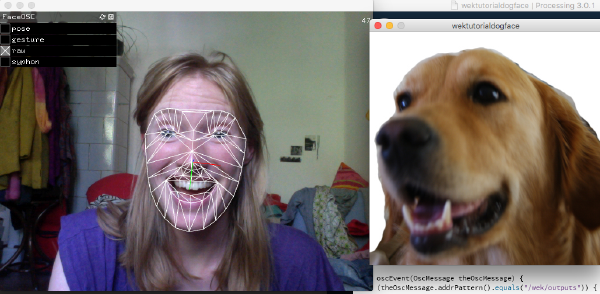
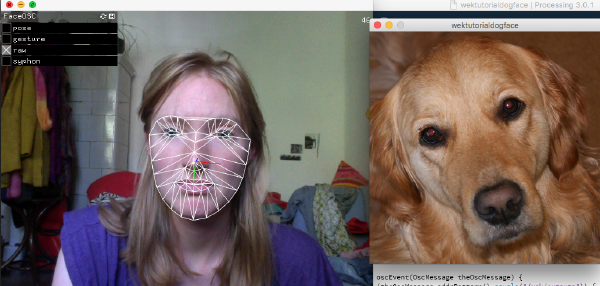
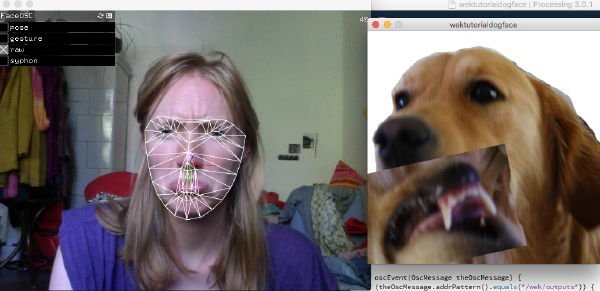
If you have, for example, chosen three pictures of your dog, you could achieve something like this.
Gesture Recognition using the Performance Platform
First Download Wekinator (on your laptop/ it may be loaded on to one of the machines in the lab in time)
Instructions for downloading and setting up can be found here: http://www.wekinator.org/downloads/
Open Captury in the performance platform and check for calibration etc. (See other tutorials)
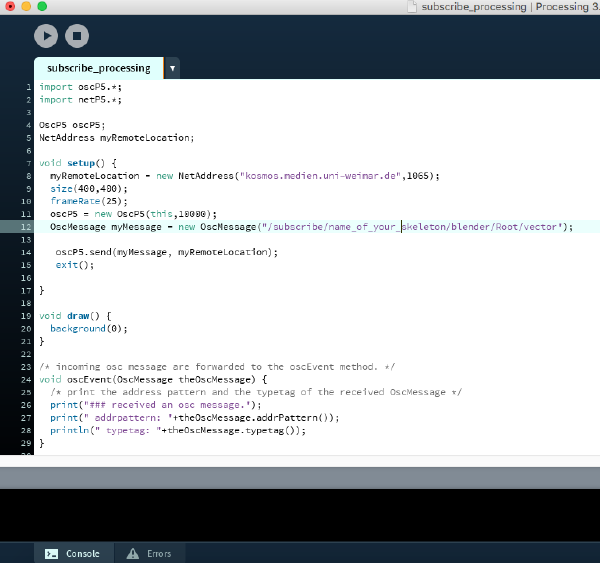
To access the OSC messages from Captury you need to subscribe. You can do this with Processing by tweaking the oscP5 send receive example. We added the line exit(); at the end of setup so that once the connection is established, the programme will automatically quit and free up the port it used. The remote location is “kosmos.medien.uni-weimar.de" for the DBL and the OSC message needs to be “/subscribe/name_of_your_skeleton/blender/Root/vector" (or Spine or Neck etc instead of Root - it depends what you want to track)
!!THE SKELETON MUST BE PRESENT WHEN YOU SUBSCRIBE AND STAY PRESENT ON THE SCREEN, OTHERWISE THE SUBSCRIPTION GETS LOST AND YOU HAVE TO SET IT UP AGAIN!!
For simplicity, you can download an example output programme from the Wekinator website. For this tutorial I will use one for Processing called ‘Simple continuous colour control’. You can download this here
http://www.wekinator.org/examples/#Processing_animation_audio
This works with one continuous parameter, instead of classifiers. So, it can be a measure of how extreme one gesture is, for example. You could also use a simple classifier like the one used in the facial expression recognition part above.
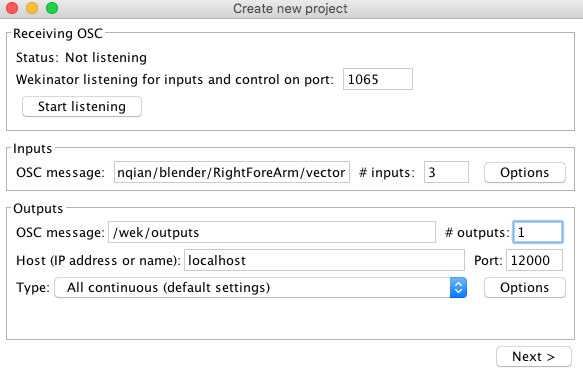
For this tutorial I will look at the gesture of raising the right arm. I am using the playback recording of LiQianqian’s skeleton so I tell Wekinator to listen for /LiQianqian/blender/RightForeArm/vector The listening port for Wekinator is 1065 since Captury is set to send to this port and the input number is 3 since it is a vector (x, y and z coordinates are sent each time).
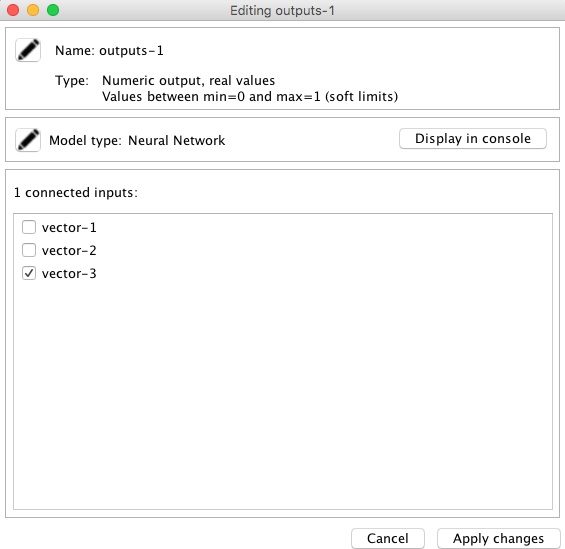
Once you have set up Wekinator, click on the button with a picture of a pen under ‘Edit’ and select just vector-3. This will focus in only on the up-down movement of the arm which is the important part of this gesture and won’t confuse Wekinator with data concerning where the person is in space.
With the simple continuous colour control sketch and Wekinator open, you should see that moving the sliding bar of values in Wekinator causes the sketch to change colour. Now it is time to record some examples.
Find a place in the playback video where the right fore arm is low, set the Wekinator control bar to 0 and press start recording in Wekinator. No need to record many examples, less than 20 is fine. Now find a place where the arms are high, set the Wekinator bar to a high level and again, record. In my example I have set the highest level to 0.7 so that high arms mean ‘blue’ and low arms mean ‘red’. Now find a place where the right arm is a medium height and put the bar somewhere in the middle. Again record. Now you can hit ‘train’ and when the status bar turns green, you can ‘run’. What you should see is Wekinator filling in all the gaps and making a smooth transition through the colours as the arms move. If not, you can add more examples!
Remember - don’t let the skeleton move off the screen!
Gesture Recognition with a live skeleton
As above, subscribe to the desired part of your skeleton by sending a message like /subscribe/Christian/blender/RightHand/vector
Make sure you set the same message, without subscribe, in Wekinator as the incoming message. I.e /Christian/blender/RightHand/vector
In the same way as above, record examples for different stages of the gesture and press train. Now you should be able to control the colour of the output programme live by moving your arms up and down.
This was a very simple example but Wekinator can be used with any OSC input/output. There are also patches available to control Ableton. Have fun!
