Eeva-Kaisa Ahlamo
Github
My github repo is here
My homepage is here
Documenting the course works
Pouch
One of the homeworks in the course was to pick a code crafting tool and programme some pattern with it and then realise it to a handicraft. I picked Pa++ern since it felt interesting enough to try out. Our teacher had coded a Processing version of the programme (here is the link) and one other task was to code the initials of our names into the programme and use them to create some patterns. Well, my nickname since I was 7 has been exactly that: my initials, so I thought it a great idea for a handicraft.
First I had to find out how to draw the lines for the letters. I found the character details in the tab "stitches". It took me a while to draw the letters, since the coordination system with this one was different from Processing in general: the starting point was in the middle instead of the upper left corner. But when I got that sorted it was rather easy to create the letters for E, K and A. (If you want to see the whole code after I tweaked it to my needs, it's here.)
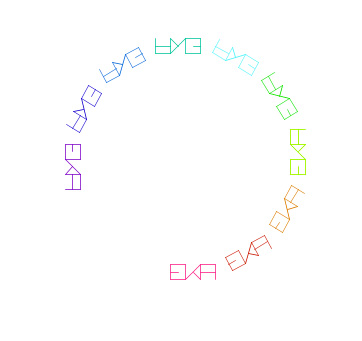
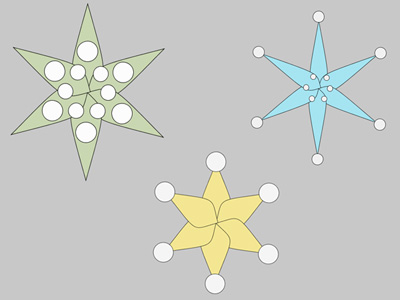
In Pa++ern the idea is to use certain characters to turn, twist, rotate, etc. the characters that are them embroidered into the fabric. The commands for this are on the first page in the Processing programme, and I took some time to try them out to see what happens with each of them. Right in the beginning of the code there is the string that controls the output, so I played with it for a while. Pretty soon I accidentally stumbled into a pattern that cought my eye.
I liked it being incomplete, but colourful, round, but edgy at the same time. (And I've been playing with the spectra in other situations for some time now.) Even if I hadn't been testing too many things yet I thought I didn't dare to play with it any further, since I know good ideas can also come in the beginning. :)
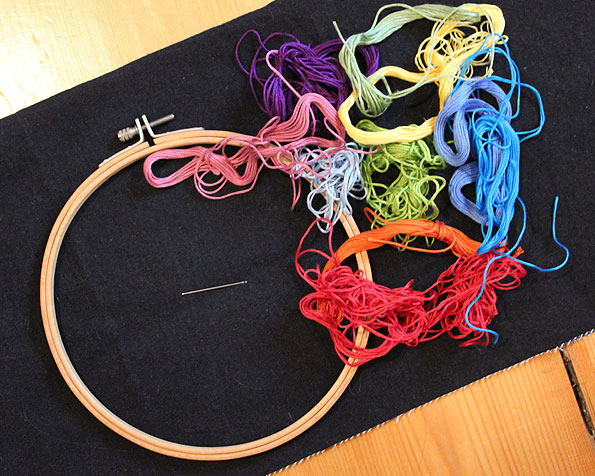
So, I decided to make something out of this pattern. First, I needed to embroider it. Luckily, I had everything I needed at hand.
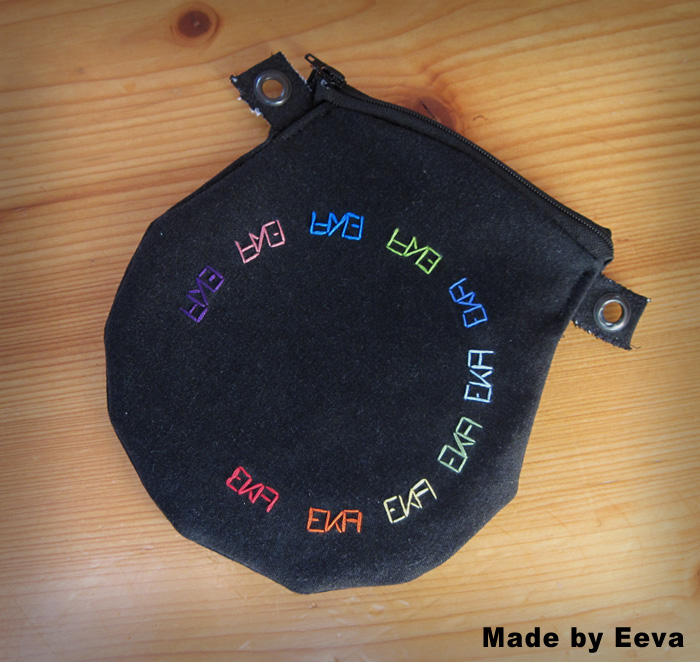
At this stage I didn't yet know what I wanted to make out of it, but after I had embroidered the letters my friend said that it kinda looked like the vinyl records. With the embroidery frame that was true, so I thought I could do something round out of it. Then the idea of a small pouch came to my mind, and that's what I eventually did.
I still need to get some chain to carry the pouch, but other than that it came out rather nice. Suitable party bag in any case. :)
Final Project: Skirt
As my final project for the course I decided to create a skirt with flowers coded in Processing. The idea was to create a code which would slightly change the form of the flowers with the random-command. Since I wanted to do a jeans skirt I decided the colours of the flowers to be red and gold, they would give a nice contrast for the fabric.
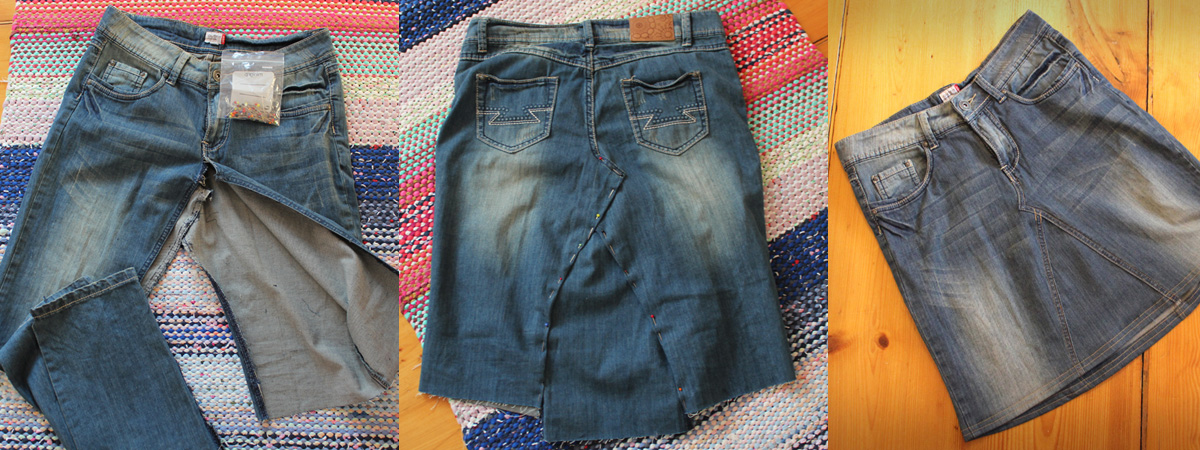
First I made the skirt, because I wanted to see what kind of a pattern the flowers could form on it. I had an old pair of jeans, from which I cut the legs and ripped the seams. I used the fabric from the leg parts to fill the gap in the middle and sewed it all together. (It actually came out nicely, considering I've never done skirt out of jeans before.)
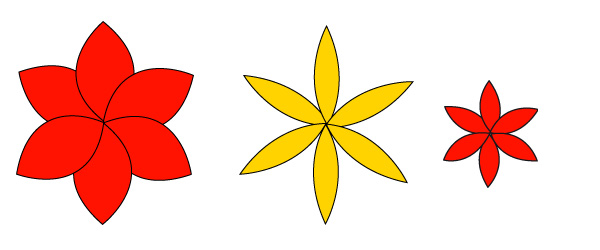
After finishing the skirt I started to think what kind of flowers I could code. I tried few things but all the time keeping in mind what is actually possible or simple for me to realise. (I'm not a pro with needleworks, I wanted to keep it with the limits what I could do with reasonable effort.) Here are a couple of the first flowers I coded. Here I set the colour as a random factor as well, just to try it out.
From the beginning on I stayed with the six petals, since more would quickly have become too complex for the smallest flowers and less wouldn't have been challenging enough for the course. I did leave the white blobs out, too, because I didn't really get good idea about how to make them and I thought with lots of flowers it could look messy.
The way I made the petals was with bezier vertex in Processing. I set the first point with vertex() and then let the programme randomise some of the other points like this:
  bezierVertex(i-random1, i-50, i-random1, i-150, i, i-200);
  bezierVertex(i+random1, i-150, i+random1, i-50, i, i);
Here the starting point for the form is i, i. The 1st and 2nd values are the coordinates for the bezier handle that starts from the starting point in vertex(). 3rd and 4th and the second bezier handle's coordinates (that are attached to the finishing point) and the 5th and 6th values are the x and y of the finishing point for the line. So these two lines are the two sides of a petal. For each flower in the programme I set different random values, because I didn't want any two flowers to be similar (the programme randomises the value only once, so random1 value is the same for each random1 used in the code.) With the rotate-command I rotated the petals so that it created 6 of them. Following, the whole code for one flower. The different random values I set in the beginning of the programme. (The full code for the flowers I did is visible on my Github page.)
  pushMatrix(); // I tell the thing to keep this code in its own 'pocket'
  translate(randomTranslateX1, randomTranslateY1); // setting the place for the flower to form
  scale(randomScale1); // scaling so that not all the flowers are same size
  for (int i = 0; i < 6; i++) { // how many petals there should be
  beginShape();
  vertex(i, i); // the middle point of the flower, here the petal starts
  bezierVertex(i-random1, i-50, i-random1, i-150, i, i-200); //create the petal
  bezierVertex(i+random1, i-150, i+random1, i-50, i, i);
  endShape();
  rotate(PI/3); //rotate command
  }
  popMatrix(); //'pocket' is closed
After I had tested and tweaked the code to my liking I got out the flowers I had in mind. Here I had already set the colours to what I wanted:
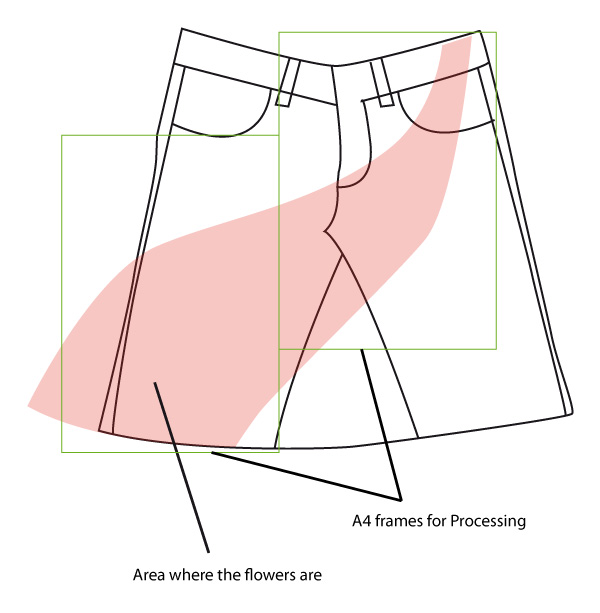
Now I had to plan how I would distribute the flowers into my skirt. So I draw a sketch of how it should approximately go. I wanted to be able to print the flowers out so I set Processing canvas to the size of A4 paper. I thought it would look nice if they would be on the skirt like flying in the wind, so I thought a diagonal presentation of them would be good.
After this I made two Processing sketches: one for the upper part (the sketch for the upper part in Github), one for the lower part (the sketch for the lower part in Github). I wanted the sketches be about the final size so that I wouldn't need to worry too much about the scale. Since I had in mind certain limits for where the flowers should form I set the translate() command (as all the other commands as well) to randomise itself inside the diagonal area of the picture above. I did the distribution of the flowers somewhat manually, because I wanted the red and yellow flowers to be mixed. So I set the random area separately for each flower. Here is an example from the code:
  float randomTranslateX1 = random(500, 600); // red flower 1
  float randomTranslateY1 = random(50, 150);
  float randomTranslateX2 = random(100, 400); // red flower 2
  float randomTranslateY2 = random(400, 850);
  float randomTranslateX3 = random(250, 500); // red flower 3
  float randomTranslateY3 = random(400, 700);
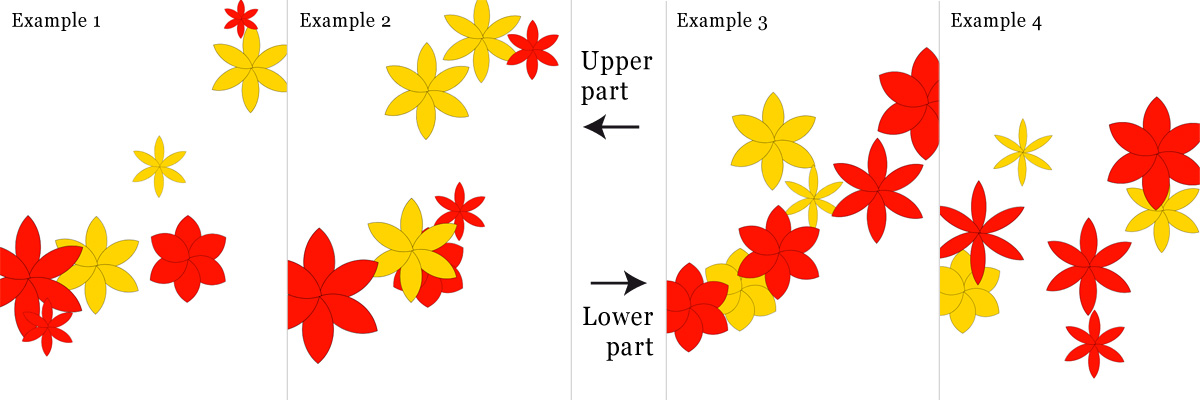
After I had this code ready I run the programme several times to find suitable results that would also be pleasing to the eye. Here are a couple of examples from both the upper and the lower parts.
In the end, though, I ended up with this pattern:
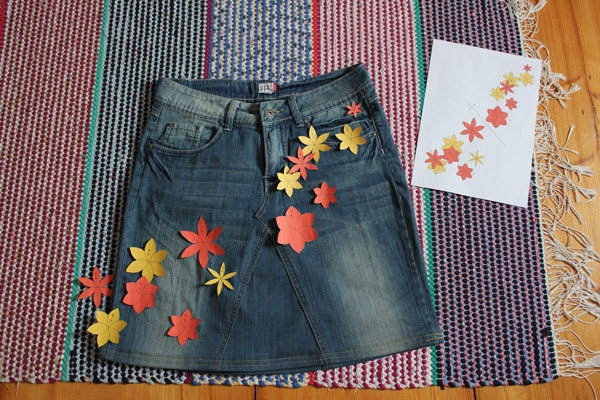
Now I could print the pattern out and test how it would look like on the skirt. I knew I would likely need to spread the design a bit, move the flowers further apart from each other, that is, because of the seams and thick places in the fabric. I also wanted the design to continue a tad over to the other side of the hem, so that it'd be visible also from the back a bit. After I had found places for all the flowers the fun could really begin. :)
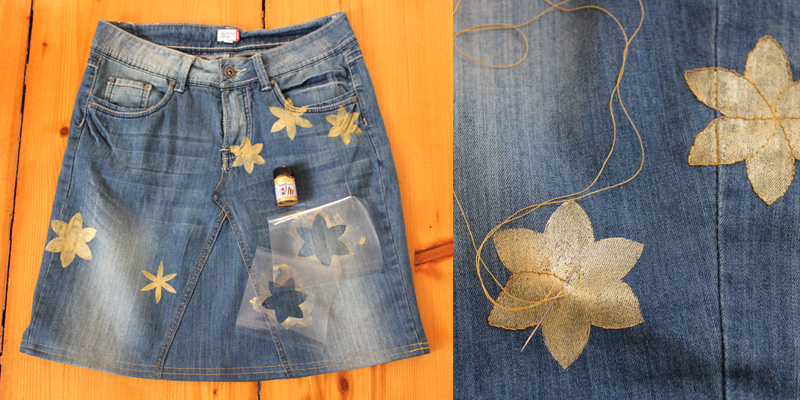
So, first I made the yellow flowers: I bought some golden textile dye and made stencils from book cover plastic. After I had finished the printing according to the instructions I stitched the outlines of the petals with a thread to give some more texture for them.
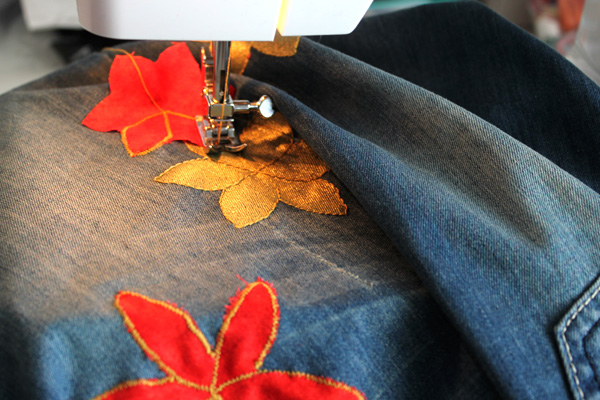
After this, I cut the red flowers from some red fabrics I had bought for this and sewed them onto the skirt with my sewing machine.
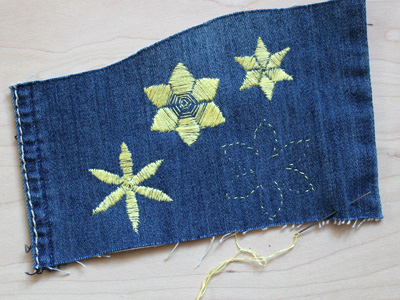
Now I had printed flowers and appliquéd flowers, but I still wanted some embroidered smaller flowers to make the texture more interesting. I already had the code for them, this time separately, since I wanted to see the ready flowers first before setting them to any precise spot on the skirt. (The code for these embroidered flowers is in my Github page.)
We had been talking about embroidery during our course and we could use an embroidery sewing machine in the university. But the trouble was looming.
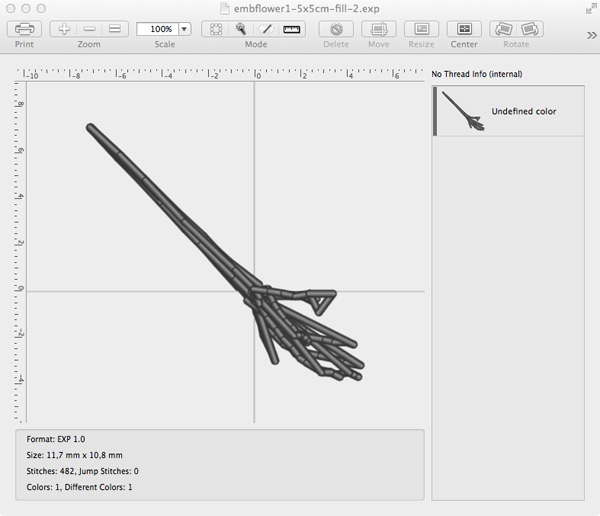
Embroidery files are naturally different from other computer files, because they contain information about the colours of the threads, stitch length, etc. Different company sewing machines with embroidery function support different embroidery files. After tedious searching (I kinda searched from wrong places first) I found out that the particular machine our university had needed .pes files. I had converted the flowers I got out from Processing into .svg, because there is only one conversion page in the net that can make embroidery files: Svg2embroidery and it uses .svg's. I got my .svg changed into .exp. (For some reason the page never gives out the .pcs it also supposed to support.) But it still wasn't a .pes file. Next I downloaded a trial version of a programme called StitchBuddy and tried to open my .exp file with that so that I could export it with that programme into .pes. Whatever I tried (I did the conversion with many different files many times) the result was very much like this:
I don't know if it's a hand or a broom, but definitely it wasn't the flower I had in mind. :D I also found out that StitchBuddy needs the embroidery files, you can't just make your own design with it. Apparently there are only a couple of programmes that you can use to make embroidery files from scratch and they are rather costly: the plug-in for Illustrator costs around USD4000 and even the trial version would have been USD200. So I decided not to go for them and still tried couple of things, but since the Svg2embroidery page couldn't even convert its self-converted designs back to .svg anymore without error messages I thought I'll just make the embroidered flowers by hand. (It wasn't a wasted venture, though, I learned a lot about US voltages and about the embroidery machines.)
Now I only needed to embroider another set of yellow flowers. The trick with embroidery is to iron some buckram to the other side to give support for the embroidery and preventing the fabric to get creased.
After these were ready, I cut them out from the fabric and gave another stitch row to the sides to prevent the flowers going apart. Then I sewed them onto the skirt.
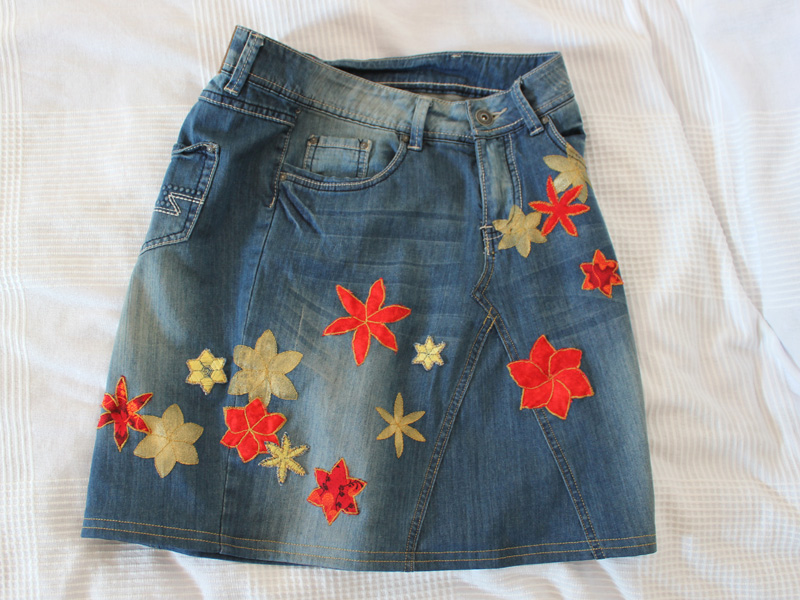
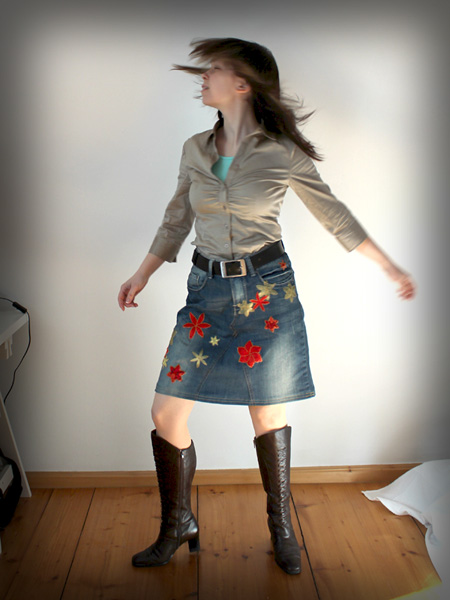
Now my skirt was finally ready.
I'm pretty happy with it, just waiting for the spring to arrive...
Easter egg
A link to the video about the Northern Lights Wall Rug - a project I did during the semester for another course. It was also handicrafted, even if the pattern I designed myself instead of the computer.
