| Line 5: | Line 5: | ||
== Preparing the Camera == | == Preparing the Camera == | ||
First remove the lens of the camera. Use a screwdriver to unscrew the outer parts. Then use a hand saw or a pair of nippers to crack open the case around the cable. Carefully remove the plastic without damaging the cable. As a result you get the PCB with the cable and the LEDs. For now leave the black plastic ring on the PCB as a protection for the sensor. | |||
The secound step is to remove the LEDs. Unsolder them carefully and clean the solder holes with a desoldering pump. | |||
<gallery> | <gallery> | ||
File:WebcamCathleen.jpg|Webcam | File:WebcamCathleen.jpg|Webcam | ||
Revision as of 12:23, 14 November 2012
Miroscopy Stage Construction

Approach with 2 wedges. The aim was to find a simple mechanism that allows for high precision. If you tighten the screw the lower wedge moves left and pushes up the upper wedge with the camera on top of it. If you loosen the screw the camera moves down. Because of its simplicity it would be less susceptible to errors.
Preparing the Camera
First remove the lens of the camera. Use a screwdriver to unscrew the outer parts. Then use a hand saw or a pair of nippers to crack open the case around the cable. Carefully remove the plastic without damaging the cable. As a result you get the PCB with the cable and the LEDs. For now leave the black plastic ring on the PCB as a protection for the sensor.
The secound step is to remove the LEDs. Unsolder them carefully and clean the solder holes with a desoldering pump.
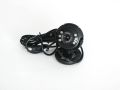
Webcam
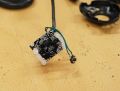
Isolated PCB with LEDs
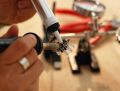
Unsoldering the LEDs
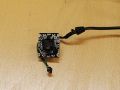
PCB without LEDs


Cardboard Model

Cardboard Model
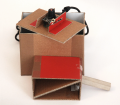
Cardboard Model


3D Model
You can download the model here: Media:ModelWedges.zip. You need to have Google SketchUp installed to open the model.