The following describes how to configure the standard e-mail client of our BSI-compliant ZDM clients, MS Outlook, to sign e-mails and to encrypt them if required. Please note that when signing, no special requirements are needed from the e-mail recipients. When encrypting, the recipients must have the same possibilities, i.e. they must also have a user certificate. To send an encrypted e-mail, you must have the public key of the recipient.
As a prerequisite for the Outlook configuration, your personal user certificate (»firstname-lastname... .p12«) must have been imported into the Windows certificate store beforehand (see also the instructions on the page »Fetch and import user certificate«).
Instructions: Signing e-mails
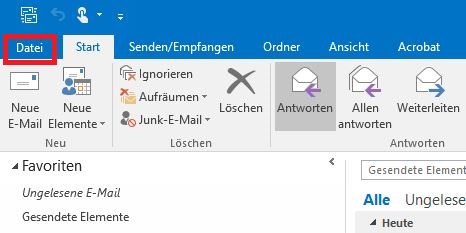
Step 1: Open Outlook and click on »File«.
Step 2: Then click on »Options«.

Step 3: In the Outlock options, click on »Trust Center« on the left and then on »Settings for the Trust Center ...« on the right.

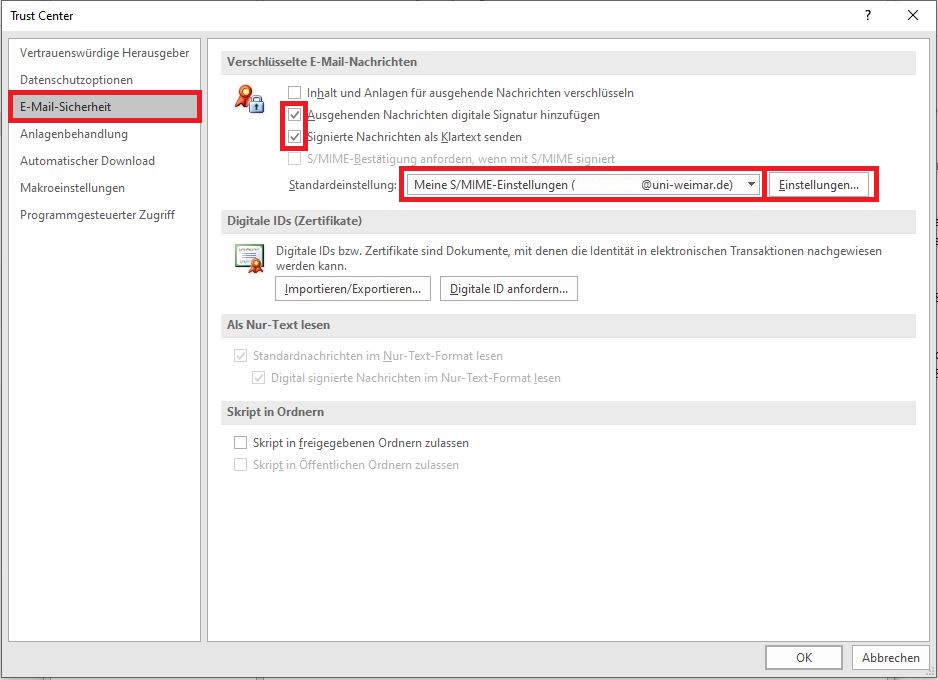
Step 4: Click on »E-mail security«. on the left. Select the highlighted features. Under Default setting, your certificate is displayed, which had to be imported into the Windows certificate store beforehand.
Click here on »Settings...«.
The window »Change security settings« opens. Adjust the signature and encryption algorithm as shown in the illustration. Click on »OK«.

»Signing« is now selected by default for every new mail. Your sent e-mails are now always signed. This ensures that they are indeed the senders and that the content of the email has not been changed since it was sent.

Encrypting e-mails
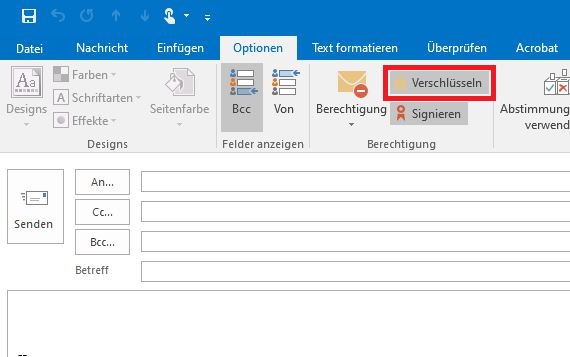
After completing the configuration for signing e-mails, you also have the option of encrypting the contents of e-mails. This is useful, for example, if you want to transmit sensitive data by e-mail. To do this, click on the »Encrypt« button for a new e-mail.
The prerequisite for use is that the respective recipient also has a user certificate. In addition, you need the public key of the recipient. The easiest way to obtain this is to have the person send you a signed e-mail beforehand.
Integration of the directory service of the »DFN-PKI« in Outlook
Users of »DFN-PKI« who have agreed to the publication of their certificate can be found in the public LDAP directory service of »DFN-PKI«. It is advisable to include this in the e-mail client used. The instructions for Outlook are described below.
Further information on the configuration of other e-mail clients can be found at the TU Dresden in the topics e-mail and certificate on the topic »E-mail configuration for the use of the DFN PKI LDAP directory«.
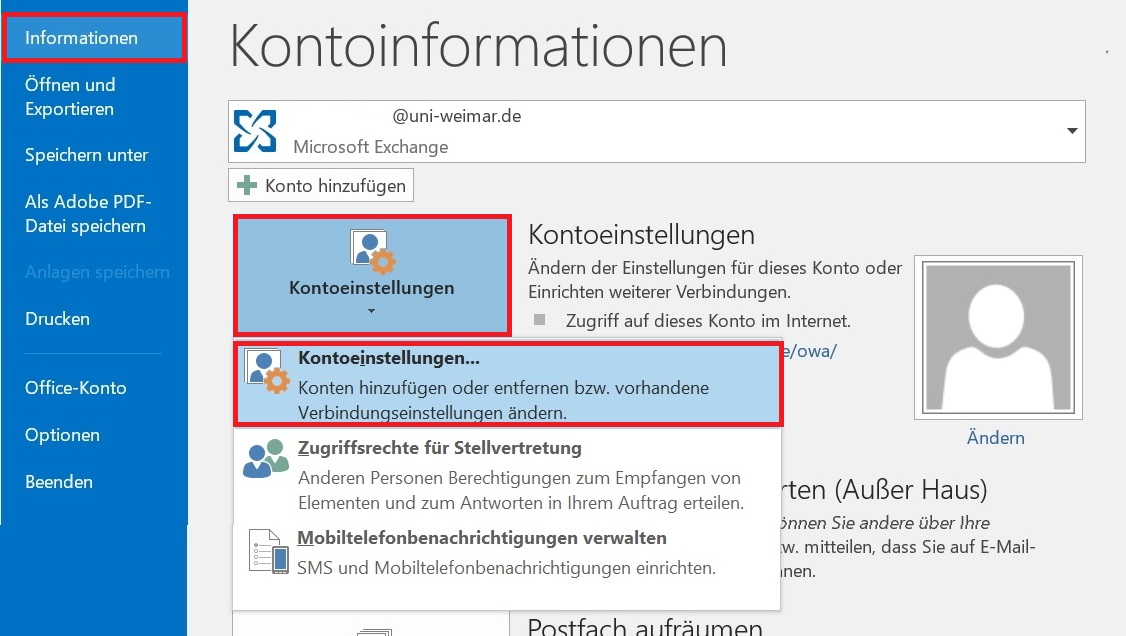
Step 1: To integrate the directory service of the »DFN-PKI« in Outlook, please go to »File« – »Account settings«. In the »Account information« area, go to »Account settings« here as well.
Step 2: Go to the »Address Books« tab, click on »New« and select »Internet Directory Service (LDAP)«.
Click on »Next >«.

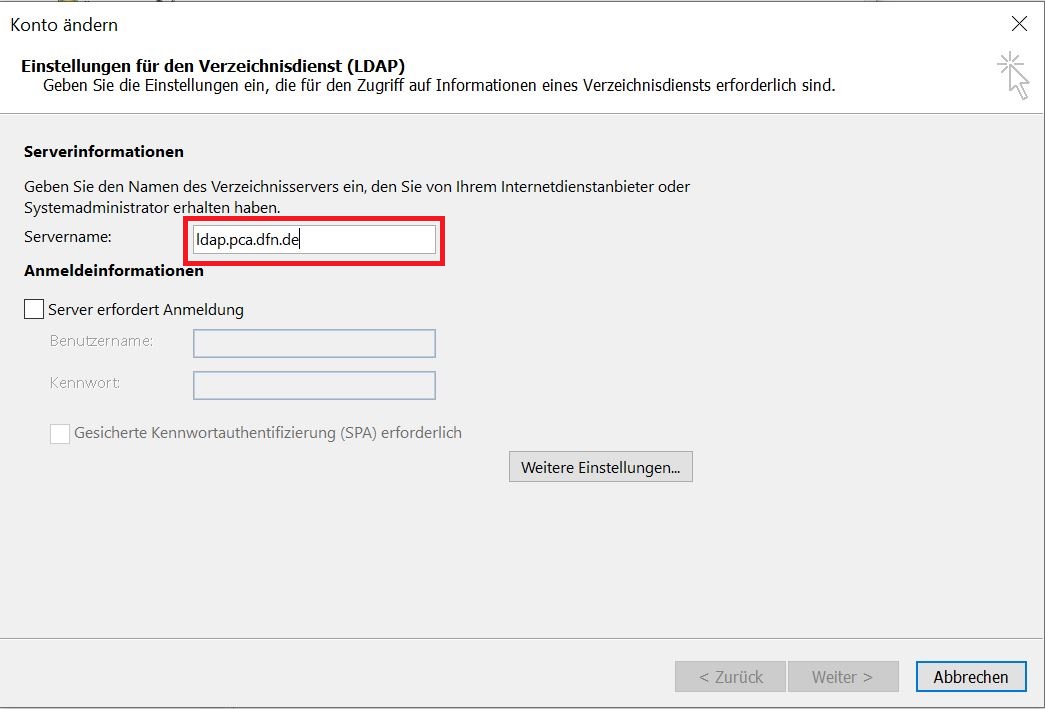
Step 3: Enter »ldap.pca.dfn.de« under Server name and click on »Further settings ...«.
Step 4: Under »Connections« the name »ldap.pca.dfn.de« just entered is taken as the display name. Under »Connection details" please enter »636« under »Connection:« and tick »Use Secure Sockets Layer«.

Step 5: Switch to »Search« end enter »O=DFN-Verein,C=DE« under »Search base - User defined:« and click on »OK« and then on »Next«.

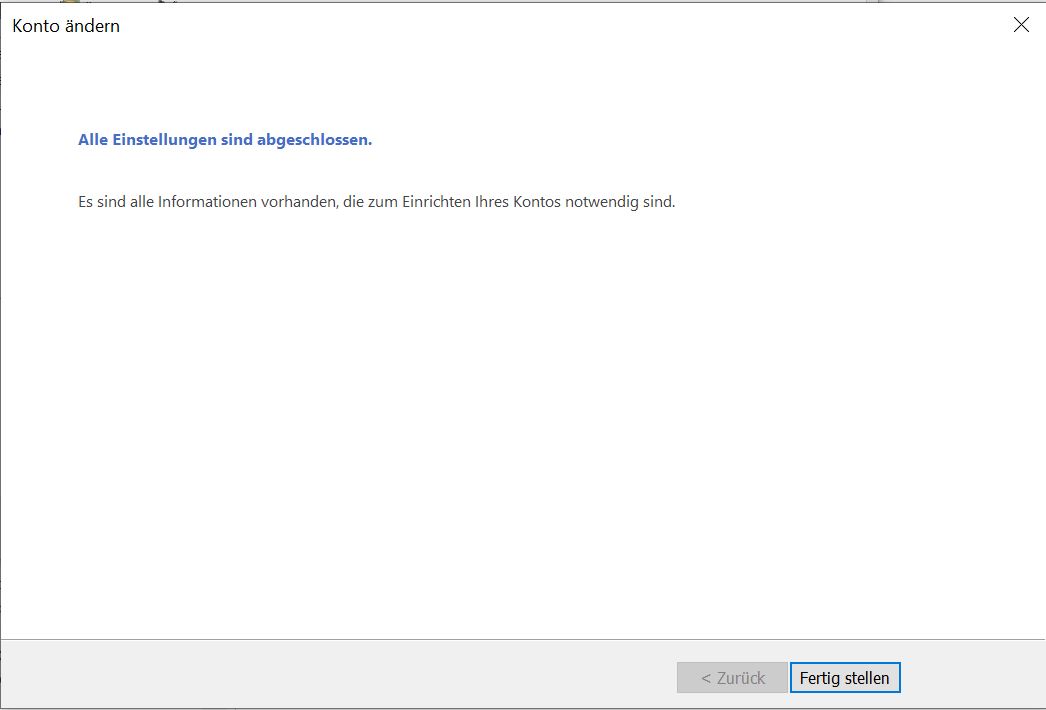
Step 6: The completion of the settings is displayed. Now click on »Finish«. The »DFN-PKI« directory service is now displayed as the newly created address book and can be used after Outlook has been restarted.